These two raised garden beds were built to replace one long one that was only one foot tall. We decided we wanted taller versions this time and made two beds, so it was easier to move from one side to the other without having to walk all the way around. They may be taller than most raised garden beds but we love them this way!
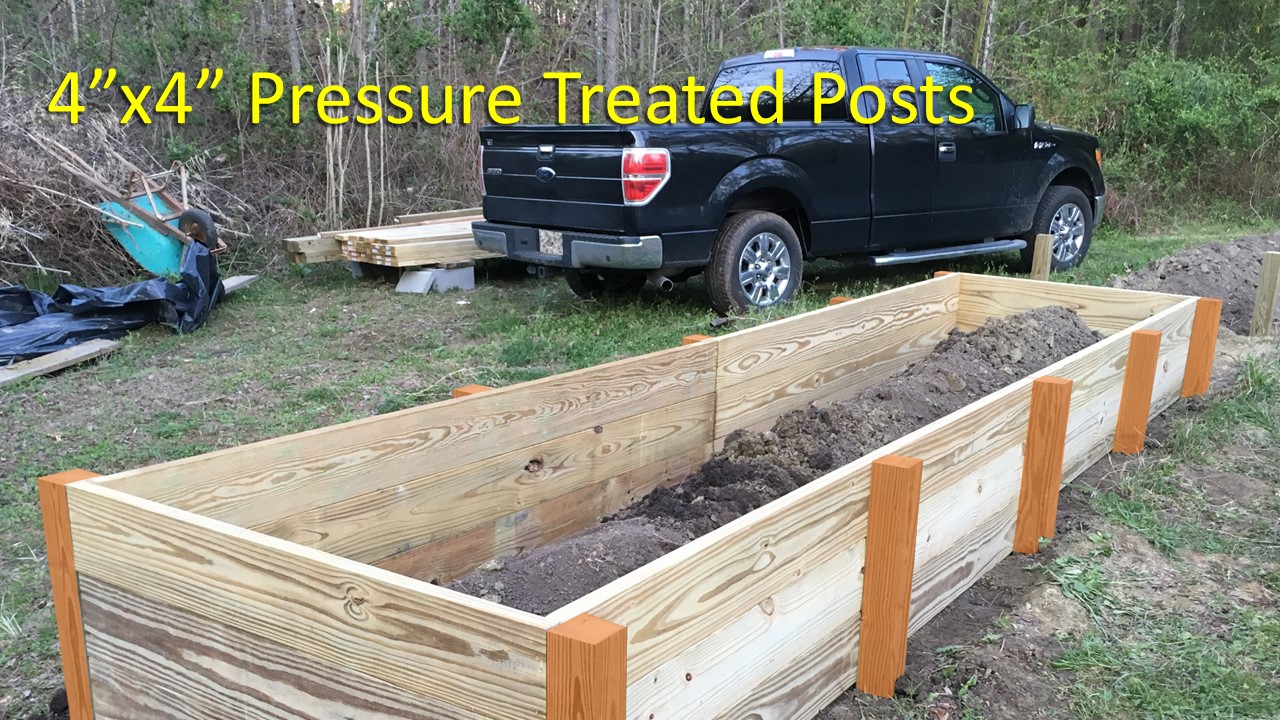
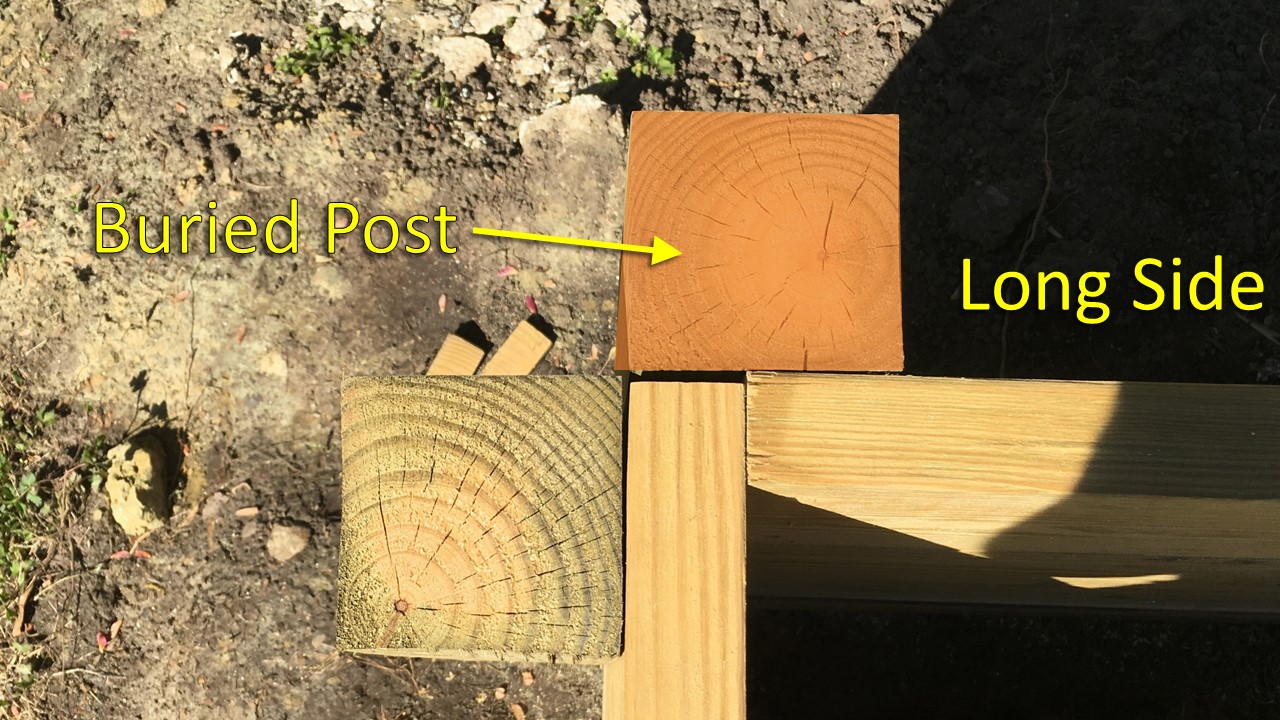
We tore down the old one and pushed all the soil to the middle to re-use in the new garden beds. All the wood used is pressure treated, starting with the 4×4 inch posts that support the 2×8 boards. These posts are buried in the ground between 12 and 16 inches depending on whether we hit rock or not.
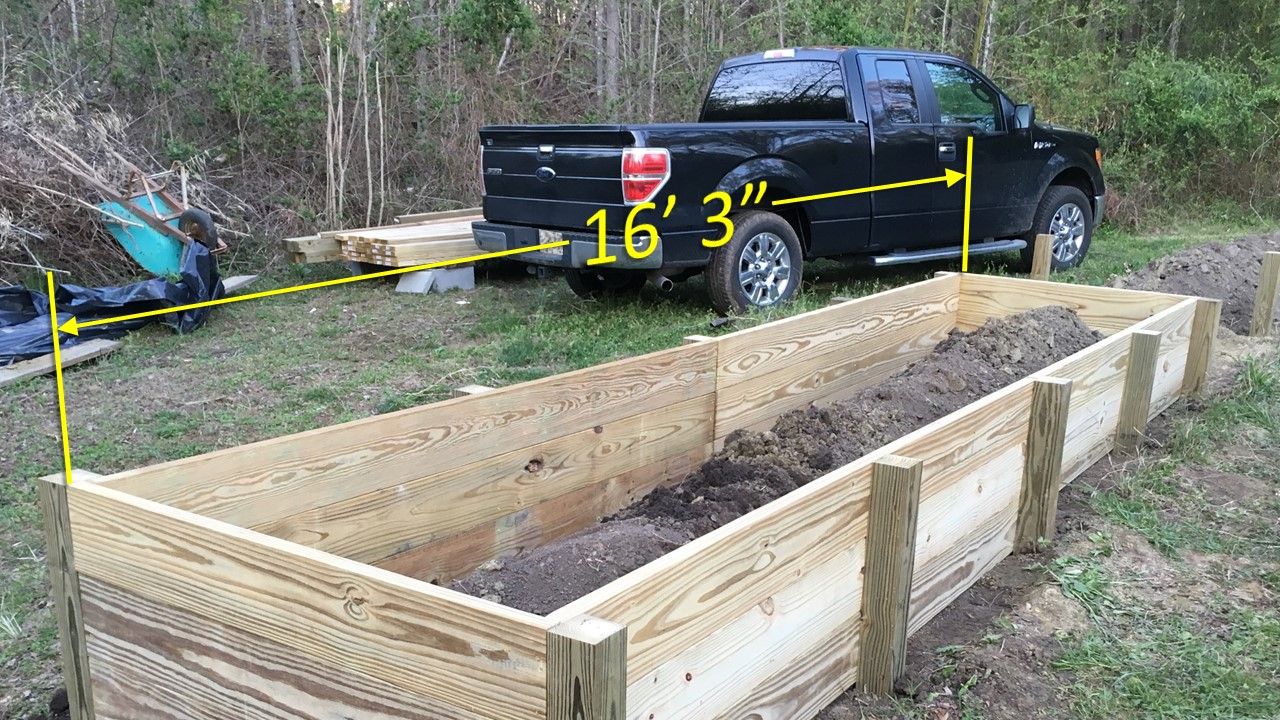
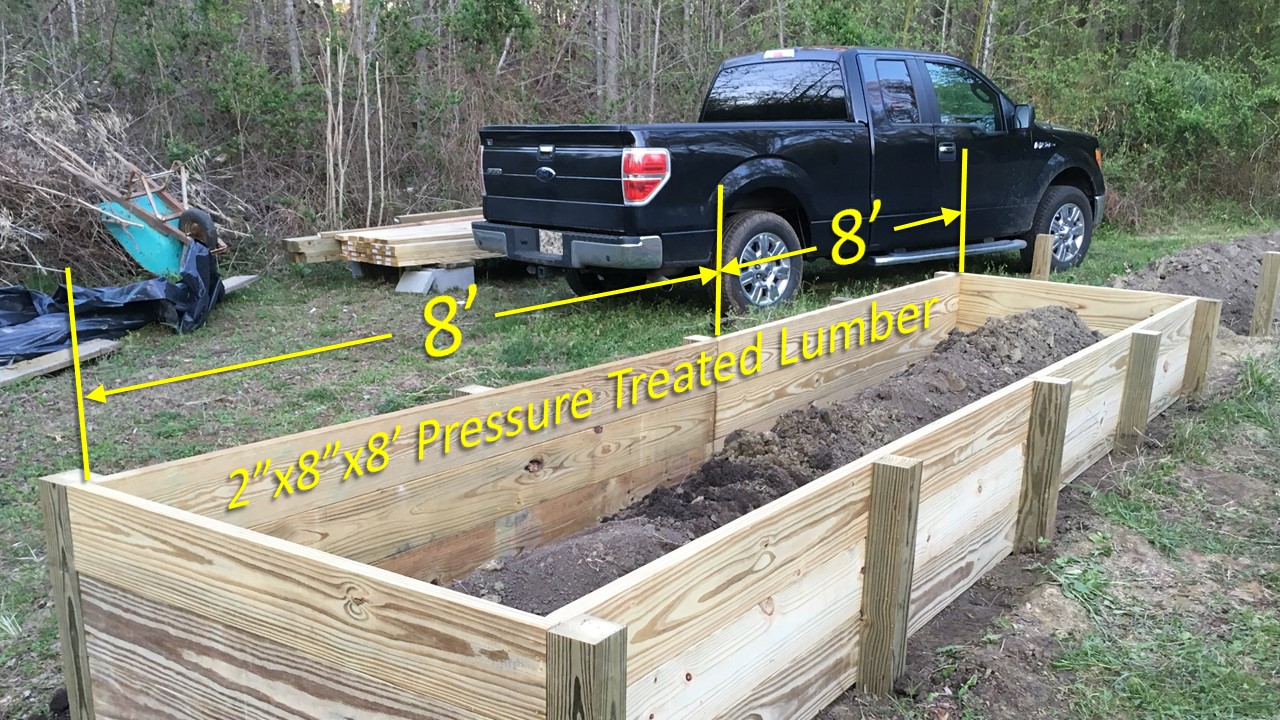
The dimensions of the beds were chosen to minimize the number of board cuts, so the long side boards are 8 feet long and the end boards are 4 feet long, making the total length 16 feet and 3 inches before the top boards are added.
The spacing between the posts is 4 feet.


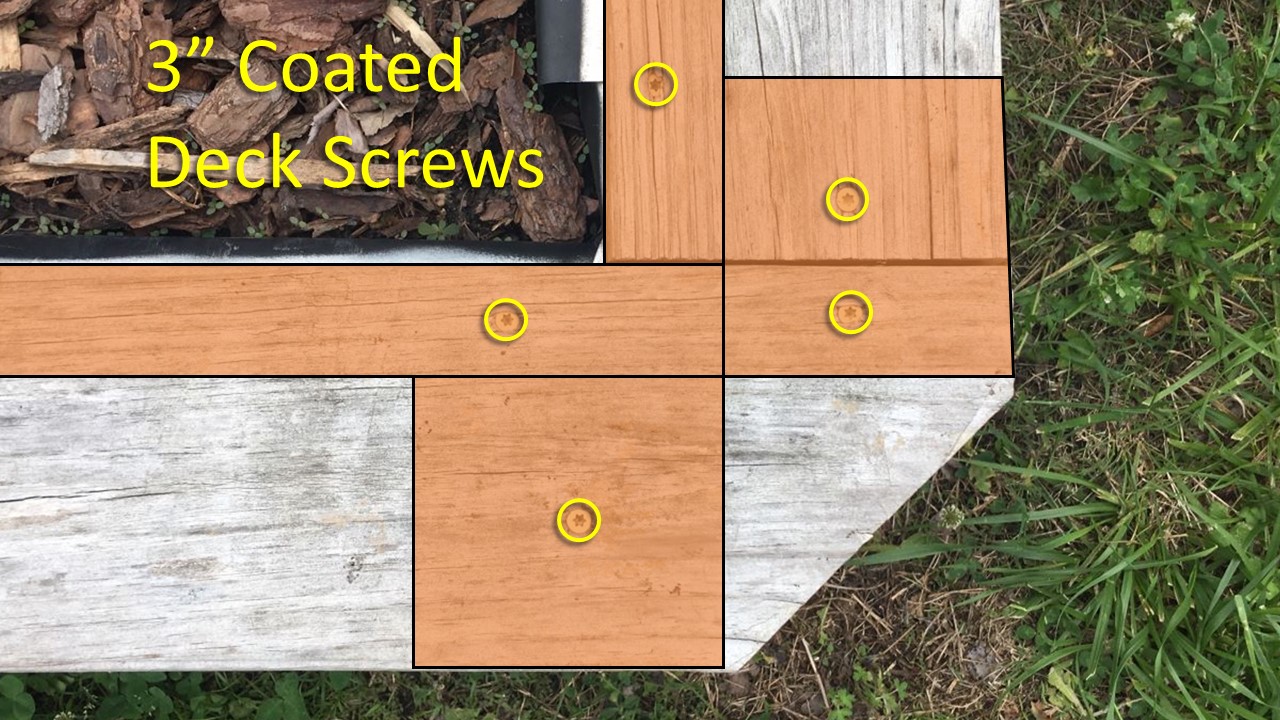
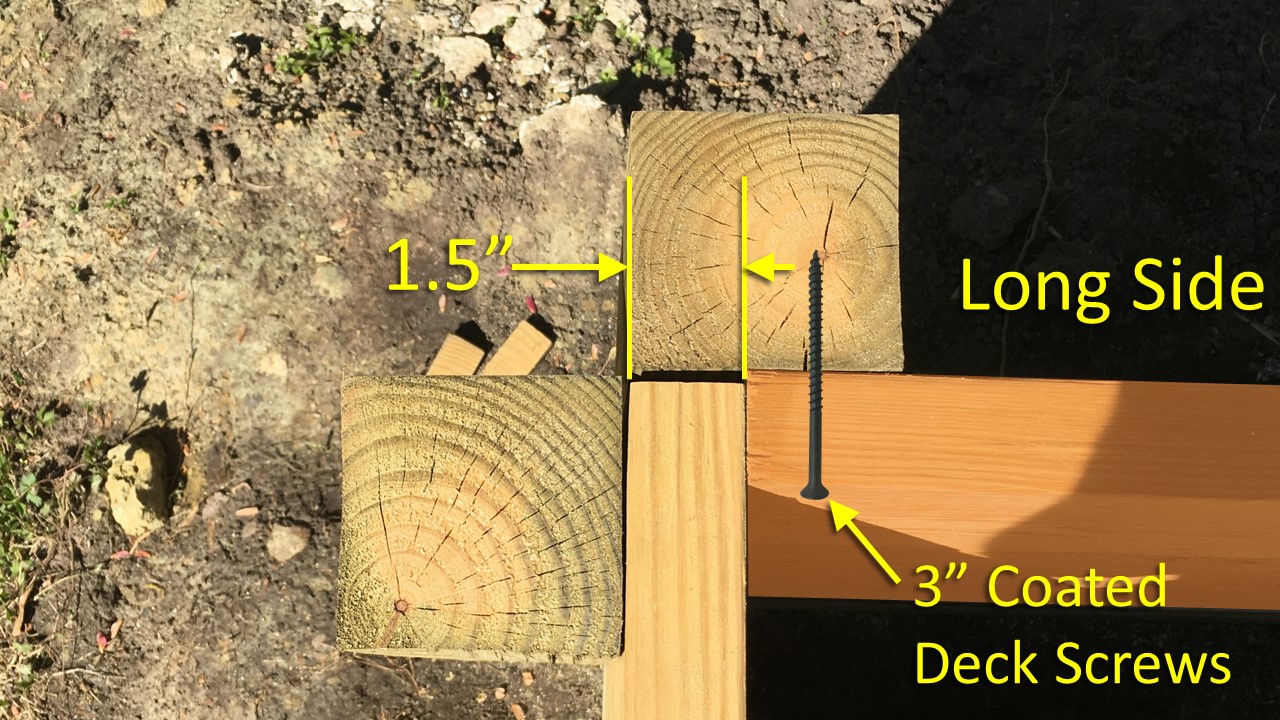
Coated 3” deck screws are used to attach the side boards to the posts and to attach the end boards to the side boards.
The side boards attach at the corner posts with 1.5 inches to spare to leave room for the end boards to sit flush with the corner post. Three deck screws attach each side board to the corner post. Likewise, three deck screws attach each end board to the side boards but offset enough to avoid hitting the other screws.
The end pieces of 4×4 post are not buried, but attach to the end boards with deck screws. The main purpose of these is to support the top board on the end and to look nice as well. Here is a look at the end posts from the side.


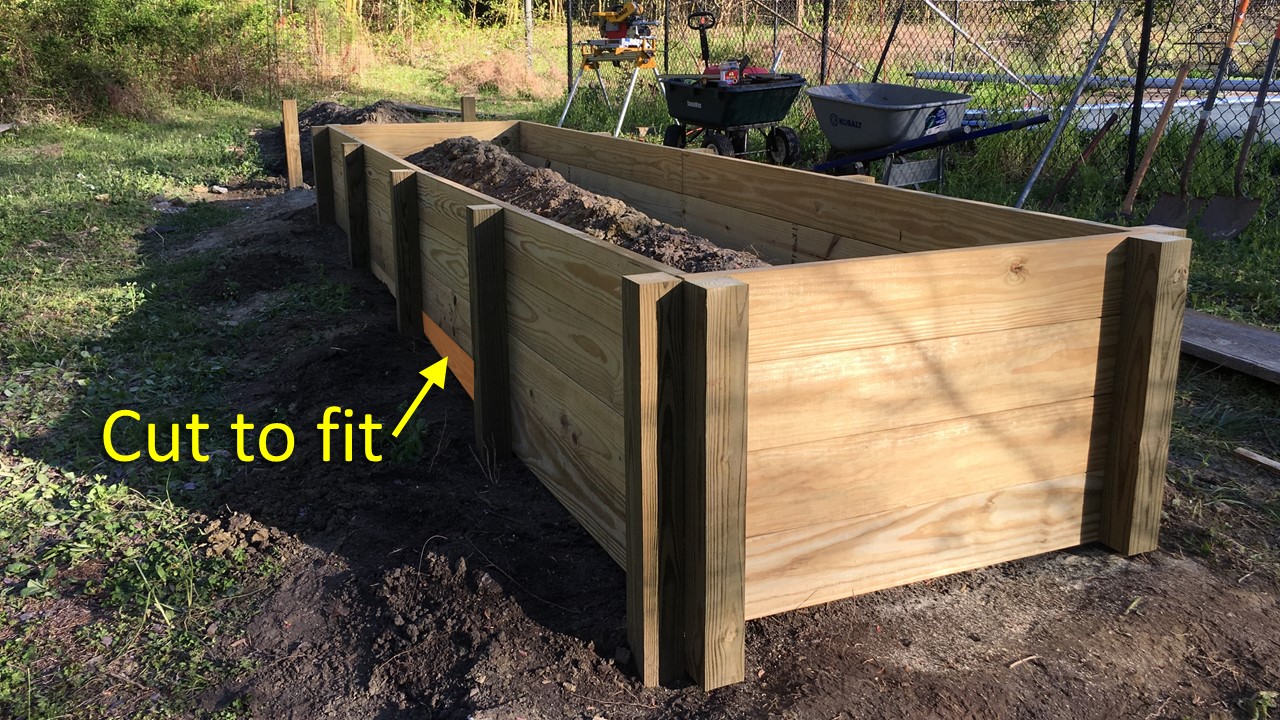
Because of the slope of the ground, some pieces had to be cut to follow the lay of the land. In some case I just used a different width of board.


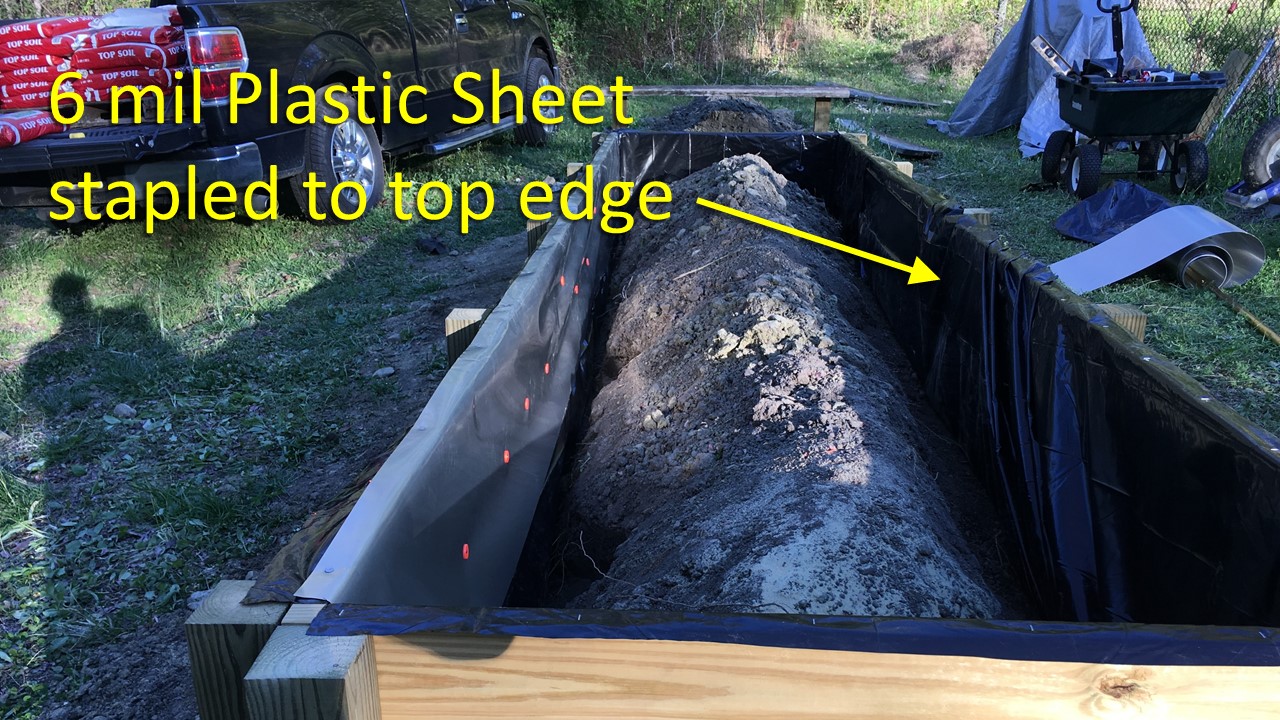
Even though this is pressure treated wood, it is lined with 6 mil plastic sheeting to better protect the wood for the long haul. This is relatively cheap insurance for the longest board life. It is stapled to the top edge
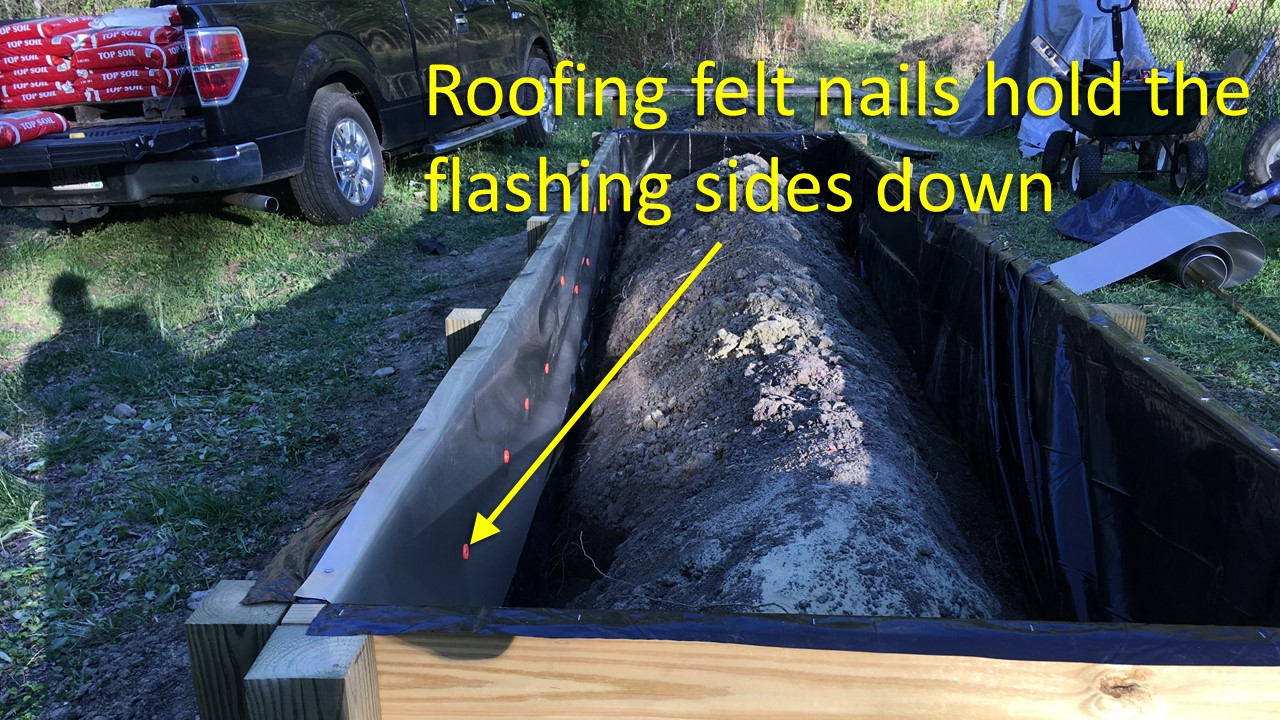
In addition to that, 18 inch aluminum flashing is attached along the top edge on top of the plastic sheeting with roofing nails, then folded over and held down with roofing felt nails. The flashing protects the plastic sheeting from damage by gardening tools like our tiller.

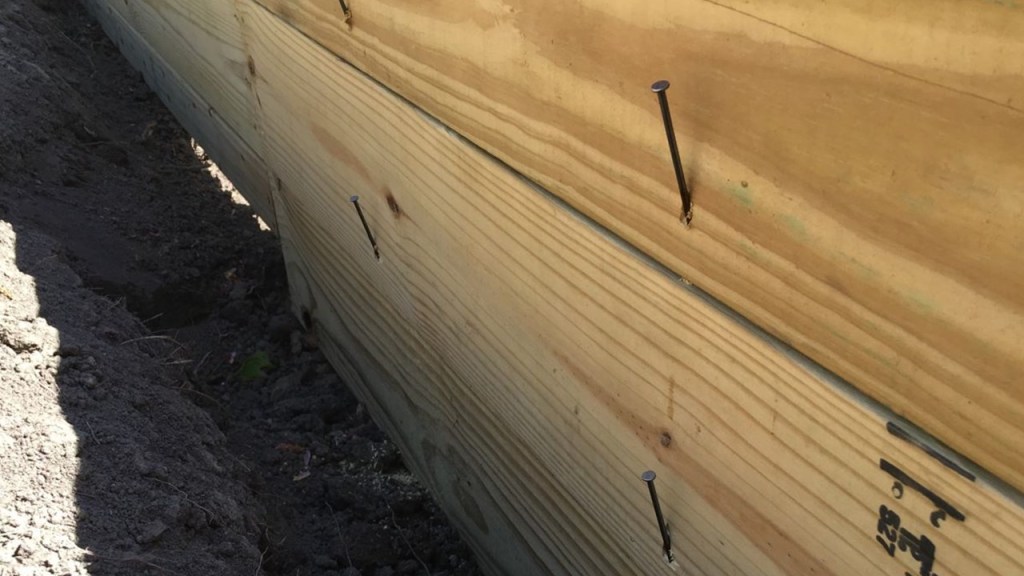
Since the side boards may warp, I toenailed them together with nails between the posts, first pre-drilling the holes to avoid splitting the wood. Then hammering the nails in.
A little flat black paint on the top of the flashing for the hell of it and it’s time for the top boards.
The top boards are 2×6 pressure treated lumber with 8 foot lengths in the middle to add rigidity where the side boards meet in the middle. If I had it to do over, I’d stagger the side boards so they didn’t all join in the middle. The other side pieces are 4 feet long.
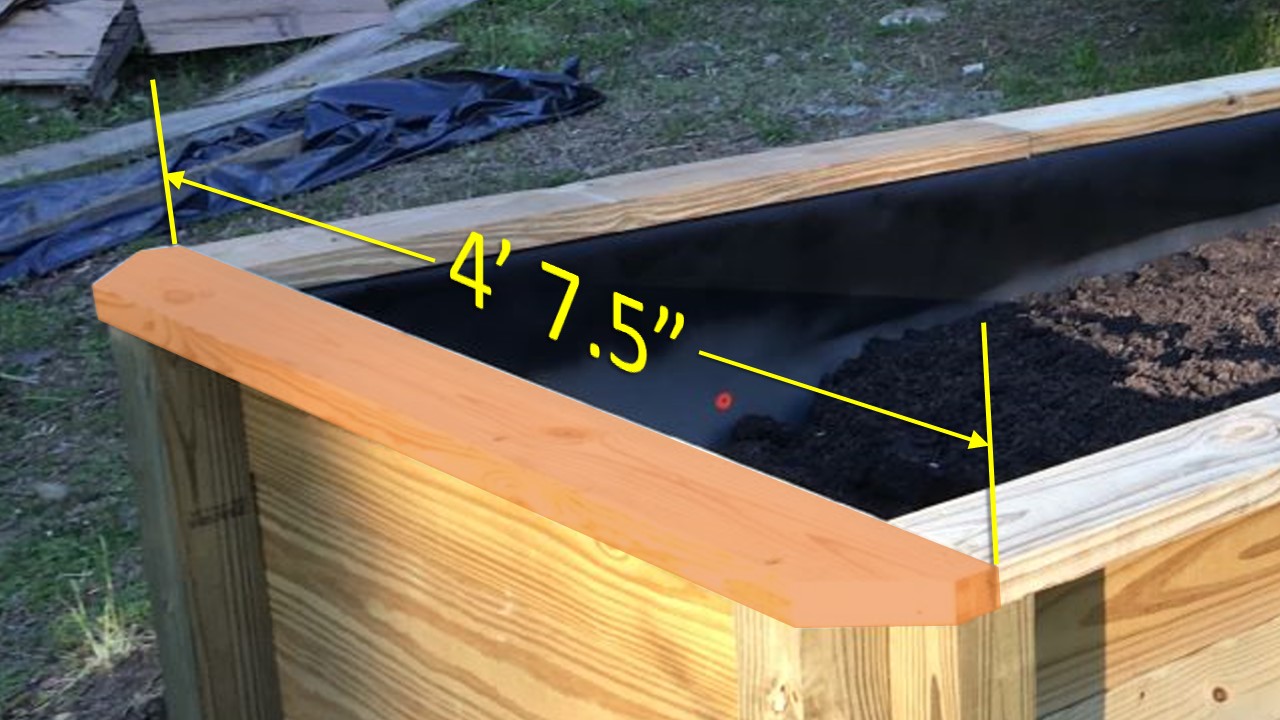
The end top boards are 4′ 7.5″ long with the corners cut at 45 degrees. All of the top boards are attached using 3” deck screws.


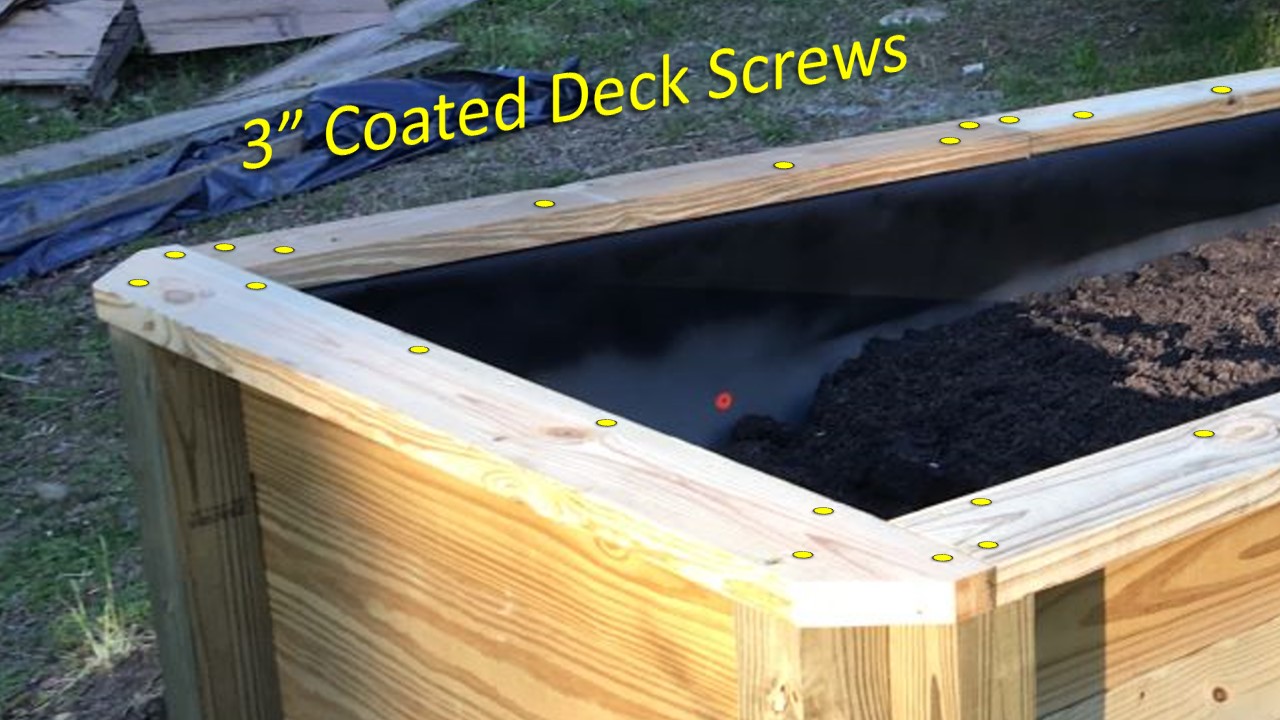
The slideshow below shows where the deck screws are placed on the corners and how they attach where the side pieces meet, positioned to avoid hitting the screws holding the side boards on.