
After almost three years of owning the Titan BX42 Wood Chipper, I can say with confidence that it has been a good investment for me. I cover specs, setup and field testing in this post.
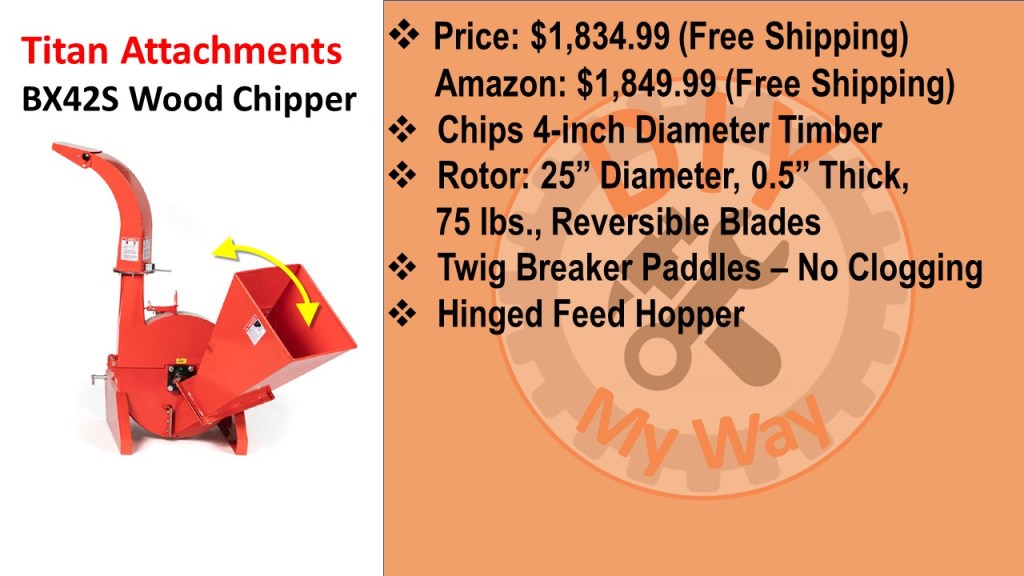
First let’s cover the specs on the BX42 woodchipper. The price on the Titan Attachments website is $1,834.99 with free shipping. But Titan also sells it on Amazon for $1,849.99 with free shipping, so it’s slightly more on Amazon, but if you already have an Amazon account, it may be worth it not to have to set up an account with Titan. I own several Titan implements and I have found that the prices do vary between Amazon and Titan direct. Sometimes, it’s a better deal on Amazon and sometimes it’s better directly from Titan, so check both. By the way, here a link to the owner’s manual, which I recommend you read if you are considering buying the chipper.
The chipper can handle timber up to 4” in diameter, which is plenty big for my needs. The rotor is 25” in diameter, is ½” thick, weighs 75 lbs. and has reversible hardened steel blades so you can just flip the blades for a fresh, sharp edge before having to sharpen them. BTW, Titan sells replacement blades and I have a link to them in the video description.

The rotor paddles have twig breaker notches and Titan claims that it eliminates clogging, but I can tell you that it will still clog from time to time as most chippers will. However, it’s pretty easy to clear a clog.
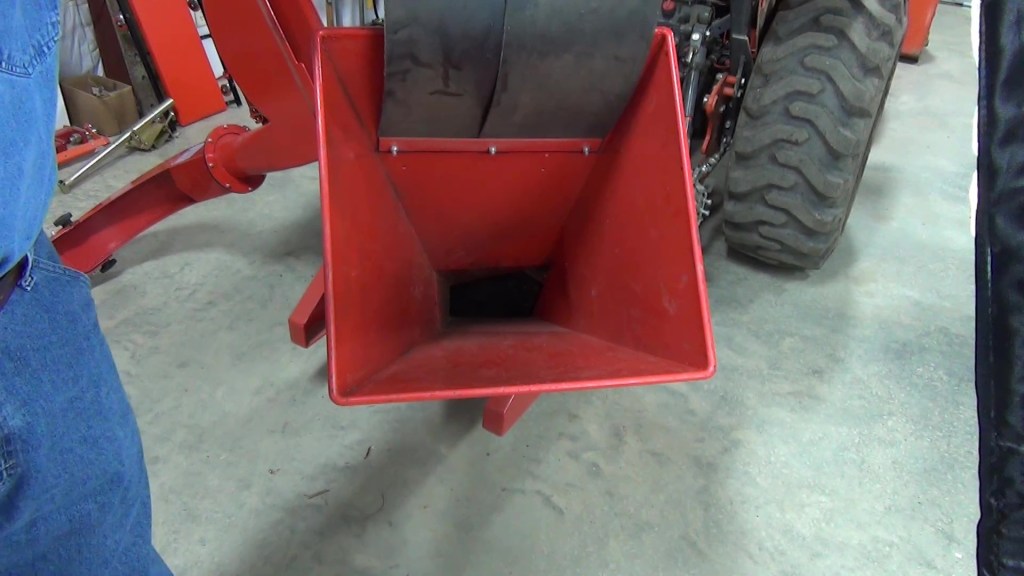
It has a hinged foldup feed hopper for transportation and storage and the discharge cute is adjustable for direction and throw distance.
It also includes a PTO shaft. And the chipper is rated for tractors up to 40 HP. They don’t specify a minimum HP, but I’ve seen subcompact tractors operate this chipper just fine in other videos. If I had to guess, it needs a minimum of about 17 HP at the PTO shaft.
The operating PTO RPM is between 540 and 1,000. Finally, in weighs in at 431 lbs.


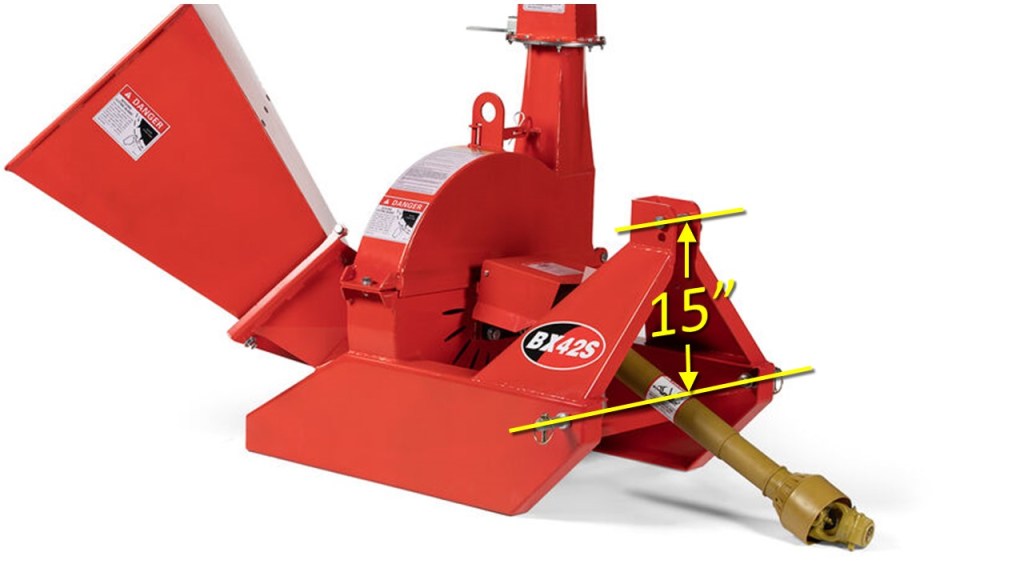
One thing to note is that is does not say it is quick hitch compatible. However, the bottom pin distance of 26.25” is within quick hitch specs. Also, there are two holes for the top link pin, and the height from the bottom pins to the top link pin in the upper hole is 15”, which within quick hitch range so I think it would work. If you have a quick hitch, you should verify the dimensions will work with your quick hitch, since quick hitch dimensions vary somewhat between manufacturers.

The wood chipper comes strapped to a pallet and in a protective metal frame, which BTW, I later turned into a welding bench, so keep that frame. It’s delivered by a freight carrier that likely won’t have a lift gate on the truck, so have your pallet forks on your tractor at delivery time.
The feed hopper, discharge hood and PTO shaft were bubble wrapped, which was good to see.
I didn’t video the assembly when I got it, but it is very straight forward and easy. Having a second person help attach the discharge hood is nice, but I managed it myself with no problem.

I store my wood chipper on a dolly in my shop so hooking up to my tractor is easy, especially with my Pat’s Easy Change system. I attach the PTO shaft after greasing the universal joints.
As I mentioned in the specs, the feed hopper folds down from the storage position. There’s even a storage spot for the latch arm. On the bottom are two bolts that are secured with washers and nylock nuts. You’ll need a 17mm wrench to tighten them. I don’t use the nuts because the feed hopper is plenty heavy and stay in place on its own.

Hopper Latch 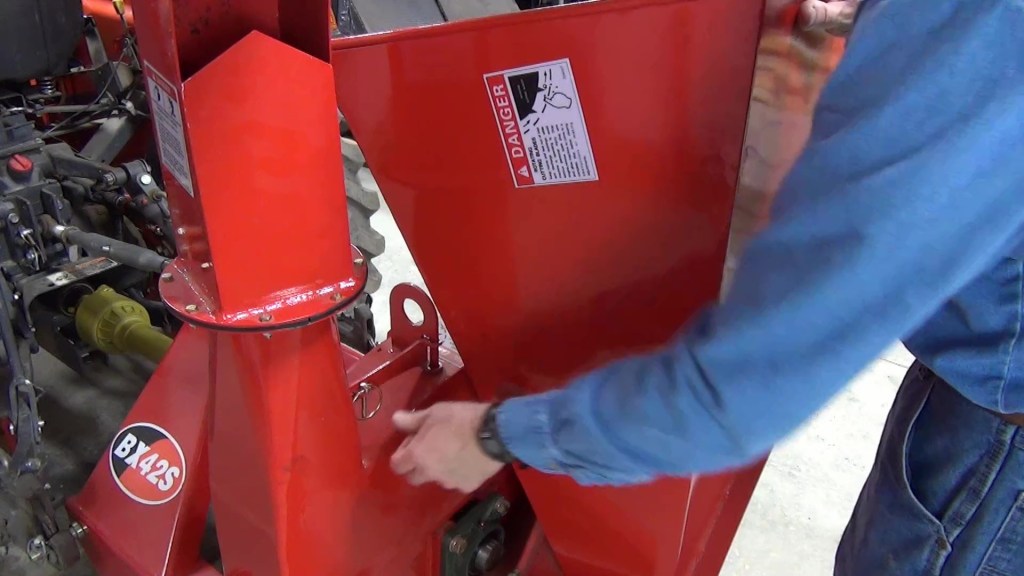
Latch Storage Position 
Lock Nuts with Washers
One of the reasons I chose the BX42 over other wood chippers is the clam shell design that allows easy access to the rotor and blades for inspection, maintenance and clearing clogs. A single 18mm bolt is all I have to remove to access the innards. I keep an 18mm wrench in my tractor tool box in case I need to clear a clog in the field.
As I mentioned earlier, each blade as two cutting edges. The bolt pattern is such that it only allows you to flip the blade in the correct direction for the cutting edges. You cannot flip them the wrong way, which is great. You’d be very disappointed in the performance of the chipper if you could flip them the wrong way.
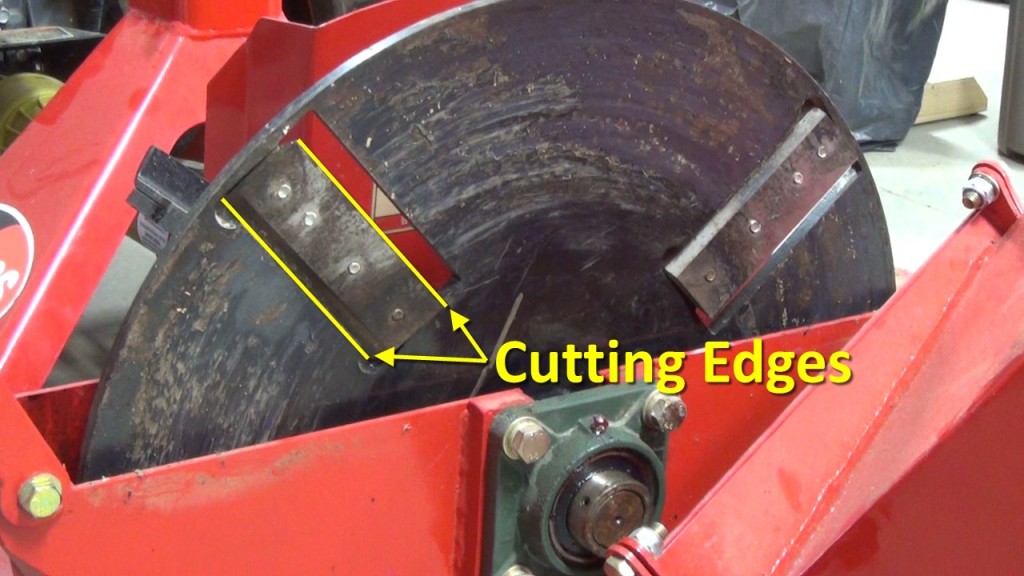
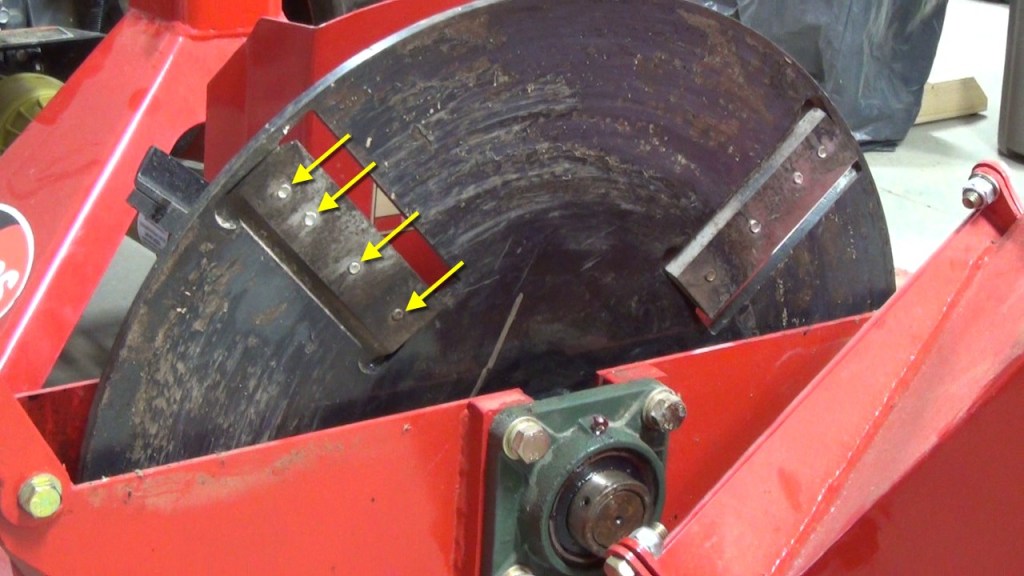


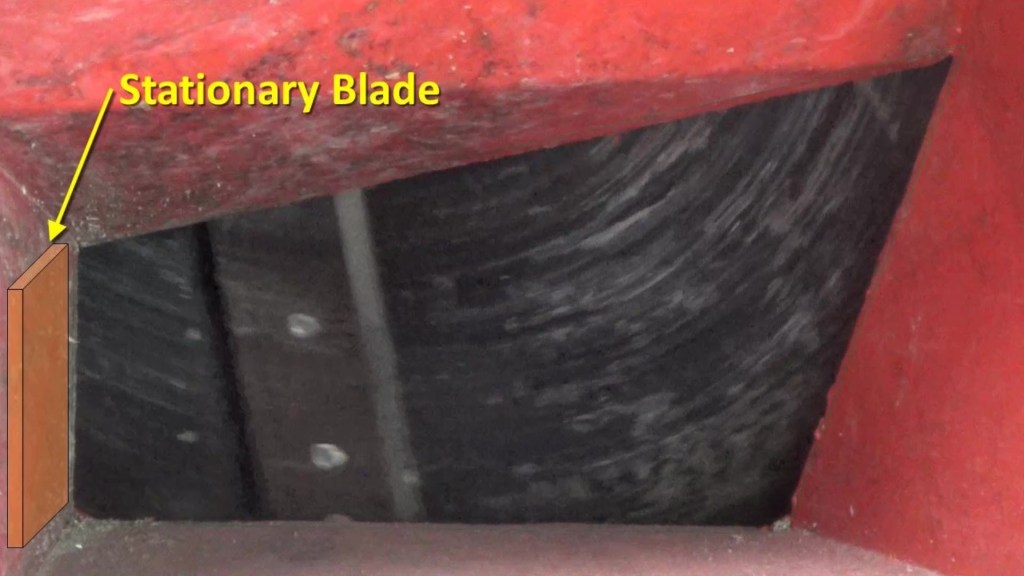
The picture below shows the stationary blade. Approach it with caution because it is sharp on all sides. This is good because that means it has four available cutting edges, so you can flip it every which way to use all four edges before having to sharpen them.

The feed chute as two heavy flaps to discourage pieces of wood from flying back at you, but this doesn’t always work as you’ll see later in the video. As a general rule, you don’t want your hands to go past the flaps while feeding limbs into the chipper.
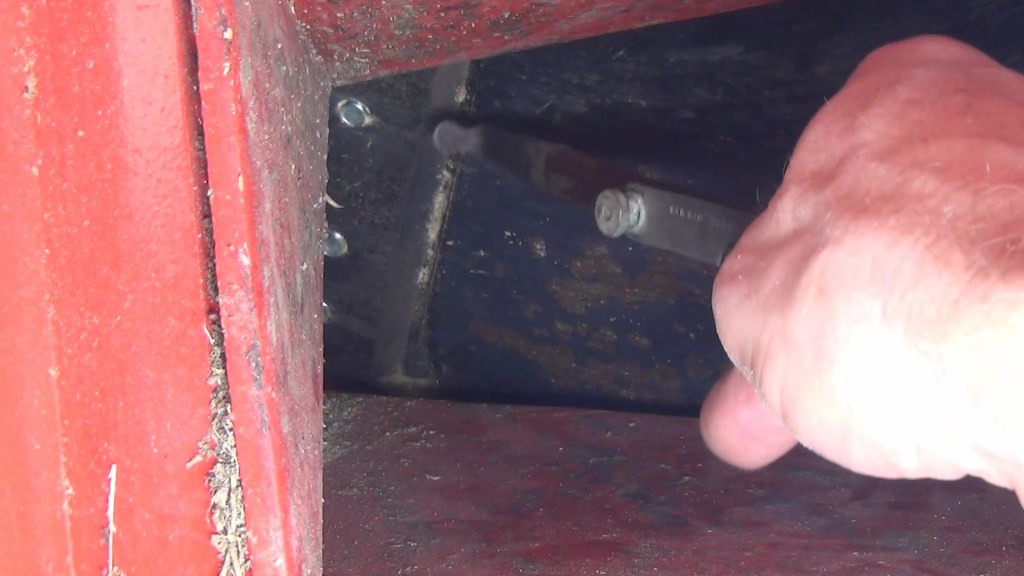
Taking a peek under the flaps, you can see where the sausage is made. The rotor blades shear limbs against the stationary blade and the chips pass behind the rotor blades to the other side of the rotor where the paddles sling them out the discharge hood. The twig breaker that chops small sticks and such into pieces too small to clog the discharge hood, in theory anyway. Like I said, it doesn’t always work.


One critical safety check is to make sure there is no front to back play on the rotor shaft that might allow the rotor blades to strike the stationary blade, which would result in chaos, death, and destruction. If you find there is any movement, loosen the set screws on the rear bearing sleeve, pull the rotor toward you then push the sleeve flush with the bearing and tighten the set screws to 18 ft-lbs. A little Loc-Tite will help keep the screws tight. Also make sure the set screws on the front bearing sleeve are torqued to spec, the recheck the gap between the rotor blades and the stationary blade. Check for rotor shaft slop before each use.

When preparing to use the chipper for the first time, the most important step is to make sure the gap between the rotor blades and the fixed blade is set correctly. The gap can vary slightly from one rotor blade to the next so spin the rotor slow to see if there is one that looks closer than the others. This is the one I’ll use to set the gap for all of them.
The manual recommends a gap of 1/32” for maximum efficiency. That’s just over 30/1000 of an inch which is a little to close for comfort for me in case the shaft developed some front to back slop. So I set the gap at 1/16”. The chipper still performs very well and I have a little peace of mind.
To set the gap, I have found that a spark plug gap gauge works well. It so happens that 60/1000” is very close to 1/16” so that is what I’m using. I position the rotor blade so that it’s cutting edge is across from the stationary blade edge then slide the gauge from top to bottom to see if it binds or has play along the way.
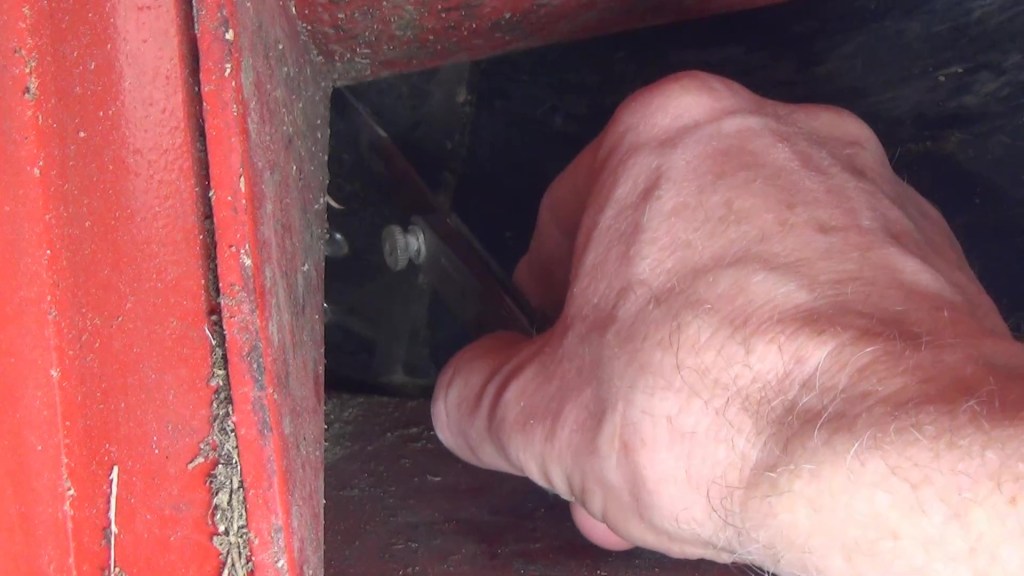
From the outside I can see the tip of the gauge in the gap to make sure it’s in the right place. Once the stationary blade gap is set to what I want, I torque the bolts tight. The manual says to torque them to specified values according to the chart in the back of the manual, but they don’t tell you what the bolt sizes are, so I had to do a little Goggling to find out that a 13mm bolt head goes with an M8 bolt. The proper torque for a class 8.8 M8 bolt is 18 ft-lbs. By the way, I had to clip the washers with a rotary grinder and cut off wheel so that the bolts could move in far enough and the washers could sit flat without lapping up on the weld.


Here’s a summary of the bolts and torques. All bolts are class 8.8, which determines the recommended torque. The rotor and stationary blades require a 13mm wrench or socket, are size M8 with a recommended torque of 18 ft-lbs. The bearing bolts require a 21mm wrench or socket, are size M14 with a recommended torque of 103 ft-lbs. The bearing sleeve set screws require a 4mm Allen wrench, are size M8 with a recommended torque of 18 ft-lbs. Note that there are two set screws on each sleeve. Be sure to check the torque on the bolts and set screws before first use. Surprisingly, the manual doesn’t give and interval for rechecking torques in the maintenance section, but they do say to torque them after the 1st hour and the 10th hour, so I do it every 10 hours of operation to be safe.

Also, before each use give the front and rear bearing several squirts of fresh grease. I use my Lincoln 1134 Extra Heavy Duty Pistol Grip Grease Gun with a LockNLube Grease Gun Coupler. My grease of choice is Lucas Red N Tacky.


So how does this chipper perform in the field? In my opinion it performs very well. It would be best to watch the video to get the full picture, but I can convey a few things with words and pictures. First, a few words about how I use it in the field Most chippers can sit right on the ground and that’s fine. But I prefer it a little higher, so I keep the chipper off the ground. Also, I like to lean it back toward the tractor a bit as insurance against the rotor shaft developing some slop. With it leaning forward, the rotor blades are not likely to strike the stationary blade if slop develops. By the way, it’s best to stand to the side of the feed hopper when feeding wood into the chipper, because some times a chunk of limb can rebound out of the feed hopper toward you. Also, I wear safety glasses at a minimum and sometimes a forest helmet as a maximum.
From my experience the Titan BX42 can indeed handle upt to 4″ limbs, soft wood or hard wood. It can handle freshly cut green wood with leaves just as well as dried up wood, It rarely clogs up, however limbs with fresh green leaves, especially when wet, are the most likely to cause it to clog up. If that happens, disengage the PTO, turn of your tractor and open the clam shell to pull out the clog.
It can also chip bamboo. Because bamboo is light, it doesn’t gravity feed as well as heavier woods, so it may need a little extra encouragement.
Always wear eye protection. A limb can sometimes decide to slap you up side the head like this:


Overall, I’ve been very pleased with the Titan BX42 wood chipper. I certainly would not call it professional grade but for some like me who will use it several times a year, I consider it a good buy.
Note: Links to Amazon products are Amazon Associate links that won’t cost you any extra, but will help support my efforts with a small commission on qualified products. Thanks for your support!
