If you’ve followed my YouTube channel for a while, you’ve seen the umbrella canopy on my tractor in some of my videos. It, plus my ROPS mounted fan, provides shade and cooling for me during the hottest months of the year.
There are a lot of choices for ROPS mounted tractor canopies. For my first canopy, I wanted something fairly inexpensive and removeable because I would mostly use the canopy in the summer months. Otherwise, I enjoy the full open view and being able to look up at the sky. I wasn’t ready for the expense or trouble of a permanent canopy, so it seemed like an umbrella canopy would be a good choice for me, and it turns out that it has.
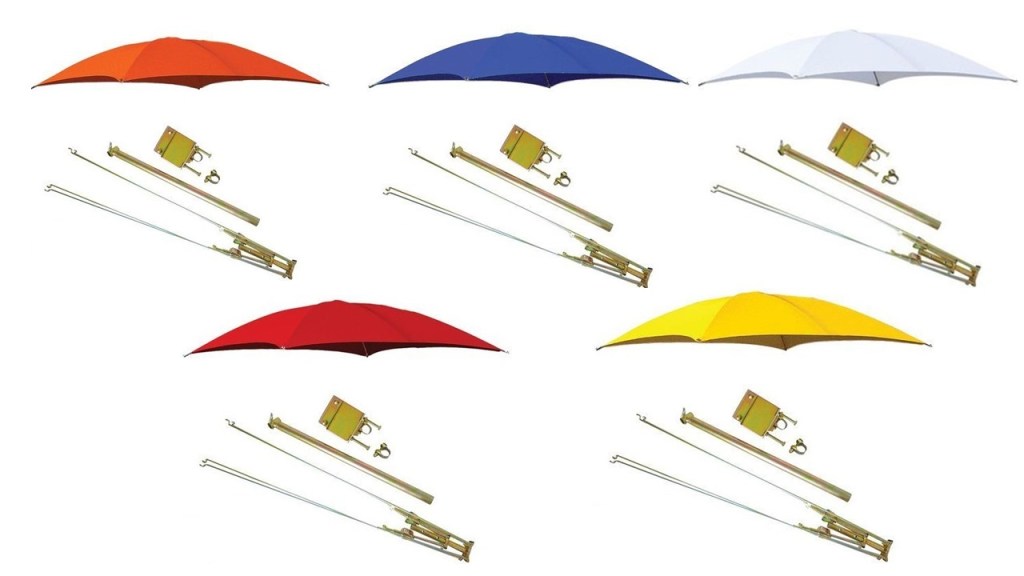
I chose the Snowco Femco RU-50 ROPS-mounted 54″ Tractor Umbrella and bought it online through Amazon from Farmer Bob’s Parts. However, it’s sold through several online stores for prices ranging from $96 to $143, but shipping cost vary a lot too, so shop around for the best overall deal. I have found all the colors available through Amazon.
It’s available in orange, blue, white, red, and yellow. There is no green option, but if you are a John Deere owner, the yellow ought to look good on it.
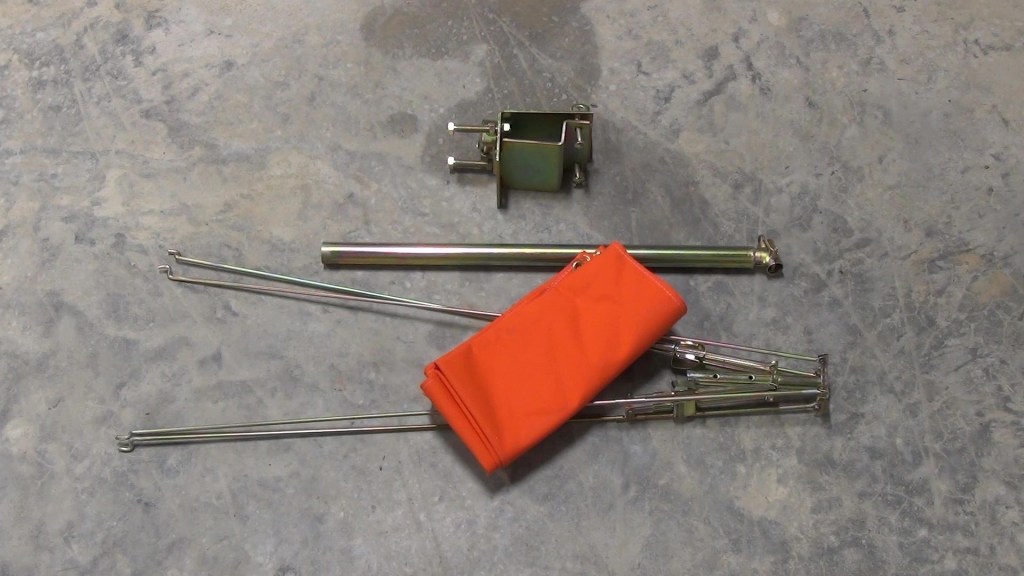
The parts of the canopy include the ROPS mounting bracket. The umbrella support arm. The umbrella frame. And the heavy-duty canvas covering.
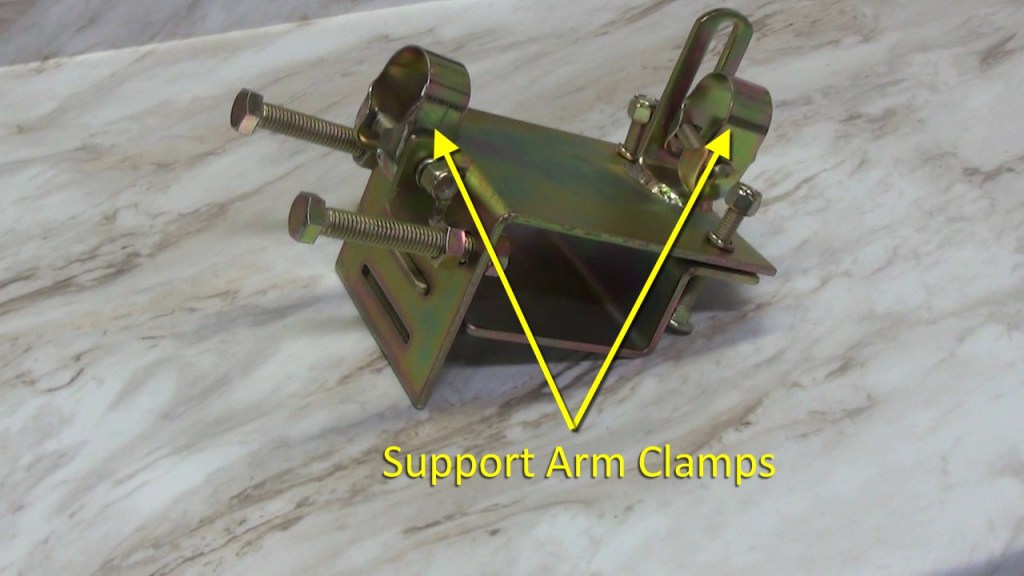
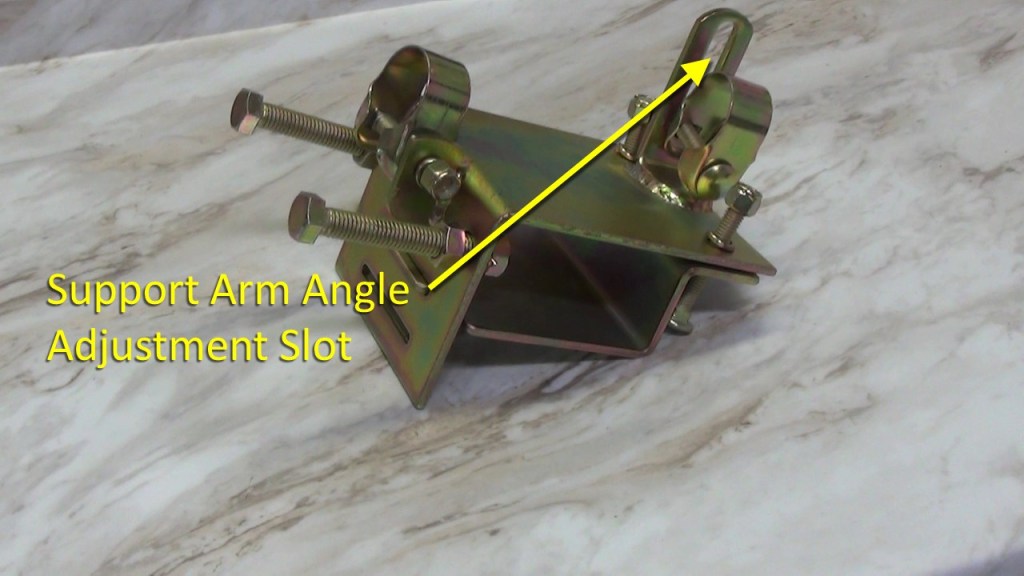
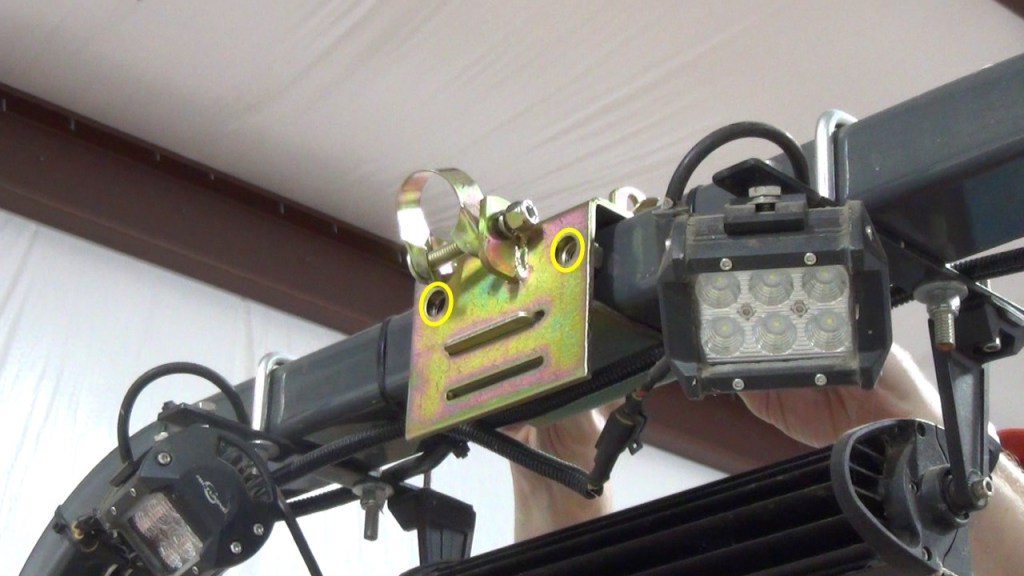
The ROPS mounting bracket can be adjusted to fits ROPS ranging from 2″x2″ to 3″x3″. These bolts adjust for the width of the ROPS. This Slot is for 2″ thick ROPS. And this slot is for 3″ thick ROPS. These bolts adjust for the ROPS thickness. I like that they use both split washers and a nylock nuts to make sure the bracket stays tightly clamped to the ROPS. It has two clamps that hold the support arm. And a slot for adjusting the angle of the support arm. The bracket is made of steel with a corrosion-resistant finish.
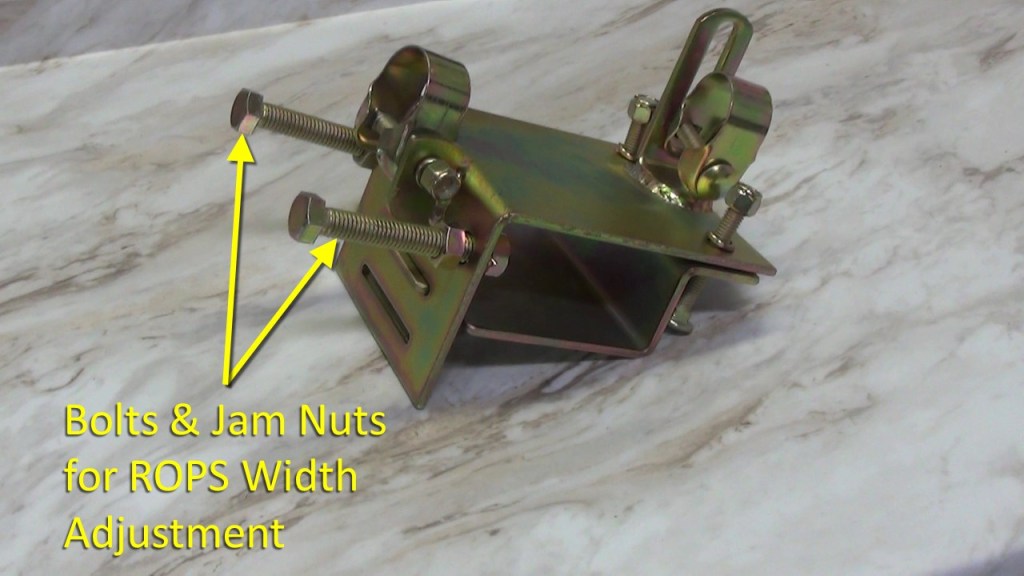
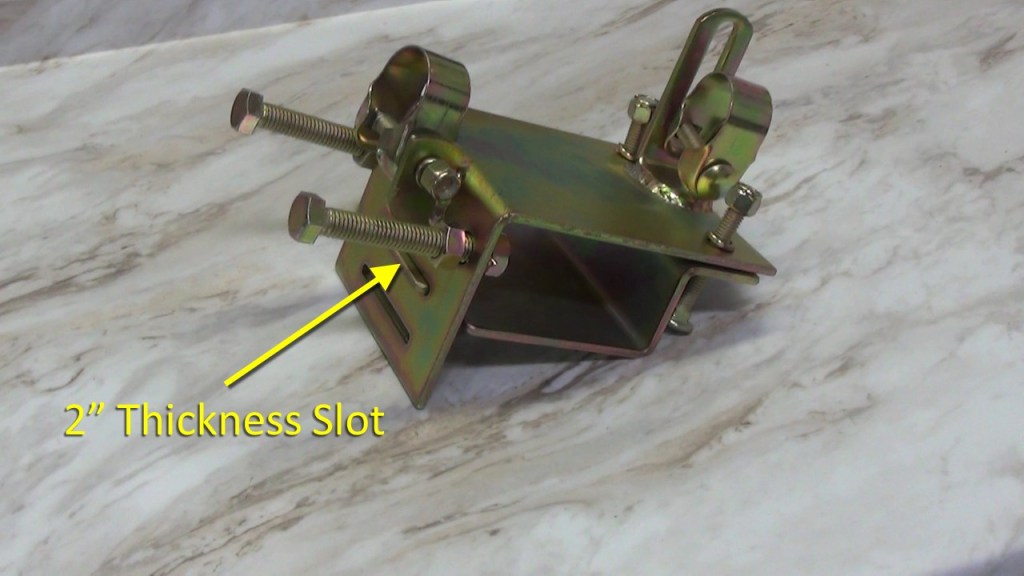

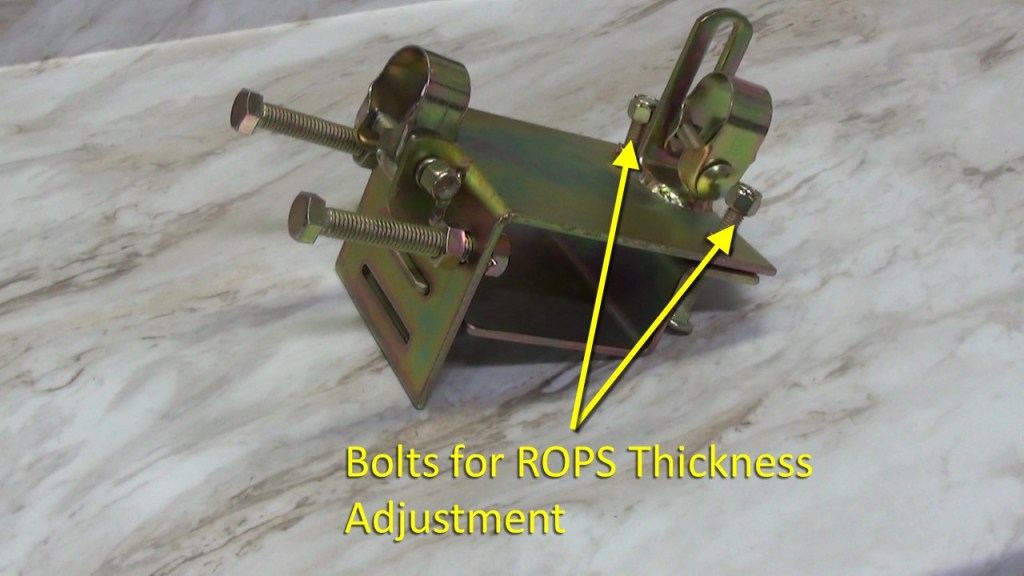
Installation on my 2×3″ ROPS is easy. The top portion of the mounting bracket sits on top of the ROPS. Then the bottom portion slides into the appropriate thickness slot. I removed the width bolts on the back, which aren’t needed for a 3″ wide ROPS. If you need to use the bolts, I recommend putting a piece of plate steel between the bolts and the back of your ROPS to keep the bolts from damaging the finish on the ROPS.
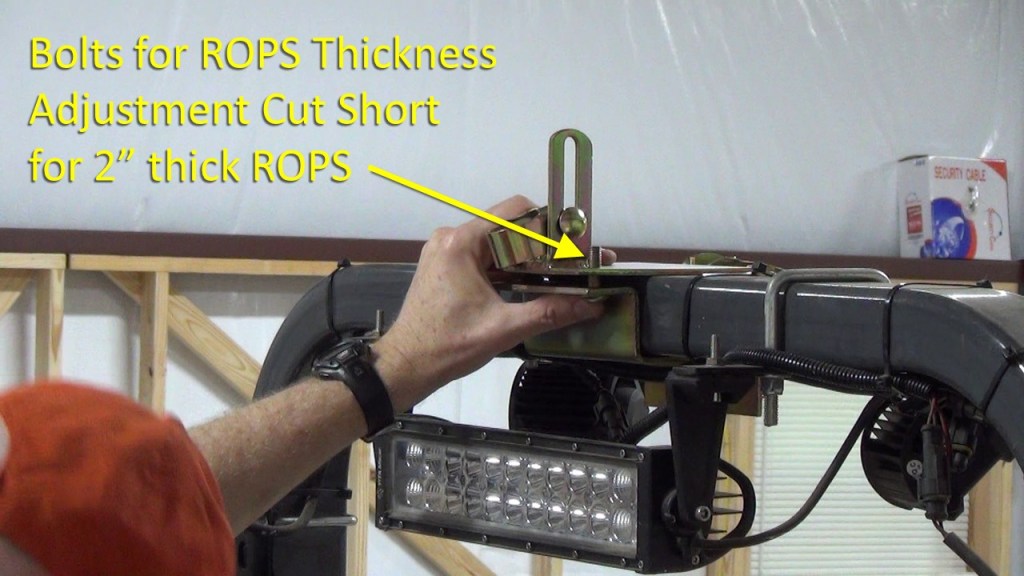
Next, insert a clamping bolt on one side. I cut the bolts shorter so they don’t take so long to get on and off. Then put on the split washer and nylock nut. A cordless impact wrench with a 9/16″ socket makes tightening the nuts up a snap. Snug the first nut but not too tight yet to allow for some movement to get the other bolt in. Repeat for the other side. You can tighten this one up all the way. Then tighten the first one.
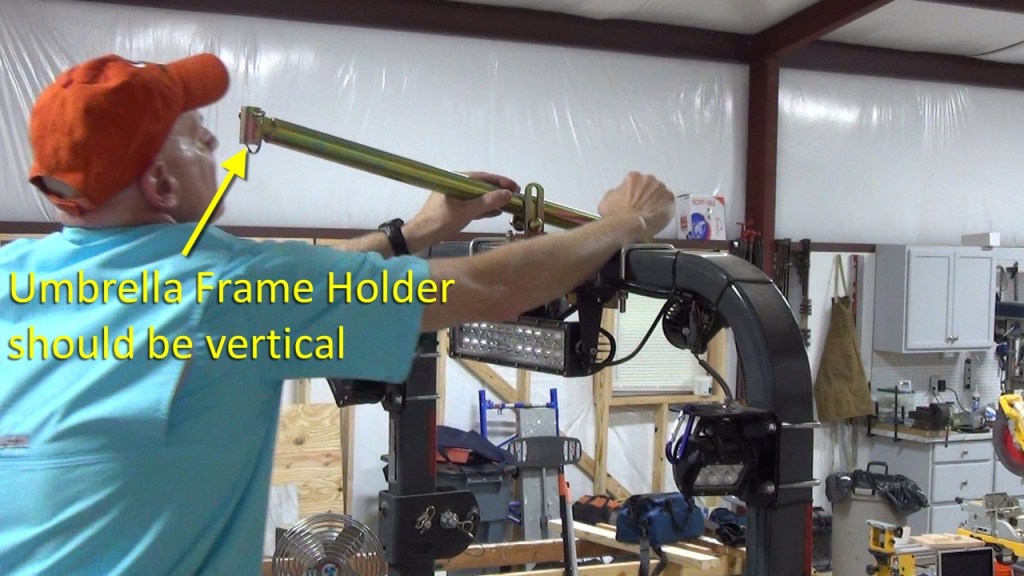
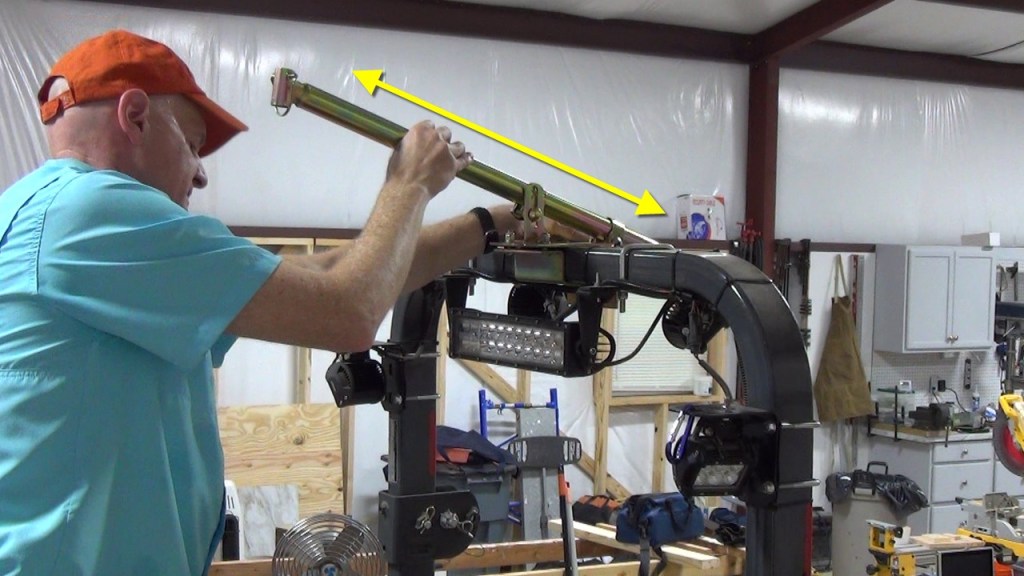
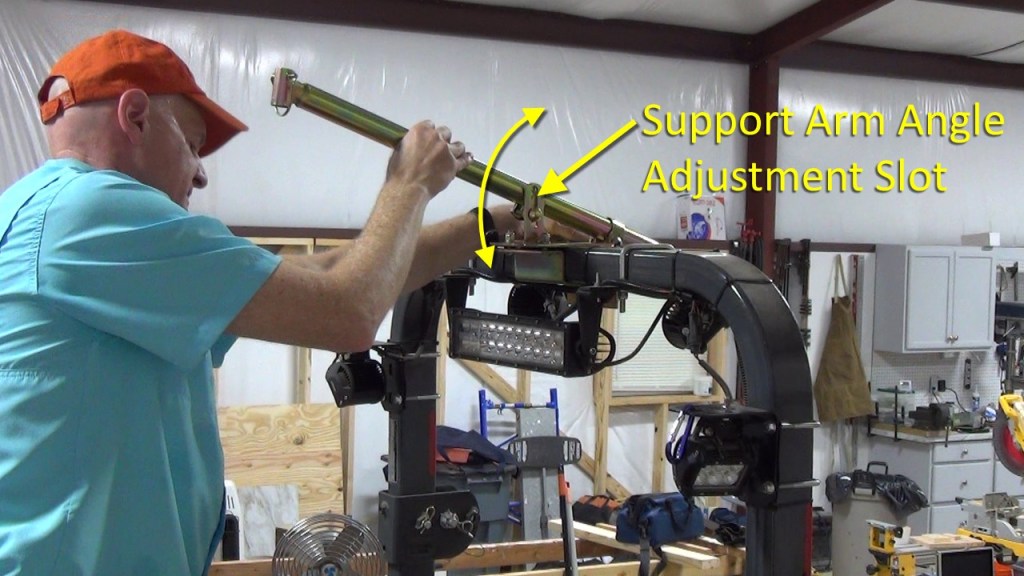
The support arm goes on next, sliding through both clamps, making sure the umbrella frame holder is vertical. You can adjust the support arm forward or backwards to suit you and you can also adjust the tilt angle by positioning the front clamp up or down in the slot before tightening the nut.
Tighten the rear clamp, followed by the front clamp.
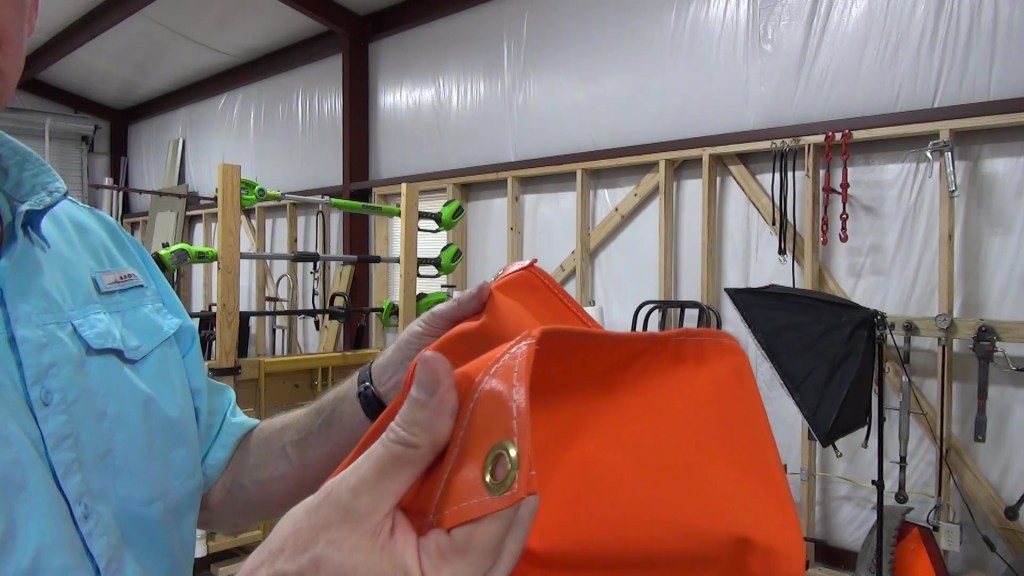
The canvas cover has metal gromets and vinyl wedges to protect the cover from wearing against the umbrella frame. There is also a square vinyl patch in the center for the same reason. Each umbrella spoke locks when full extended.
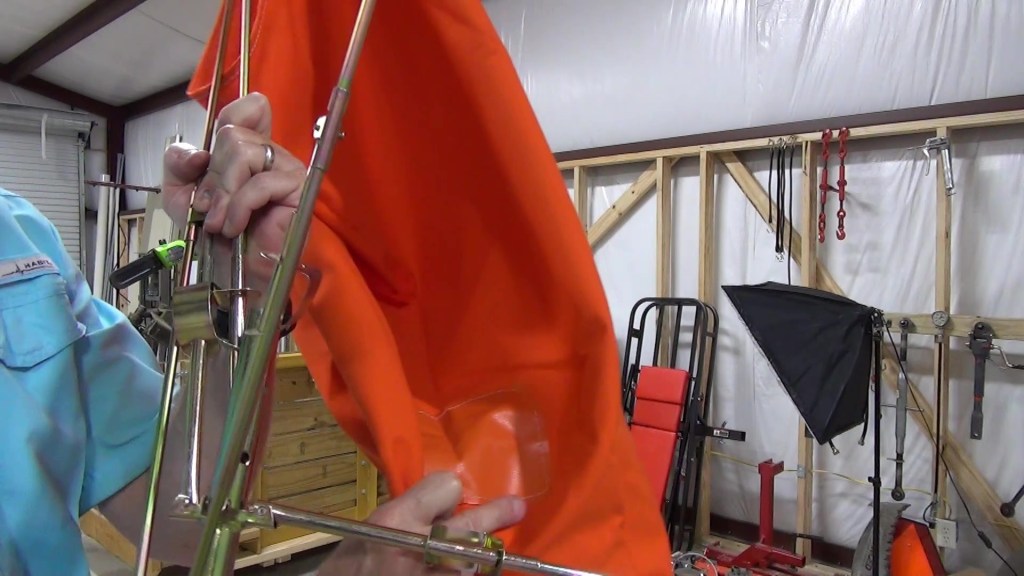
With tie wraps on all four spokes, getting the cover on becomes much easier. The other corners stay in place while you hook the last one on.
Now you can attach the canopy to the support arm using the include lynch pin. There is a low position. And a high position which gives you about 3″ more headroom under the canopy.
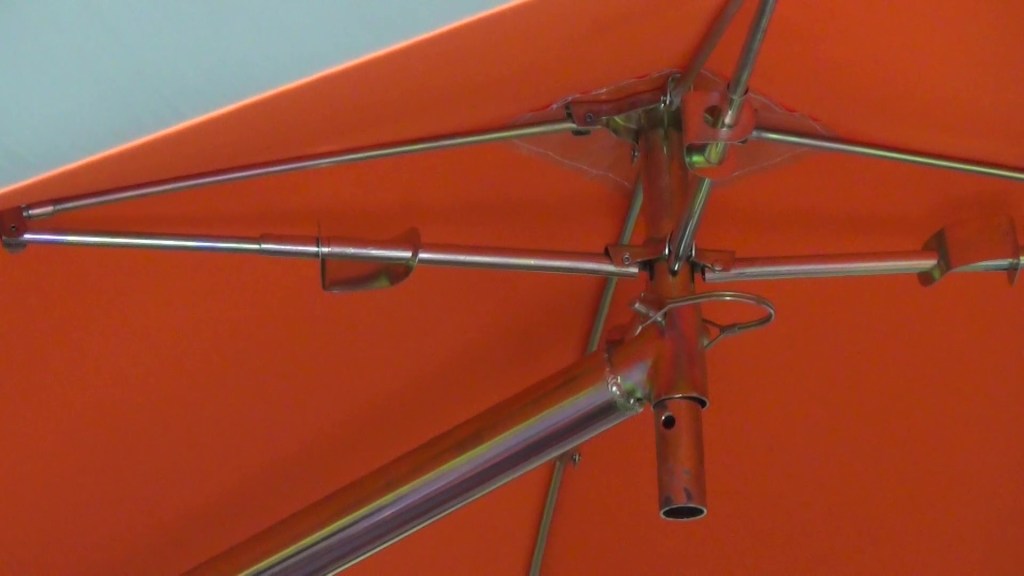
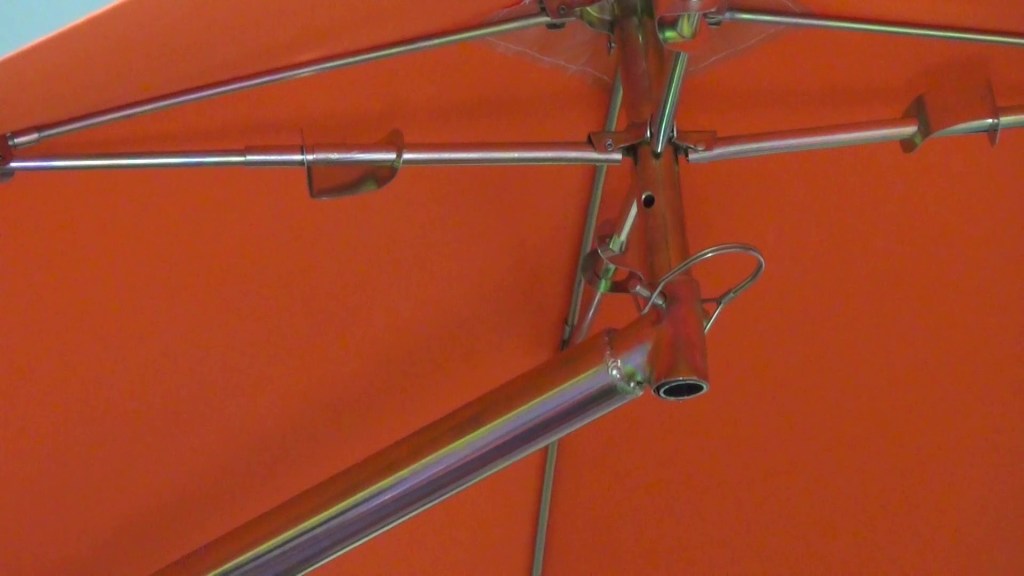
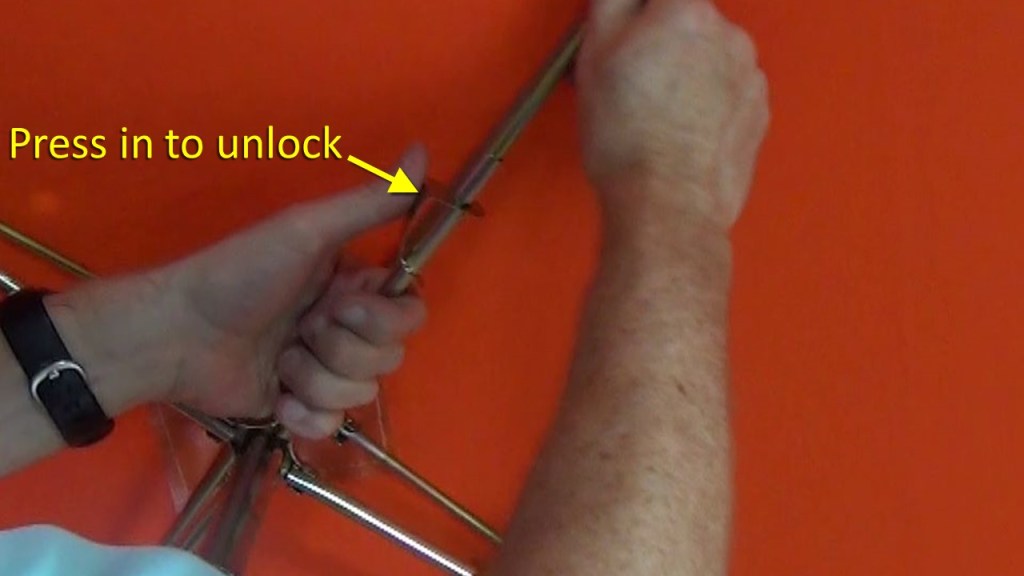
To fold up the canopy when not in use, press inward on the locking tabs on each spoke to unlock the spoke and collapse the canopy for storage.
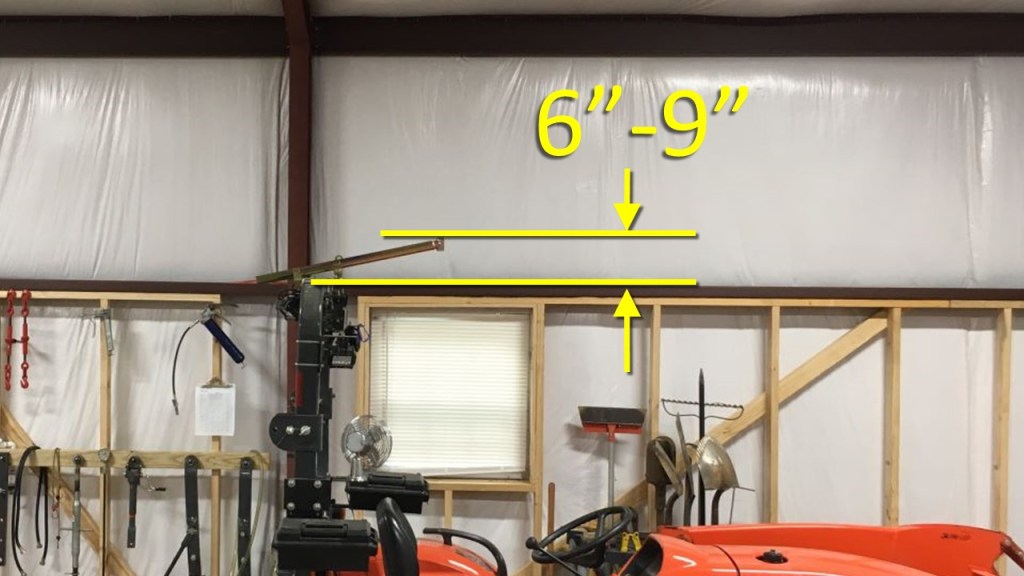
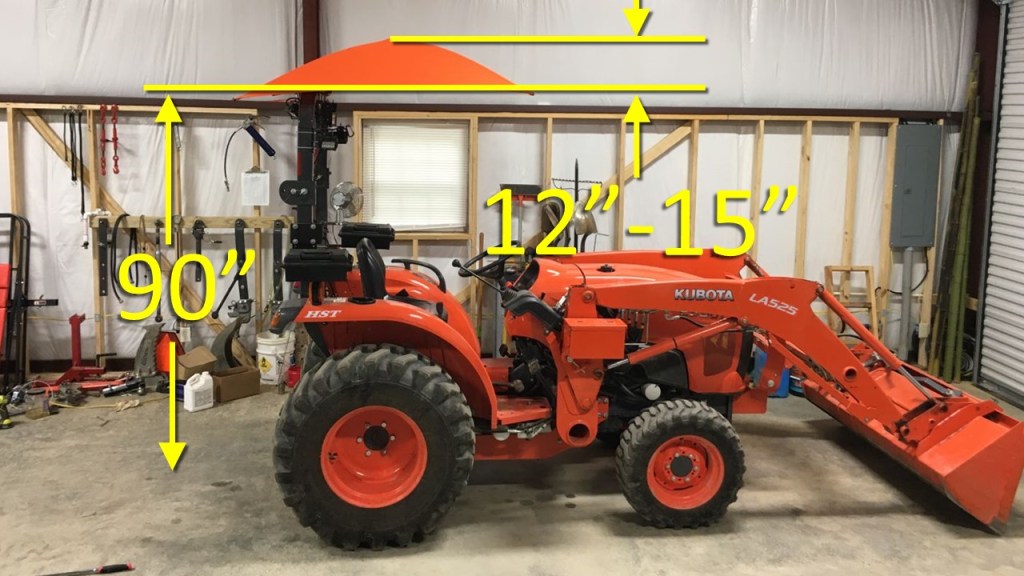
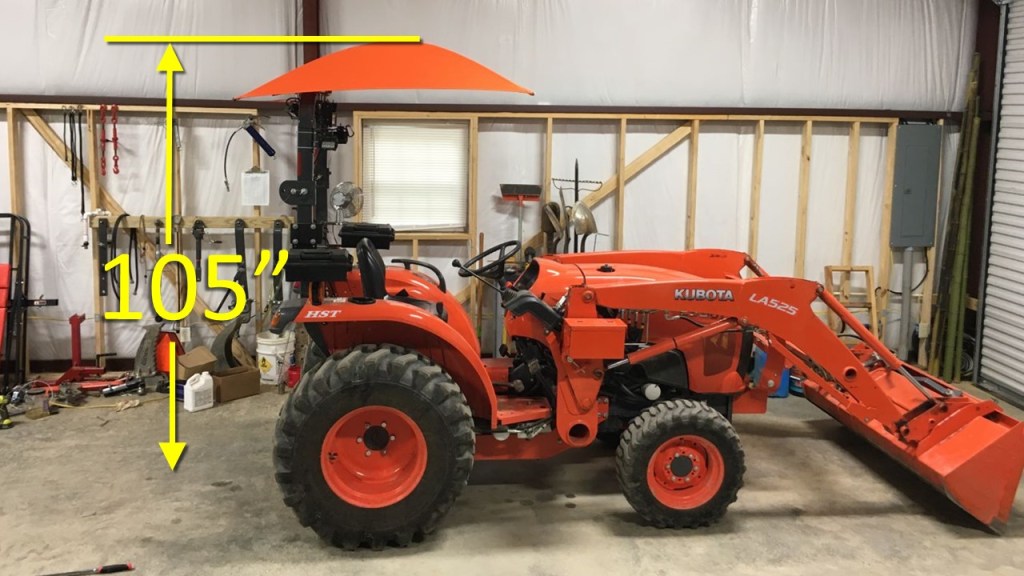
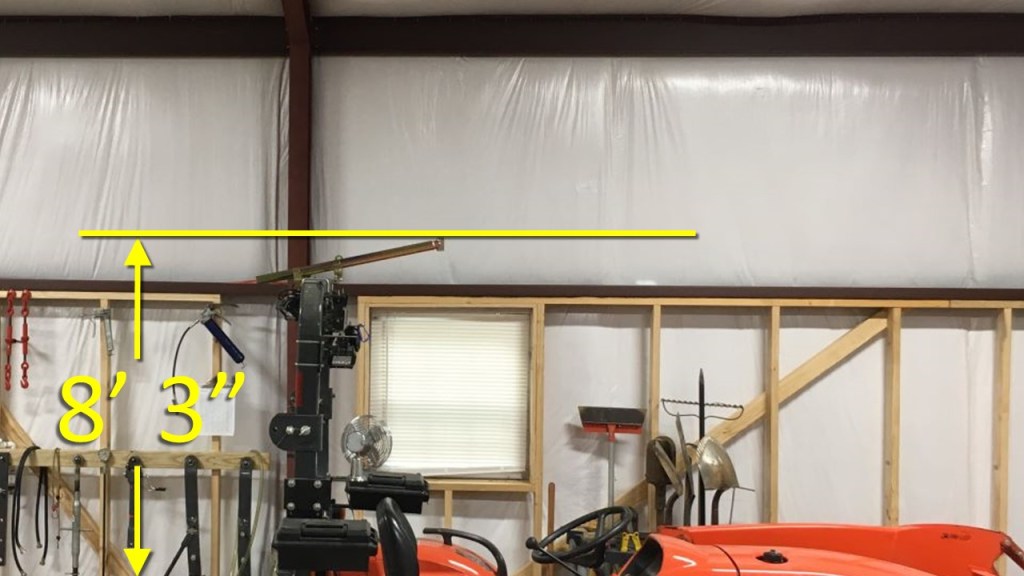
One thing to keep in mind is that this canopy sticks up from 12 to 15″ above the top of the ROPS, depending on the angle you set the support arm. The top of my ROPS is 90″, so adding another 15″ makes the total height 105″ or 8′ 9″ tall. With the umbrella canopy removed, the top of the support arm is from 6 to 9″ above the top of the ROPS or a total height of 8′ 3″. Take this into account when considering this canopy. It’s easy to take canopy off, so if you keep your tractor under a shed or in a garage, make sure you have plenty of headroom to spare.


The pros for this canopy are:
- It’s inexpensive compared to hardtop canopies.
- It is easy to install
- It is light weight
- It’s quick and easy to remove the canopy and leave the bracket and support arm attached.
- It has plenty of headroom under the canopy. I don’t have to duck down while getting on or off the tractor.
The cons are:
- It can be easily damaged if caught on a limb or the top of garage door.
- It sits a good bit higher above the ROPS than hardtop canopies do.
- Even with the umbrella canopy removed, the support arm is still 6 to 9″ higher than the top of the ROPS, which could be problem when parking the tractor under a shed or garage.
- It can be damaged by high winds. I don’t operate my tractor in high winds, but some tractor owners might not have a choice.
- The canopy fades in the sun.
For me, the Snowco Femco RU-50 ROPS-mounted tractor canopy is a great, inexpensive way to stay in the shade while operating my tractor.
Note: Links to Amazon products are Amazon Associate links that won’t cost you any extra, but will help support my efforts with a small commission on qualified products. Thanks for your support!
