In Part 1 of this series, I added rear work lights to my Polaris Range EV. In this post, I cover the installation of the front light bar and a better charging port than the stock setup. Then I take the Ranger on a night drive to test out the lights. Wow! What an improvement!
Materials List for Front LED Light Bar:
- Nilight – 72W 12Inch 72W Spot Flood Combo Off Road Led Light Bar
- Nilight 90001B LED Light Bar Rocker Switch
- GS Power Red/Black 16 Gauge Wire (16 AWG) – 100 Foot
- Cable Zip Ties,500 Pack, Self-Locking 4,6,8,10 and 12-Inch
- 2-Pin Waterproof Electrical Connectors, 10 Pack
- Ginsco 324 Pcs 6 Size Clear Heat Shrink Tubing Cable Wrap Kit
- Wire Electrical Connectors Kit – Butt, Ring, Spade, Quick Disconnect, 120 pcs:
- Two 3/8” Fender Washers
Materials for Charging Port:
- Journeyman-Pro 5278 15 Amp 125 Volt, Flanged Inlet with Cover/Cap
- 6ft Power Extension Cord, 15AWG, 15Amp
- Cable Zip Ties,500 Pack, Self-Locking 4,6,8,10 and 12-Inch
- 1/2 inch Split Wire Loom Tubing, 25ft:
- Scotch Vinyl Electrical Tape, Black, 3/4-in by 66-ft, 1-Roll
- Wire Electrical Connectors Kit – Butt, Ring, Spade, Quick Disconnect, 250 Pieces
- Gardner Bender Liquid Electrical Tape (Optional)
Recommended Special Tools:
Note: Links to Amazon products are Amazon Associate links that won’t cost you any extra, but will help support my efforts with a small commission on qualified products. Thanks for your support!
Installing the Front LED Light Bar
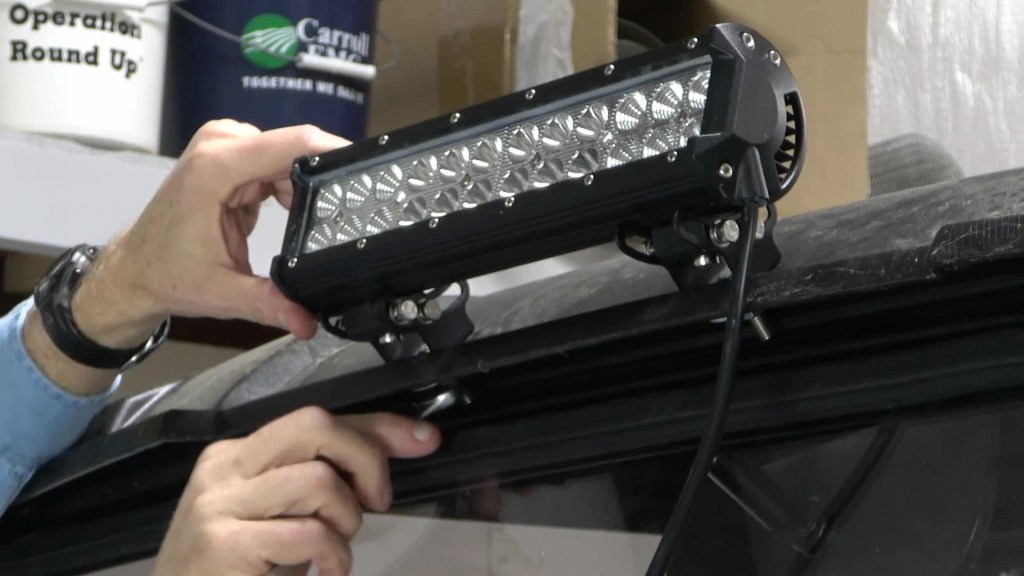
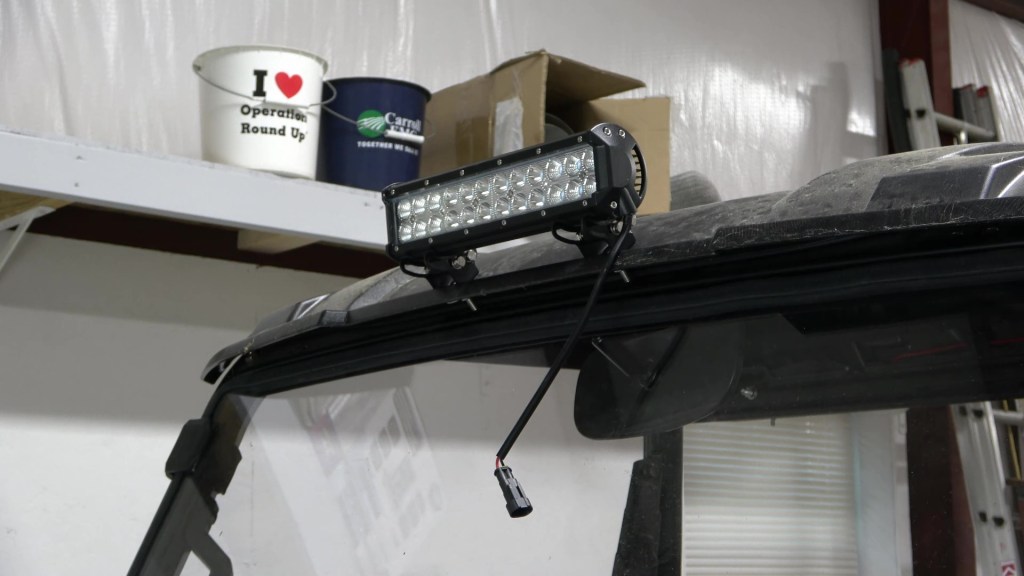
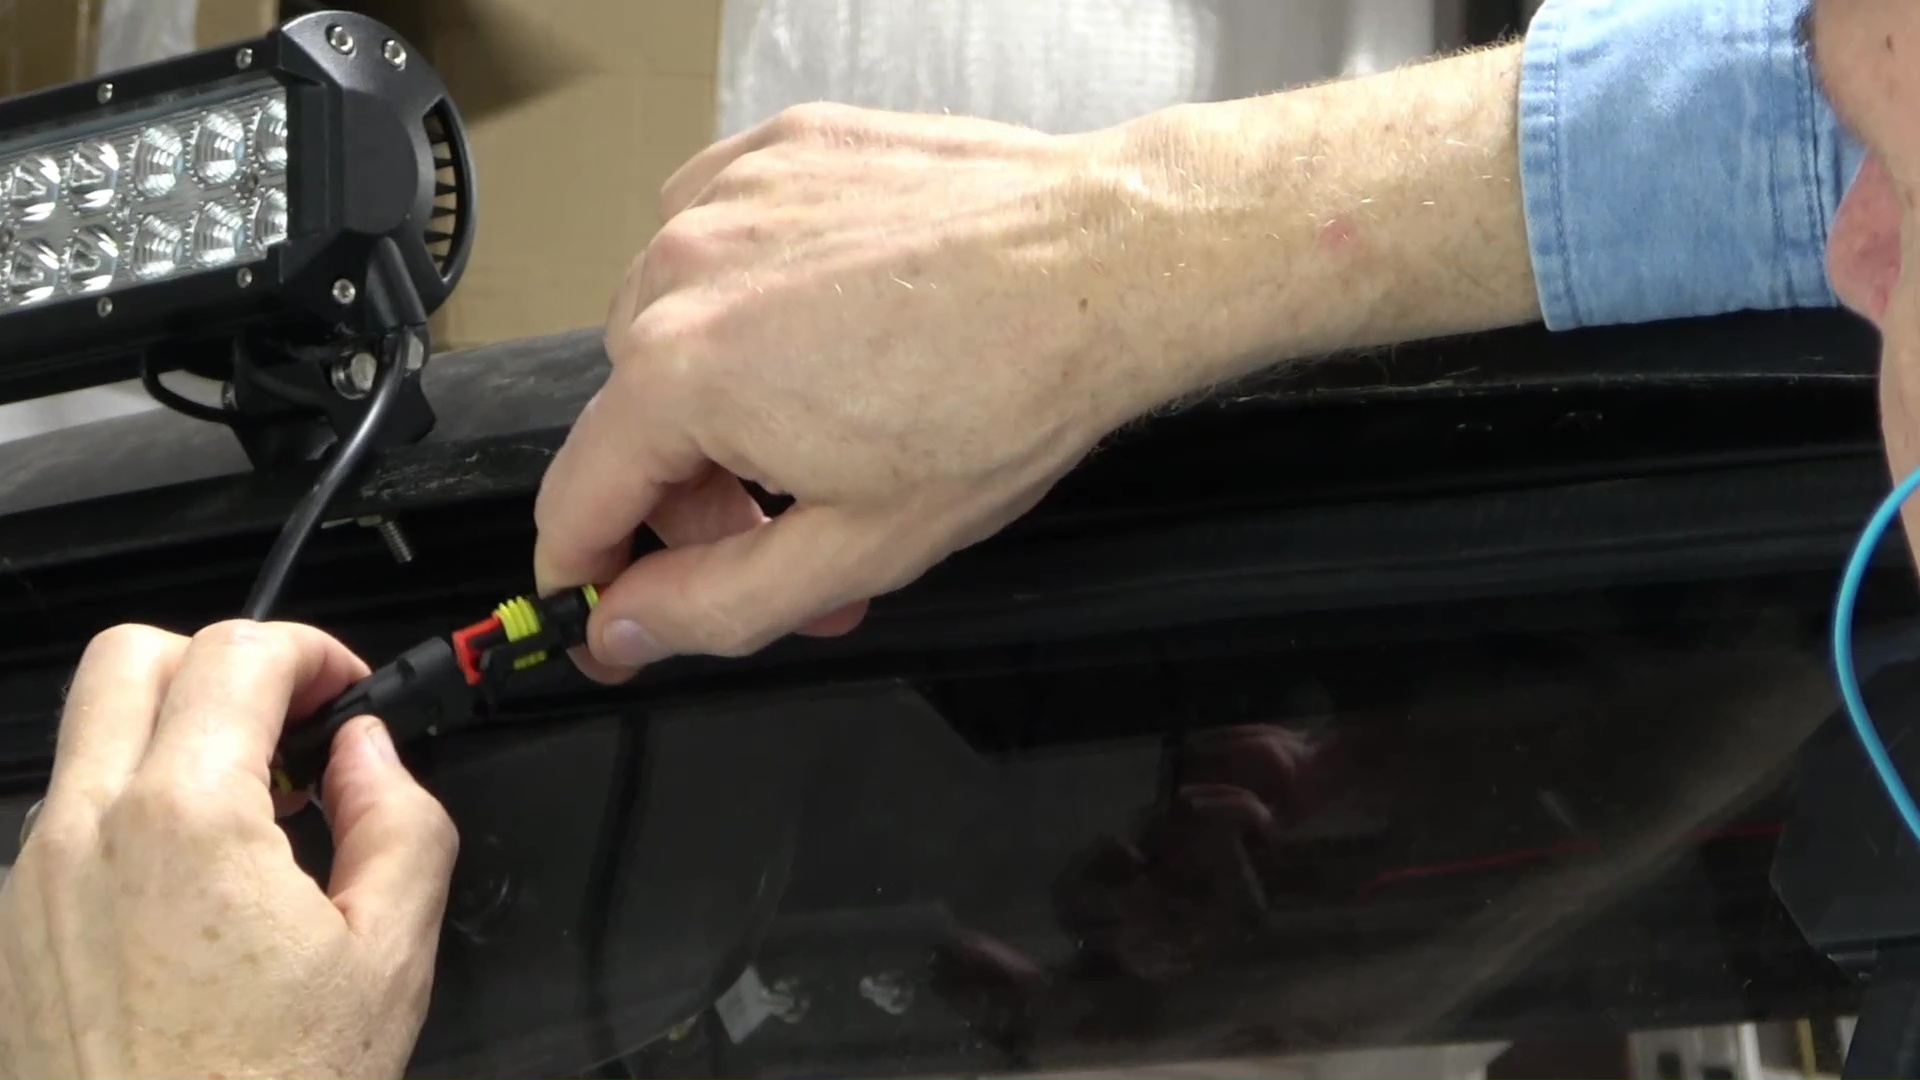
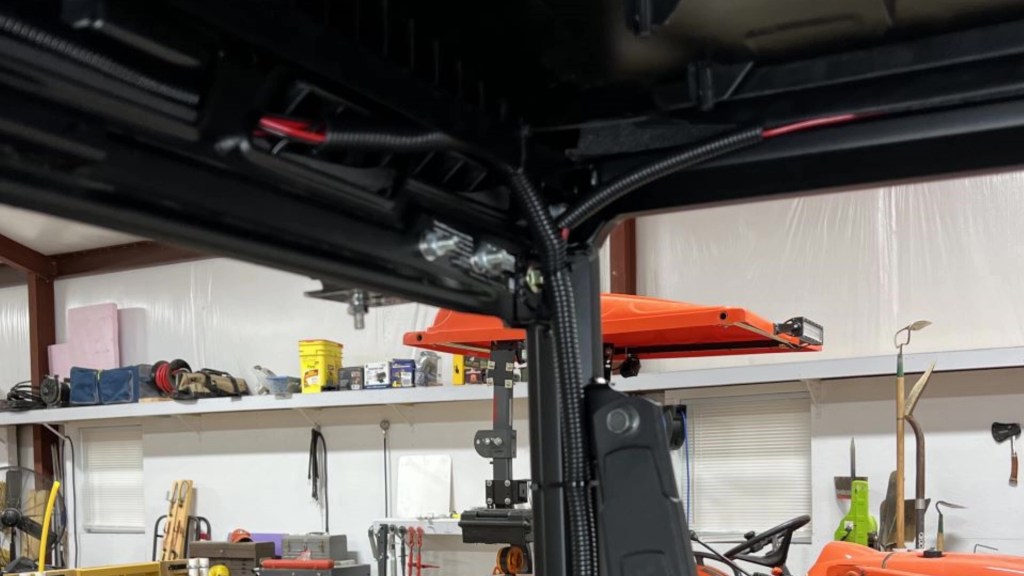
I begin by mounting the Nilight 72W 12″ spot & flood combo light bar to the front windshield overhang of the roof. Centered, of course. To give it extra support and stability, I use two 3/8″ fender washers on the underside, along with the hardware that came with the light. Then I adjust the angle of the light bar to shine straight ahead. Notice I have already attached a male waterproof connector. Once the angle is set, I tighten the angle bolts.
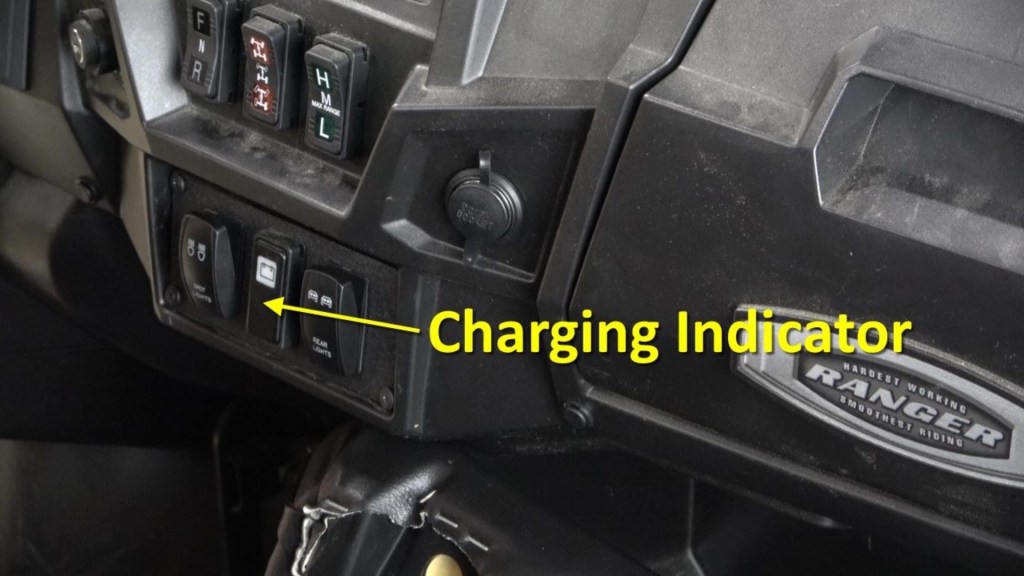
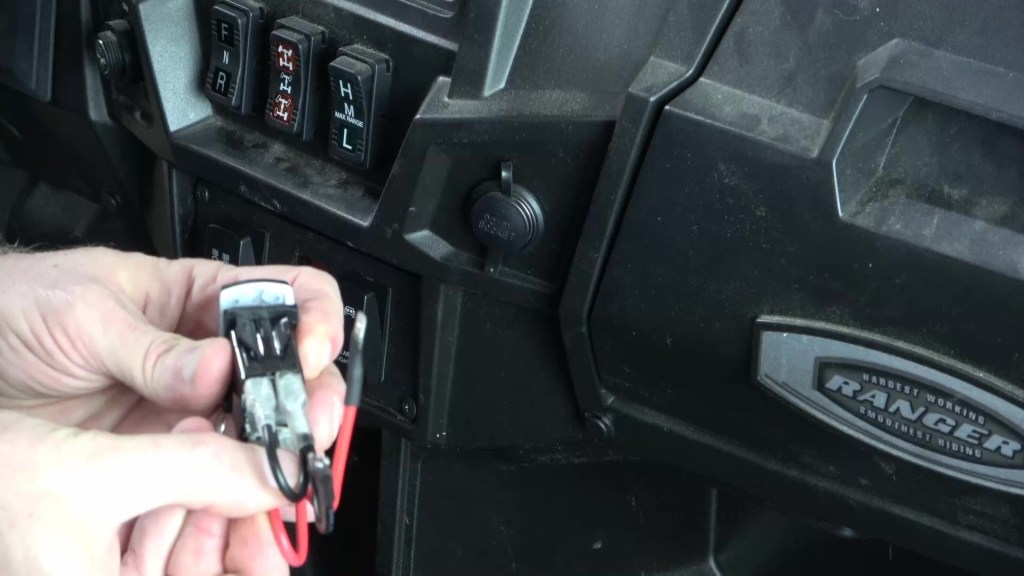
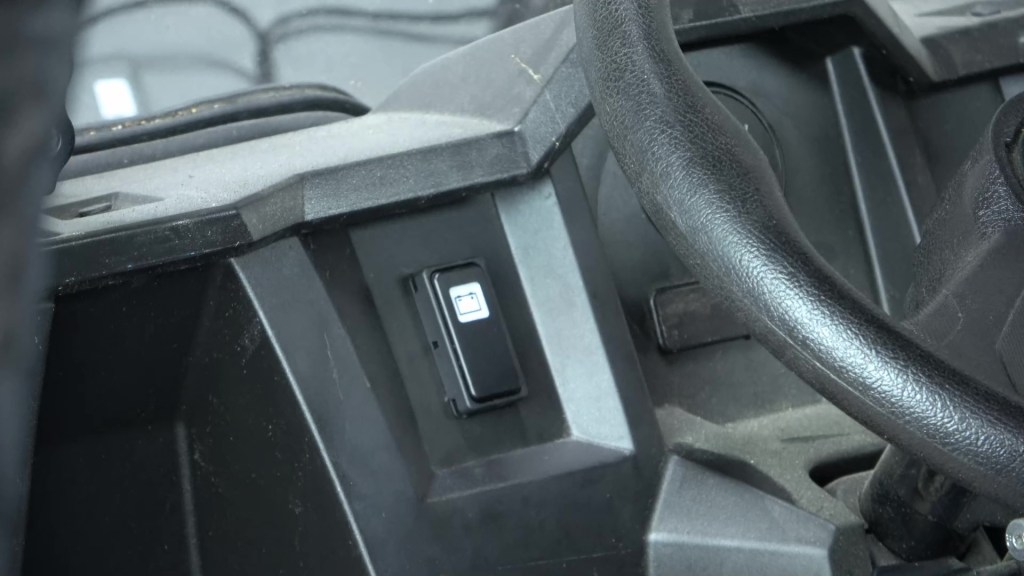
Next, I remove the charging indicator so that I can put the light bar switch in that spot. I’ll relocate the charging indicator to elsewhere on the dashboard shortly. I disconnect the charging indicator connector, then pry the indicator from the panel.
Now I can install the light bar switch with the wiring harness already connected to it.

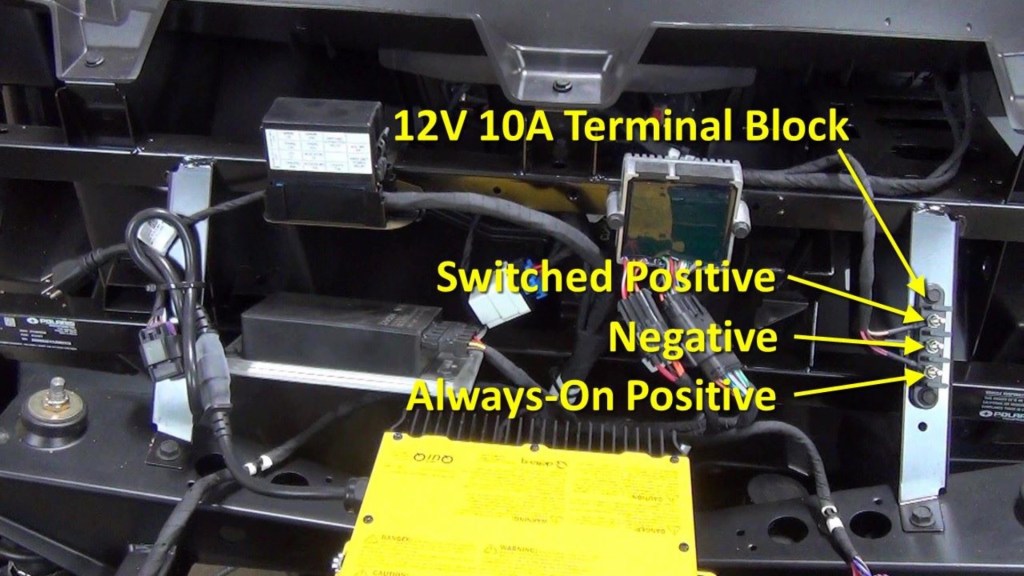
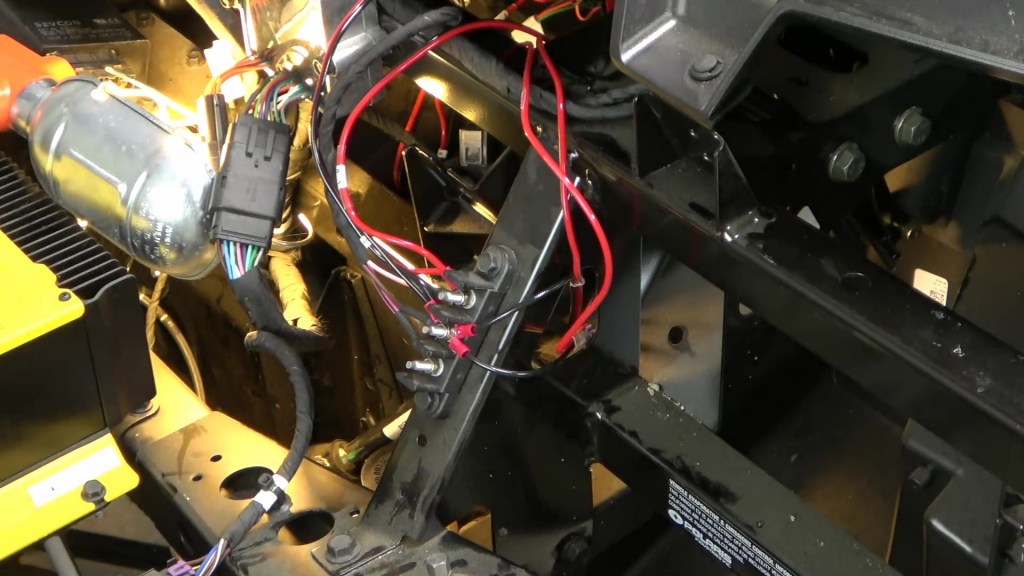
As a reminder from Part 1, the slideshow below shows how the switch connects, simplified wiring diagram of both the front light bar and rear lights, and the 12V terminal block that supplies the power for the lights.


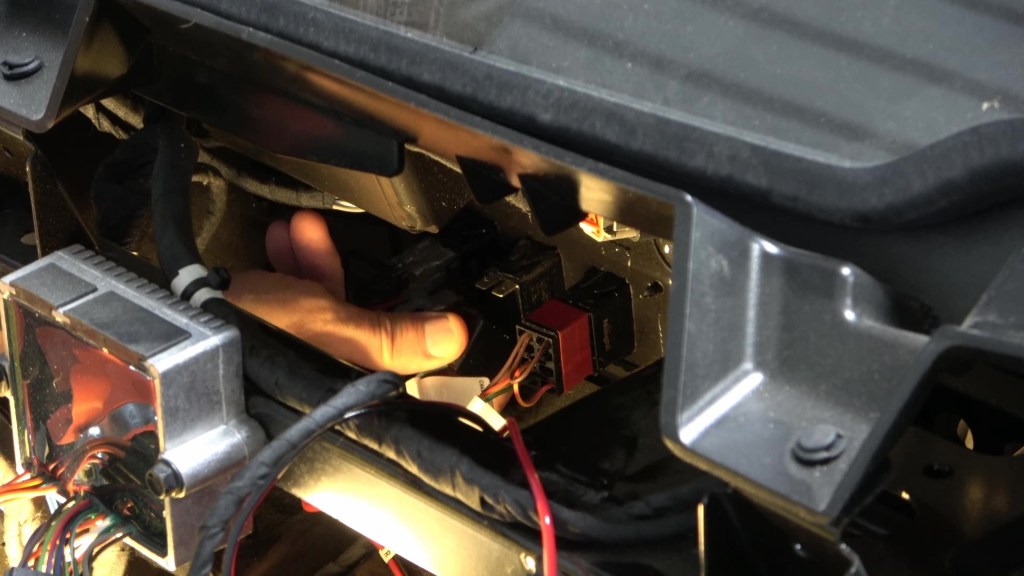
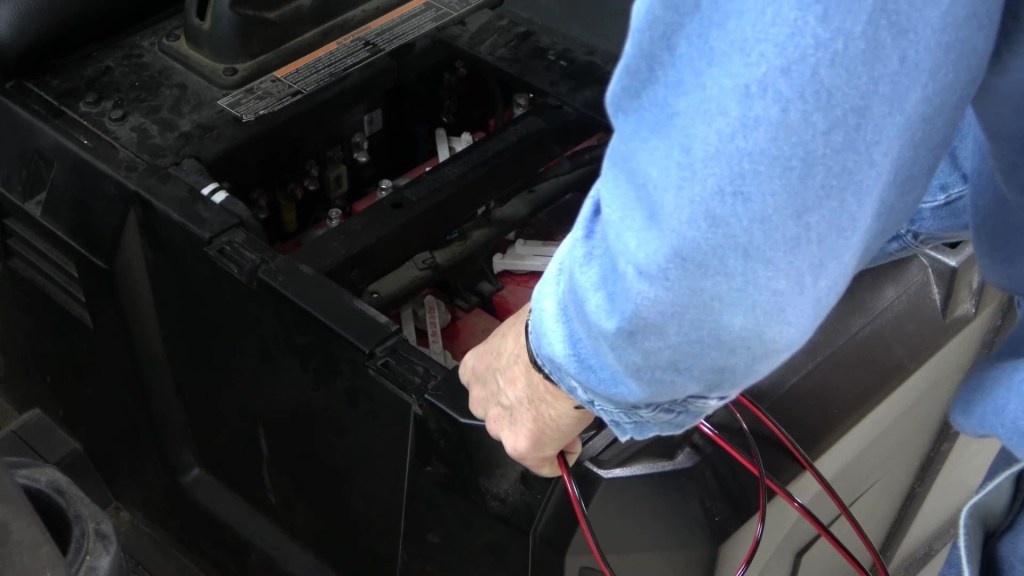
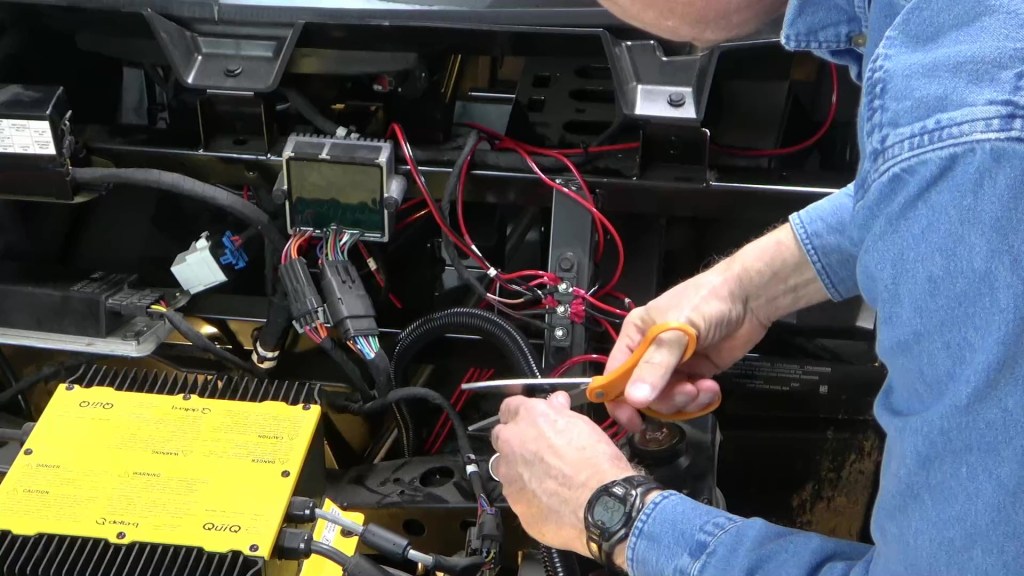
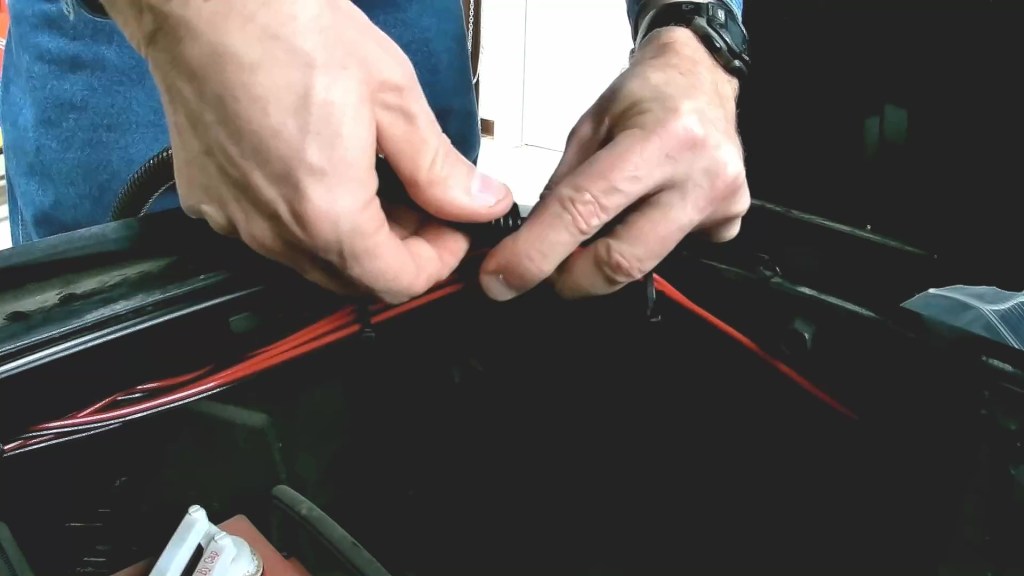
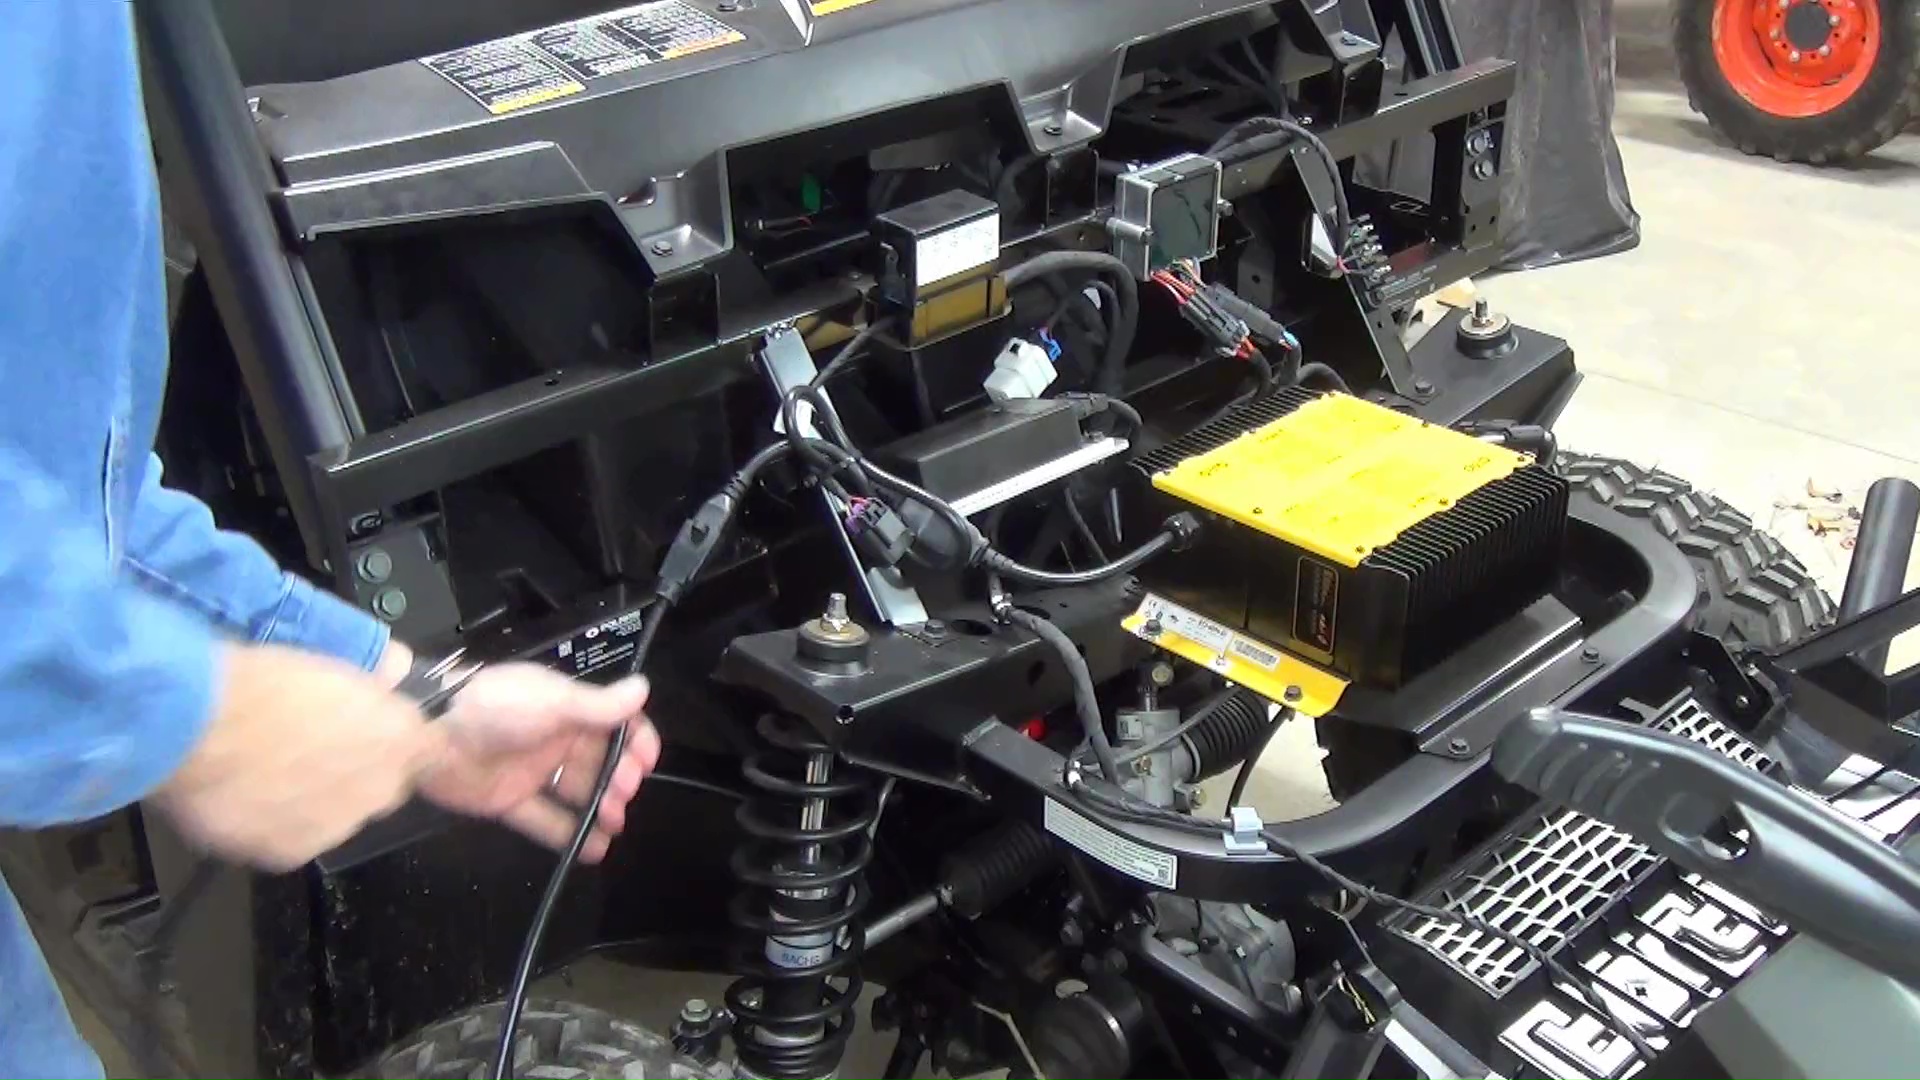
As I did with the rear lights, I run two-conductor 16 gauge wire through the battery compartment to the front of the Ranger. I label the wire as LB for light bar, then use a clear piece of heat shrink tubing to ensure the label stays put.
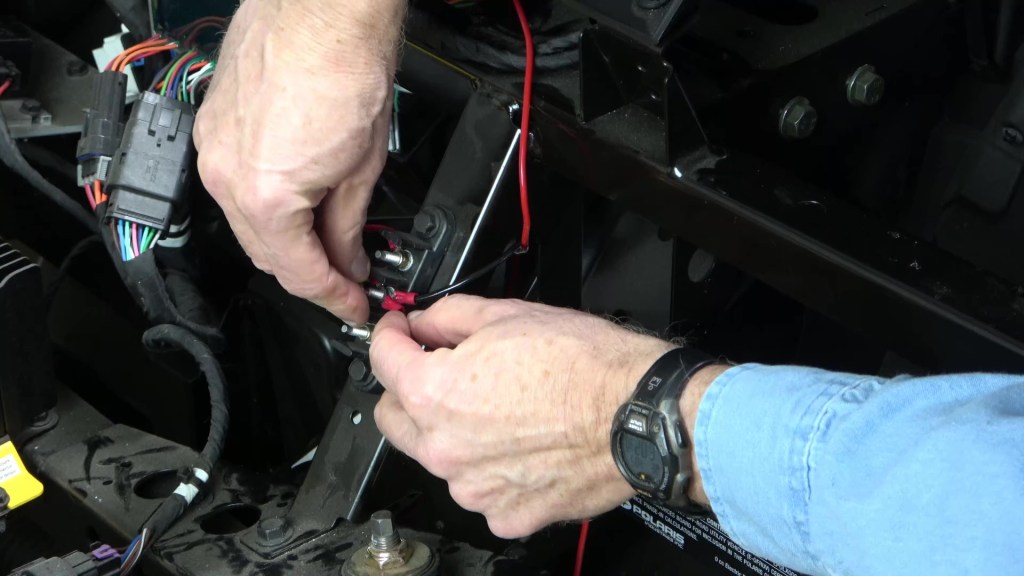
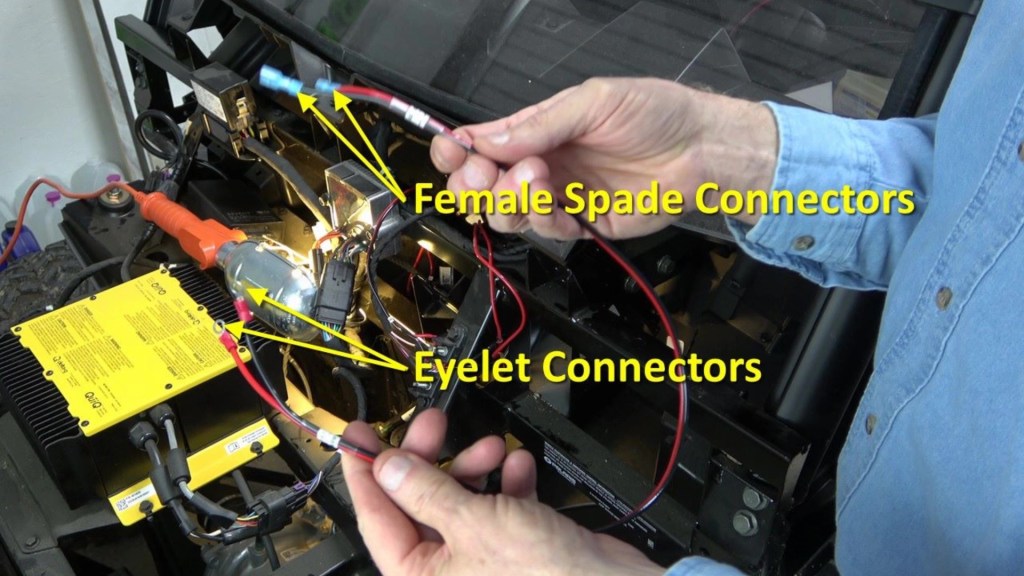
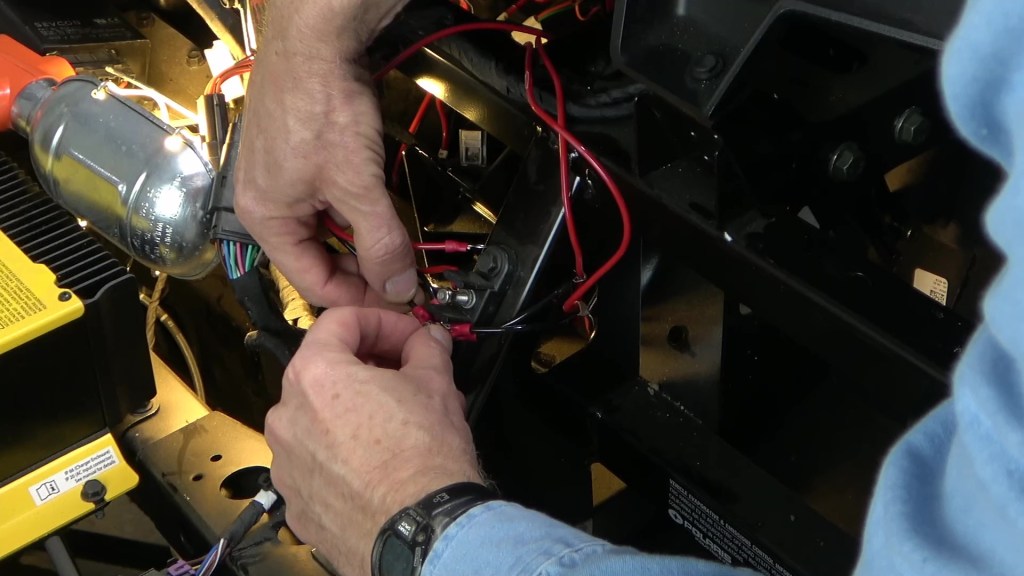
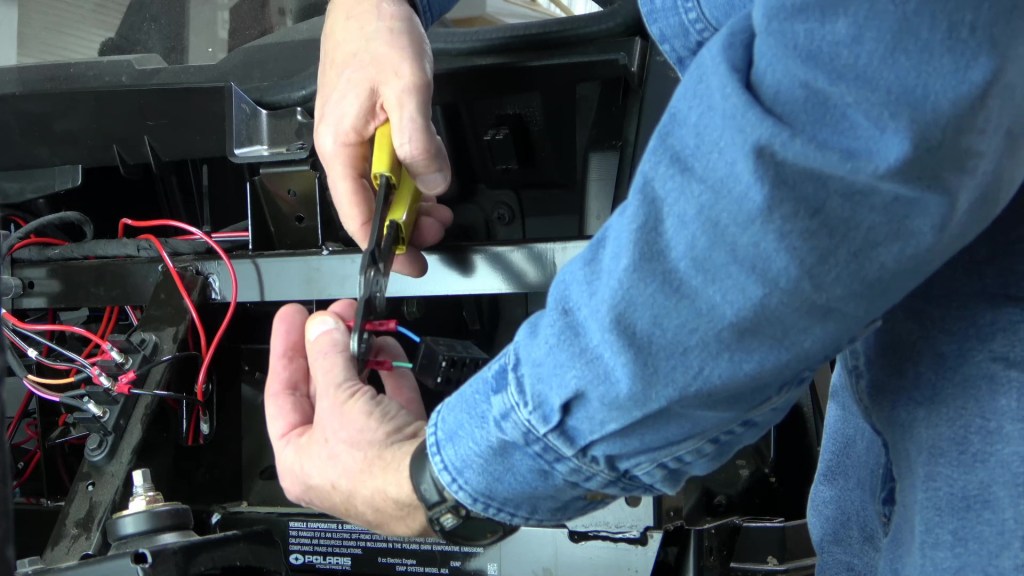
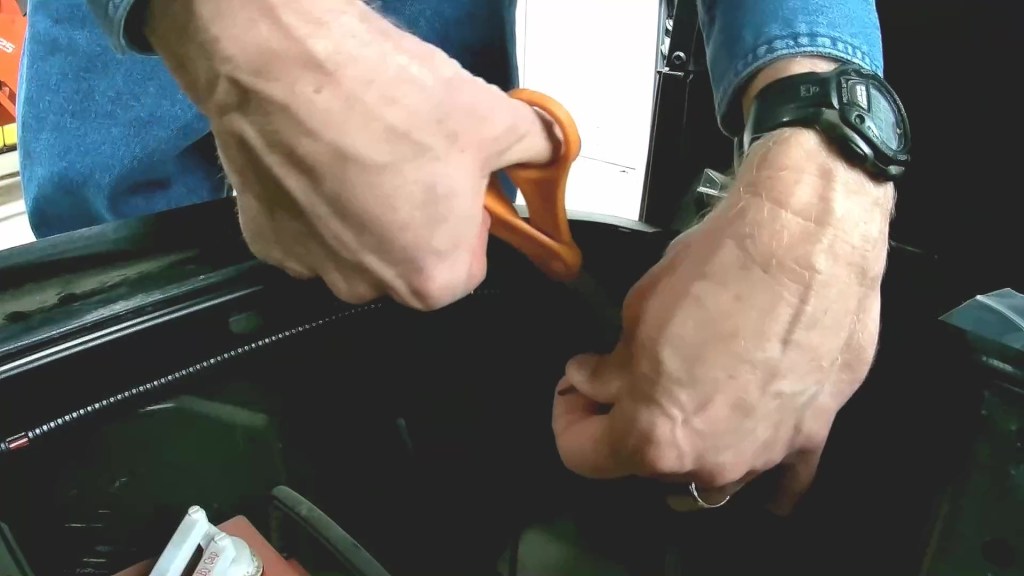
Then I separate the conductors, cut the black wire to length, and strip the end of the black wire. I crimp an eyelet connector to it, the remove the nut from the negative terminal post and put the eyelet connector on the post. Next, I label the red wire as LB as well and crimp a female spade connector to the end. Then I feed the red wire toward the light bar switch and make the connection.
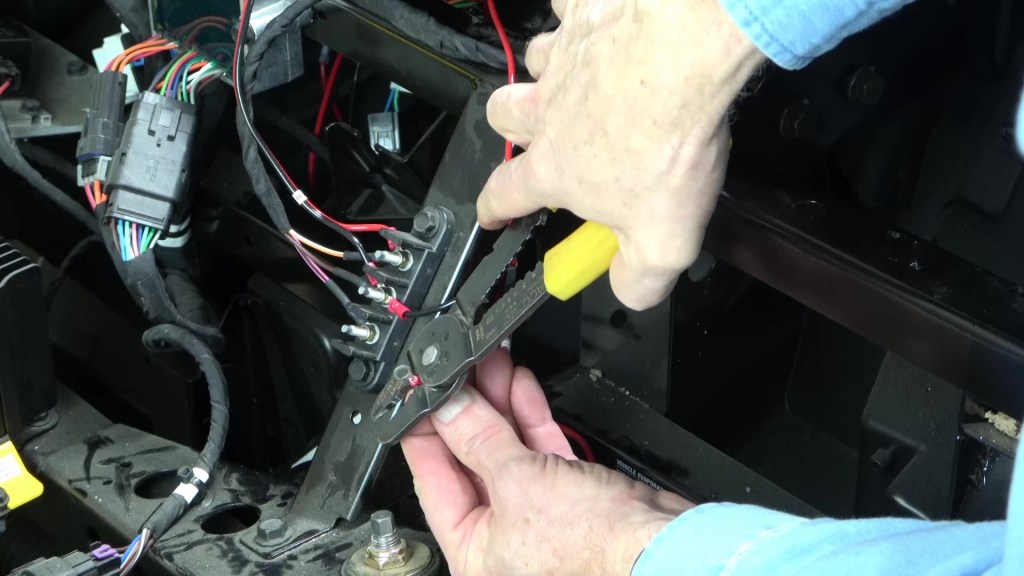
I make a harness to bring power from the switched 12V terminals to the light bar switch. It has two eyelet connectors on one end and two female spade connectors on the other. The eyelets connect to the 12V terminals. Black to the negative terminal and red to the switched positive terminal. Likewise, at the switch I black to black and red to red.


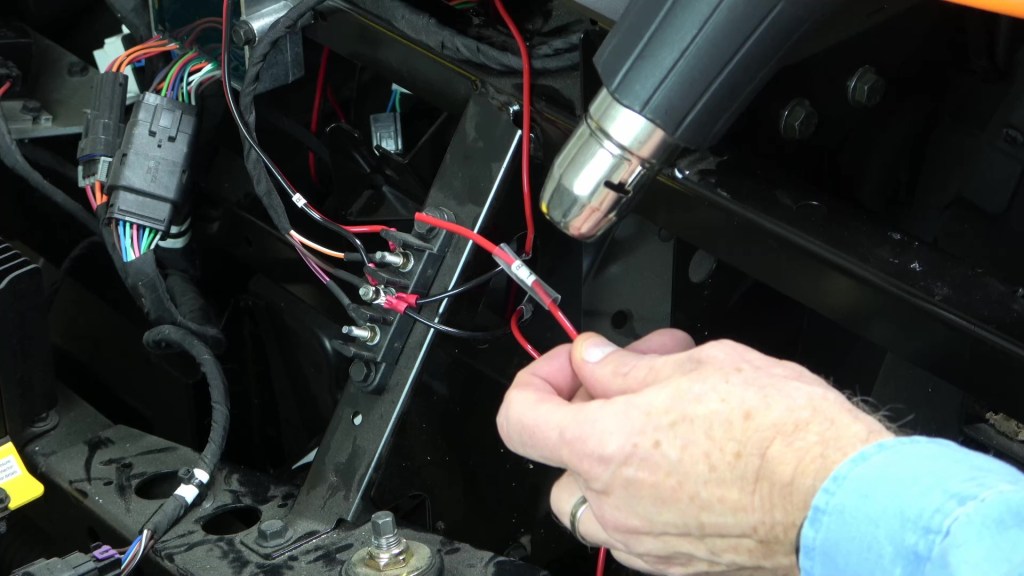


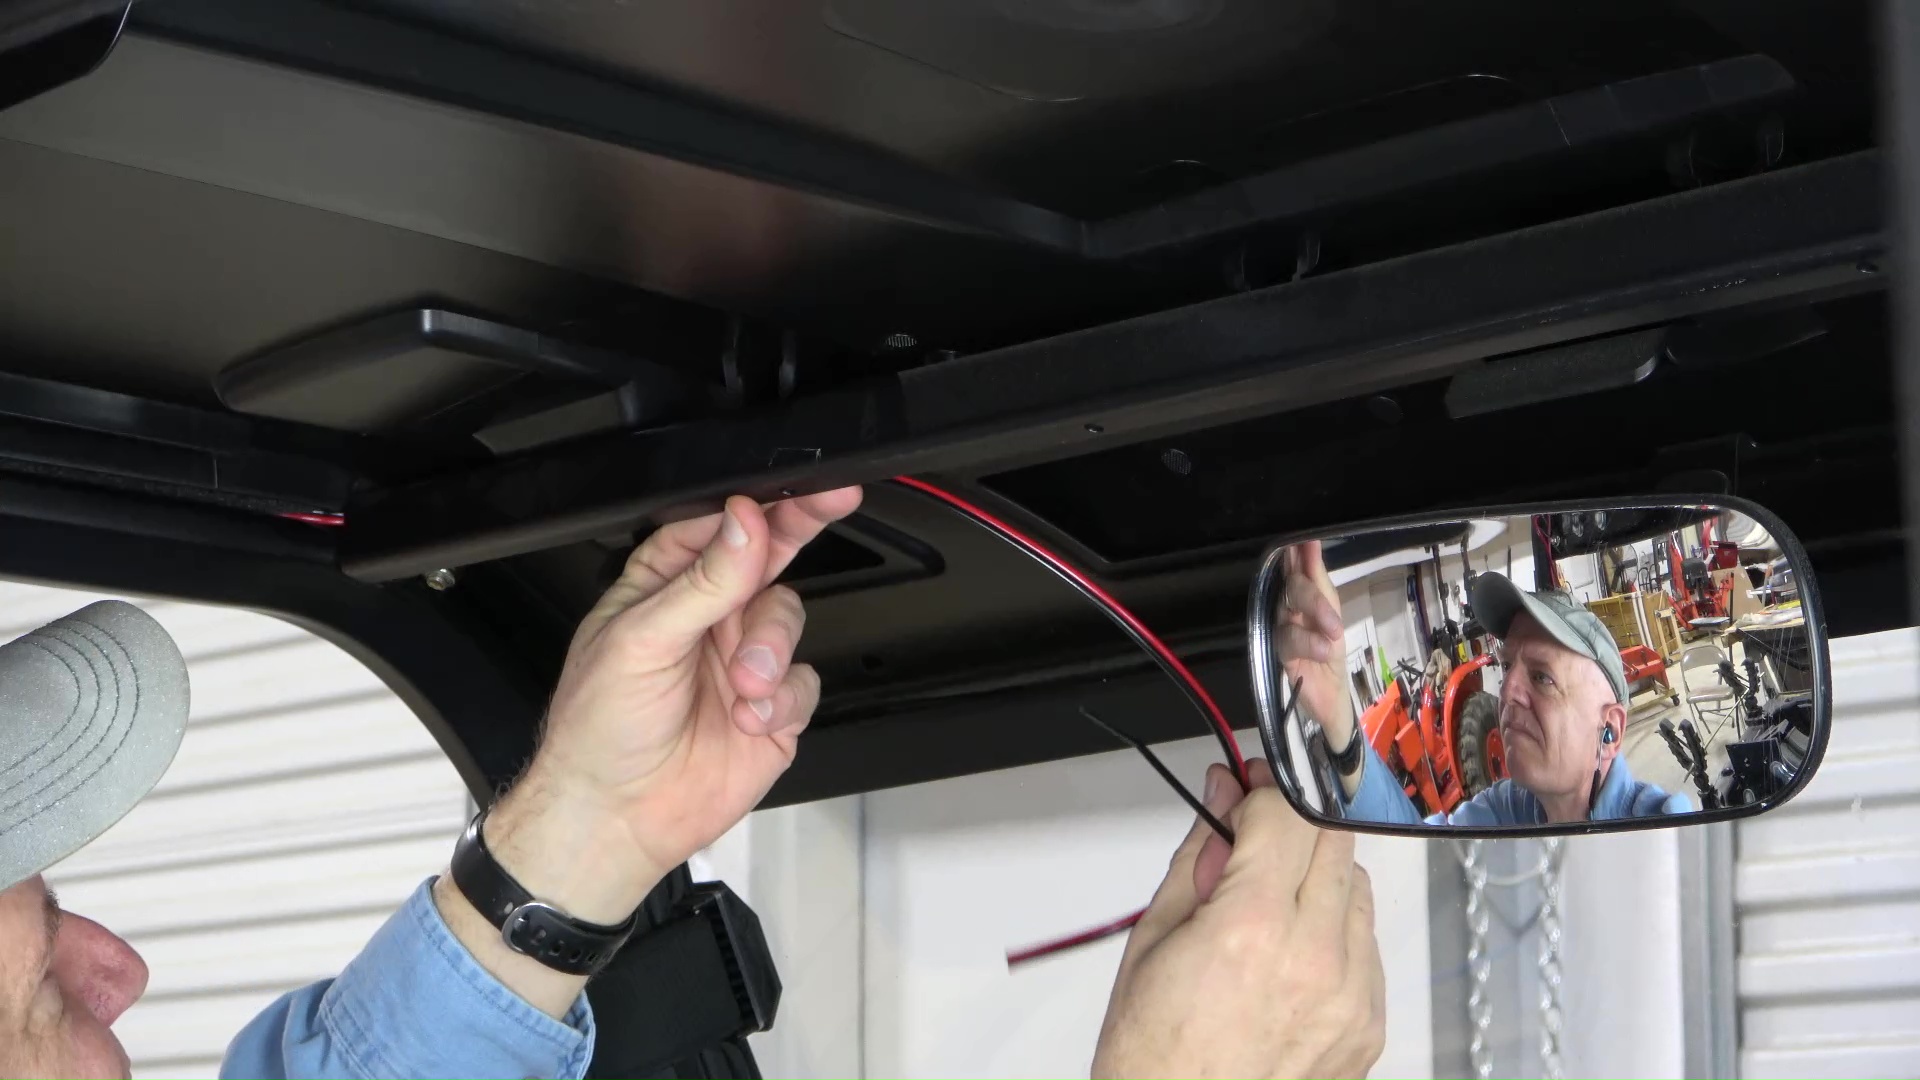
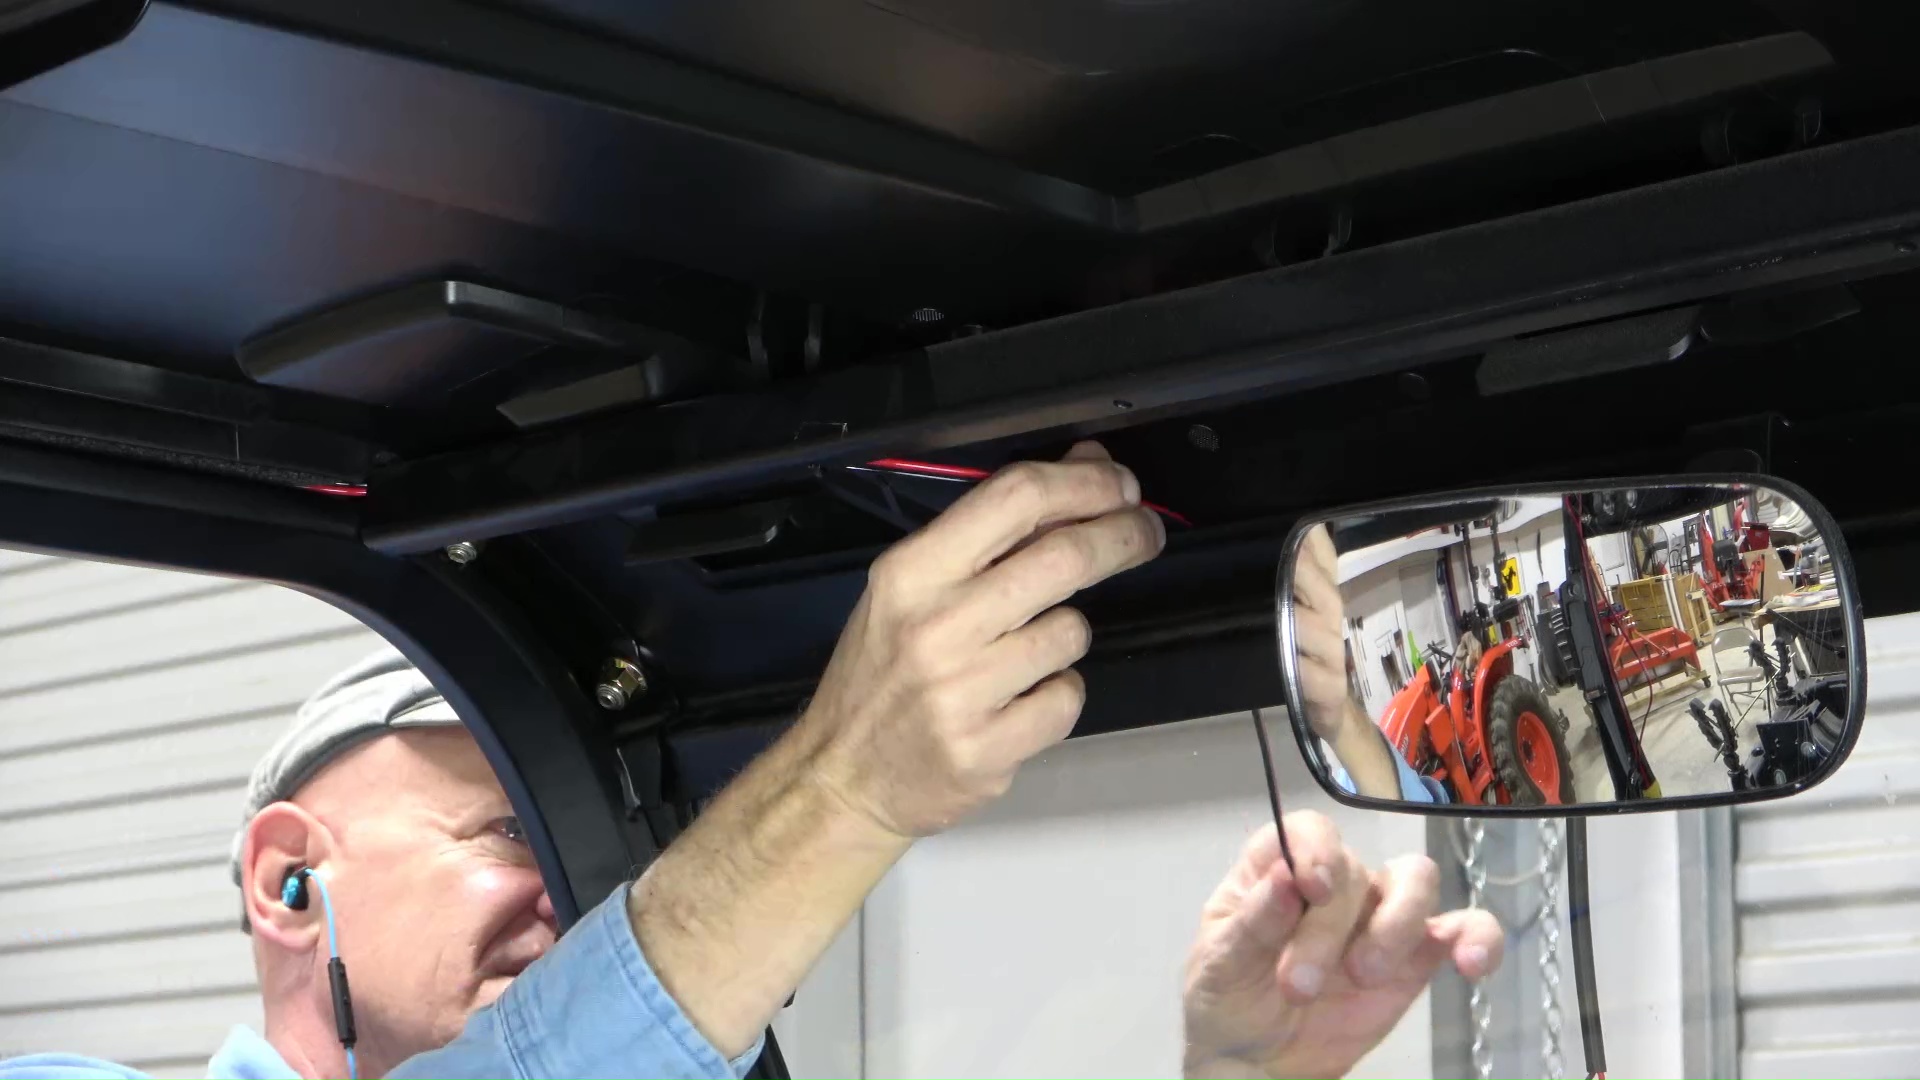
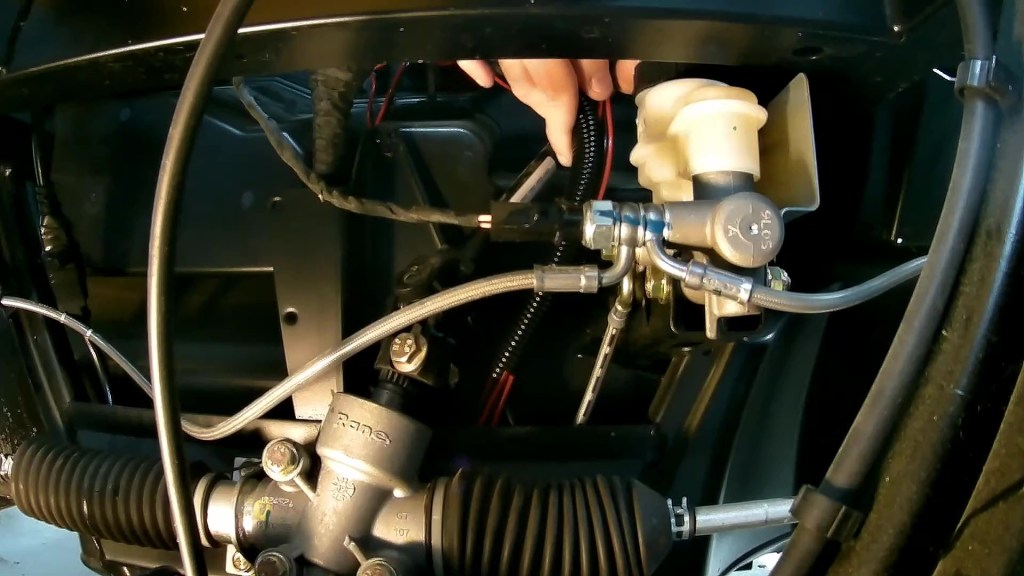
I measure off enough wire to reach the light bar then cut it to length. Then I route it up and along the ROPS. Once I reach the front of the roof, I poke the wire between the roof and the ROPS so that the end is outside the cabin. Then I crimp on a female waterproof connector so that the polarity will match that of the male connector on the light bar. I connect them together.


It’s time to relocate the charging indicator so I use a hole template I made and my Starret automatic center punch to mark where the switch hole will be. Then use a utility knife to score the outline of the switch hole. For the vertical scoring I use another utility knife blade as a straight edge. Using my Dremel tool with a right-angle attachment and a plastic cutting wheel, I cut out the hole. And finish cutting it out with the utility knife. There! Fits like a glove!


Next, I need to make an extension cable for the charging indicator wires so I cut the blue and green wires leading to the connector to have enough left on both ends to spice to the extension. A 20″ long piece of the two-conductor 16 gauge wire will do for this, with barrel connectors to connect it all up. Black to green. And red to blue. I crimp barrel connectors to the charging indicator connector. Again, black to green and red to blue. I press the connector on to the charging indicator. Does it still work? Yes it does!


BTW, I ran two more wires to the front of the Ranger for a couple more mods you’ll see in upcoming posts.
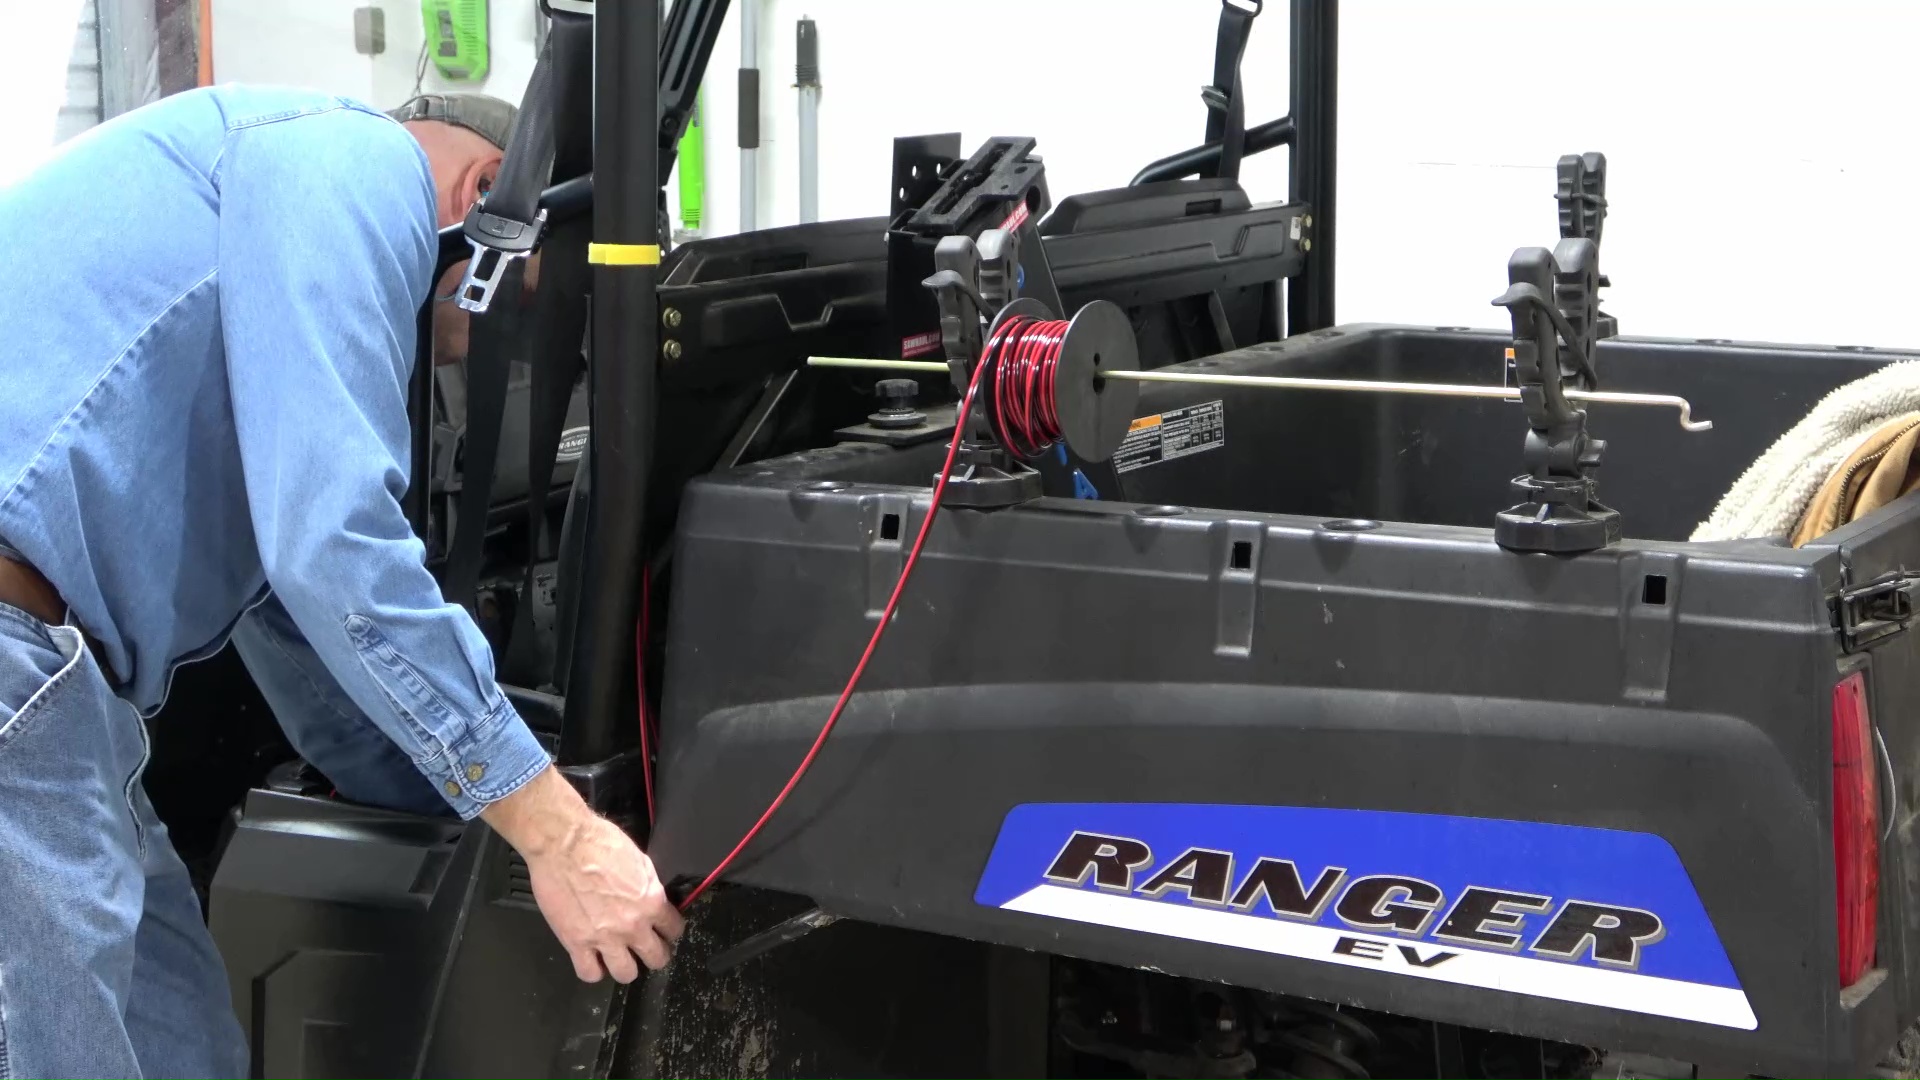

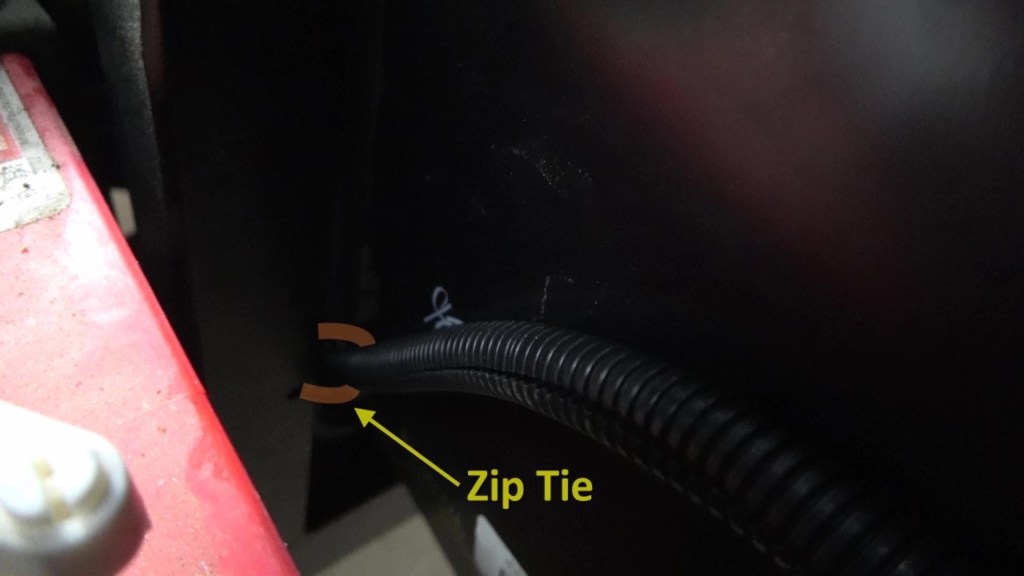
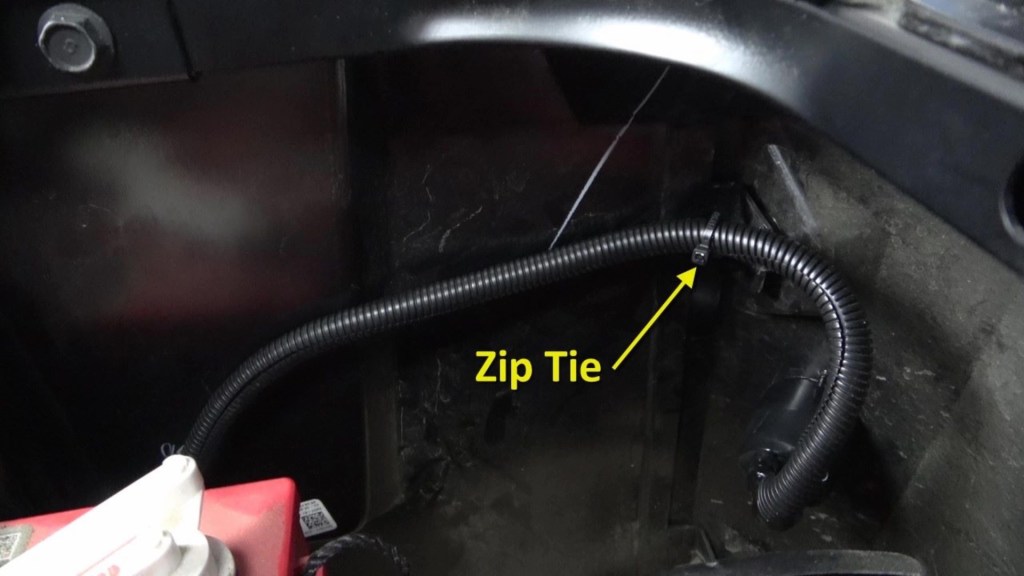
To protect these wires, I use ¾” split wire loom which I push on to the wires hoping it will stay on and make it to the battery compartment. It did, so I tidy up the wire loom in the front. Then use a length of 5/8″ wire loom to protect the wires passing through the battery compartment. Once the wire loom is on, I tighten the zip ties and cut off the excess.
I also use wire loom to protect the wires going up the ROPS.
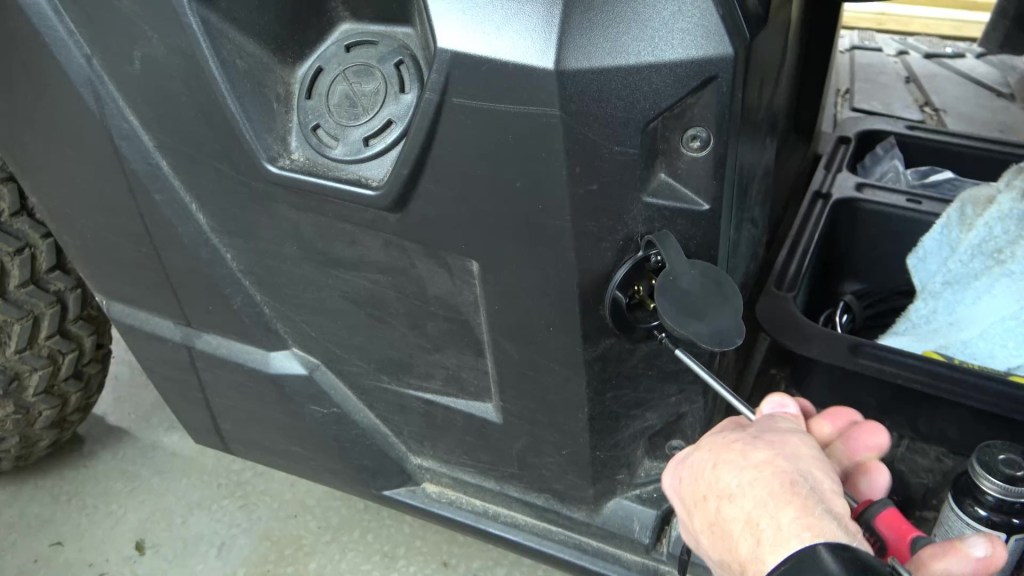
Upgraded Charging Port
The original charging port is no more than a short pig tail located under the hood, which was not as accessible as I’d like and definitely not as cool as I’d like.

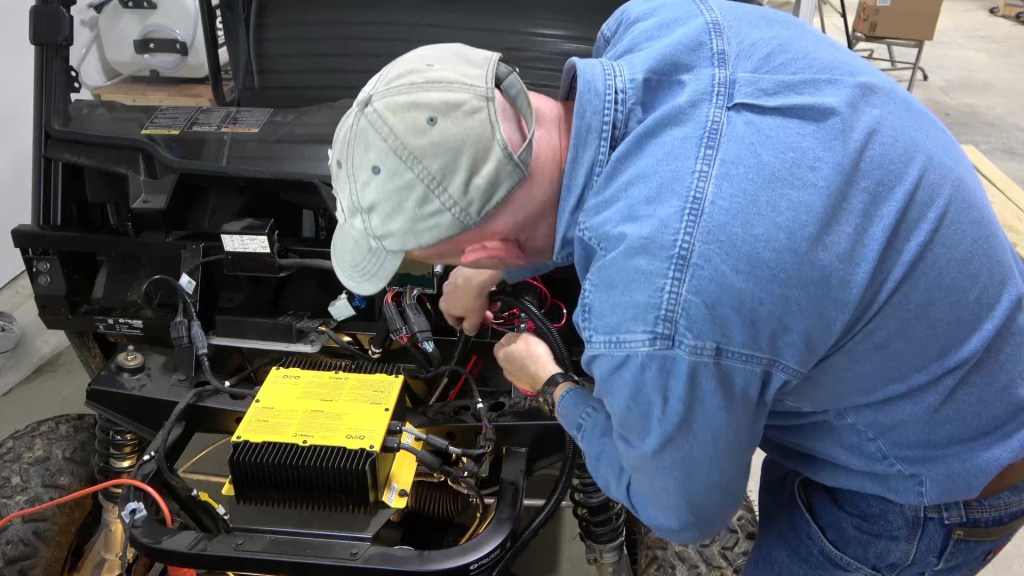
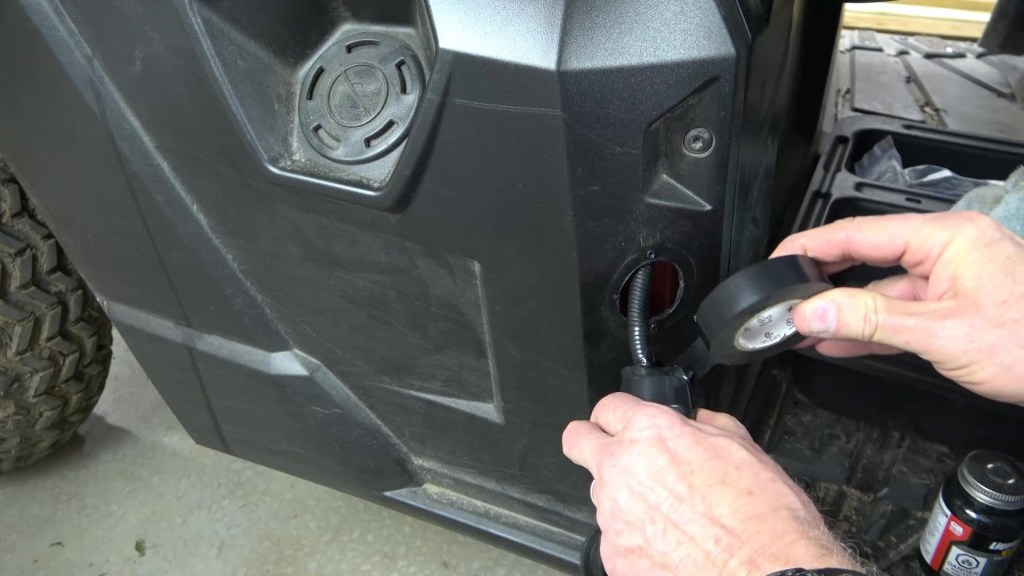
The main ingredients to this mod are a 6′ 3-prong extension cord, a flanged 120V power inlet with cover, and some ½” split wire loom to protect the extension cord. I simply cut the male plug off the extension cord and wired it to the inlet once I had routed the wire loom covered extension cord below the floorboard and above the undercarriage like I did the lighting wires.
The original charging cord is plugged into the receptacle on the extension cord and wrapped with electrical tape. There is also a zip tie run through a hole in the frame to secure the extension cord.


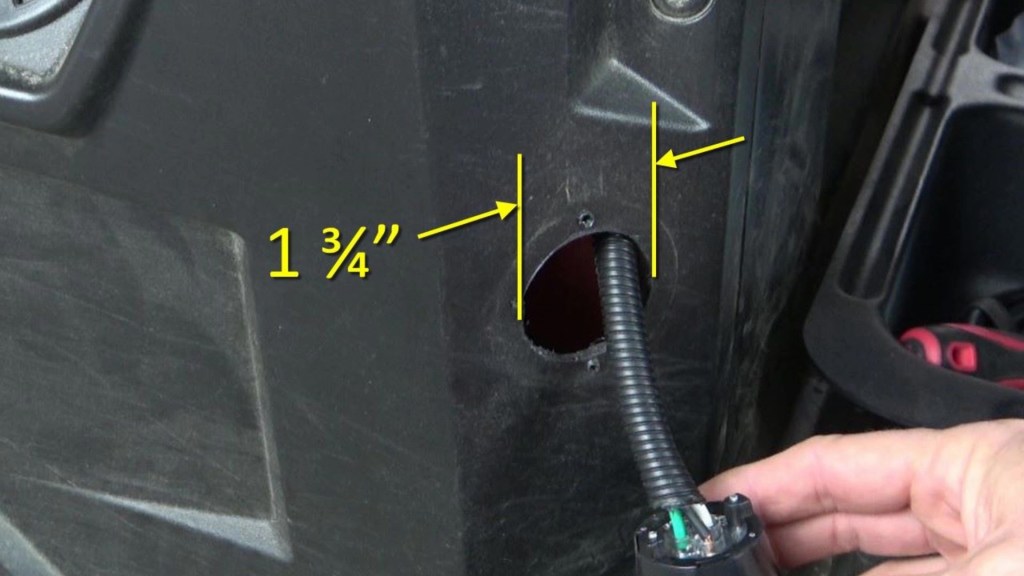
The hole size required for the charging port is 1 ¾”. I wrap the end of the wire loom and the charging port with electrical tape to cover the electrical connections. Some Liquid Tape will keep the end of the electrical tape from unraveling over time. Two Screws hold the charging port securely in place. In the battery compartment, there are a couple of zip ties to keep things tidy.


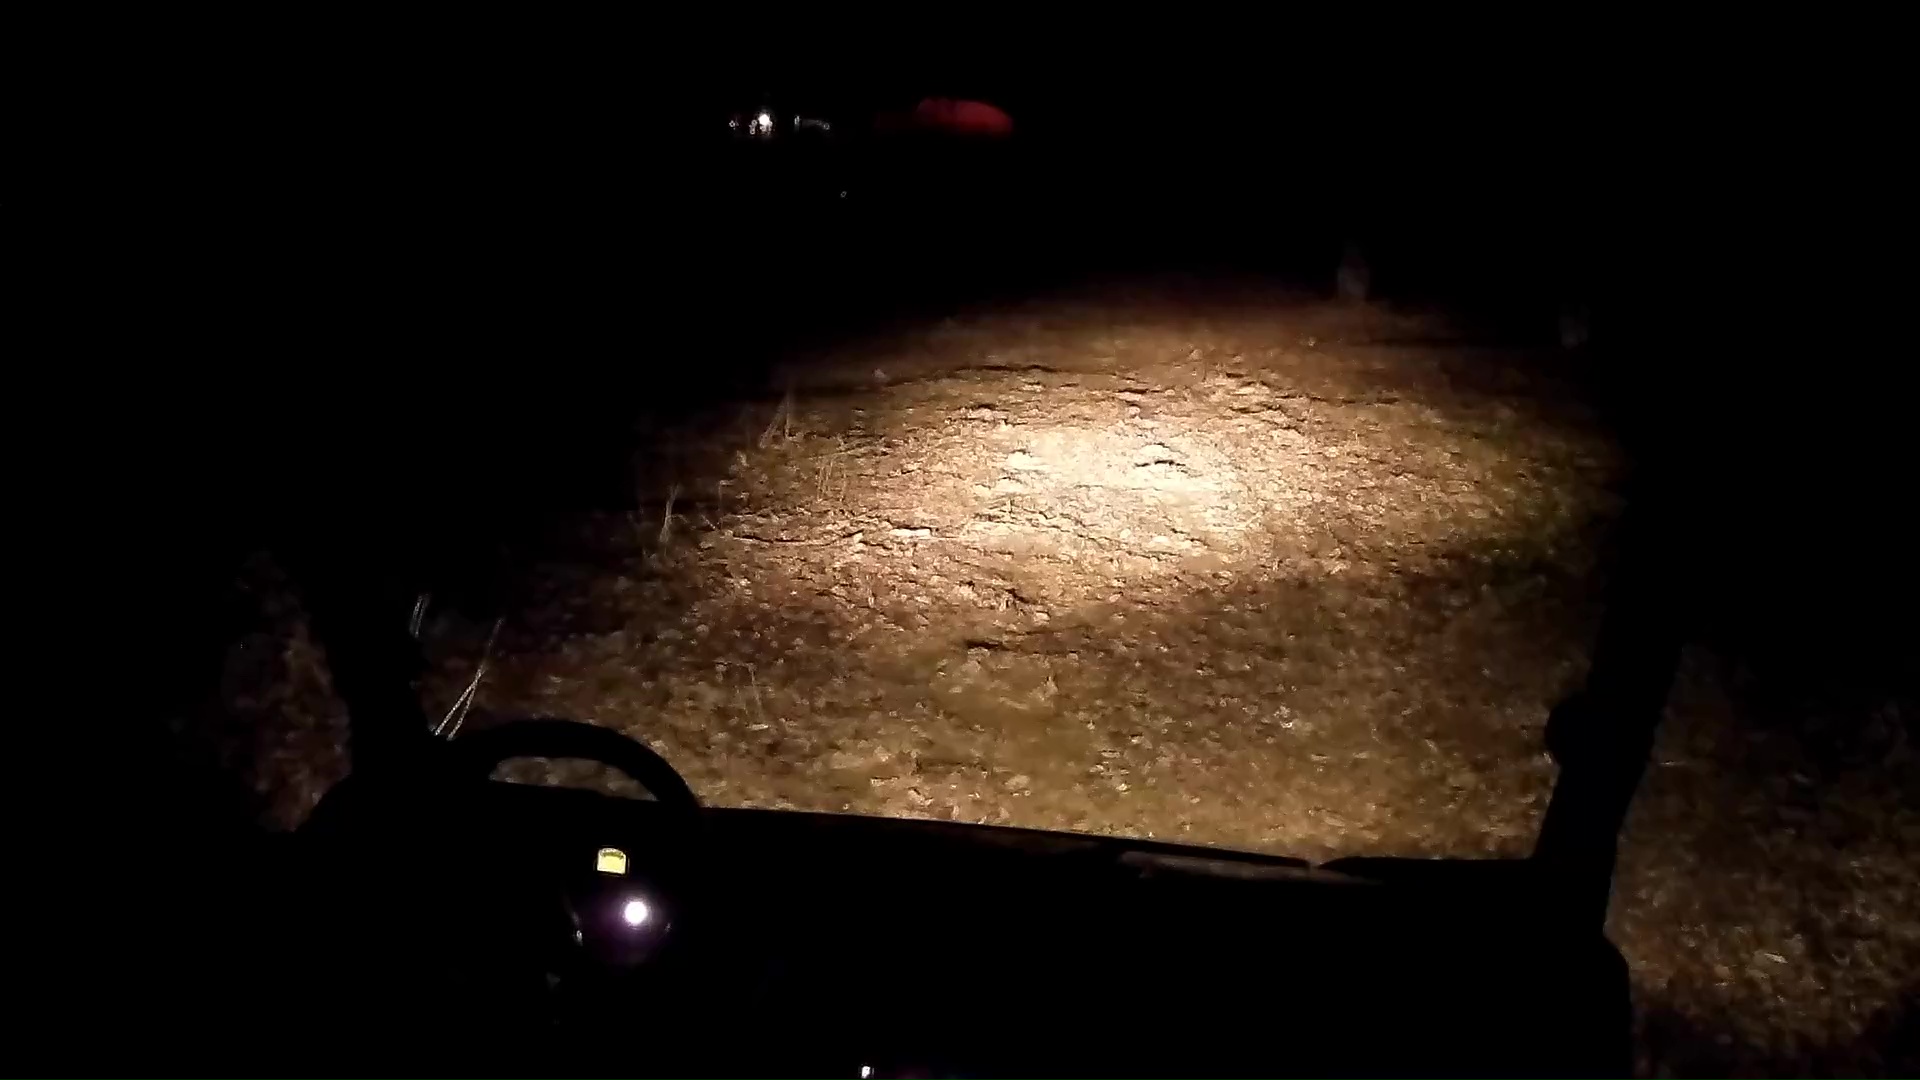
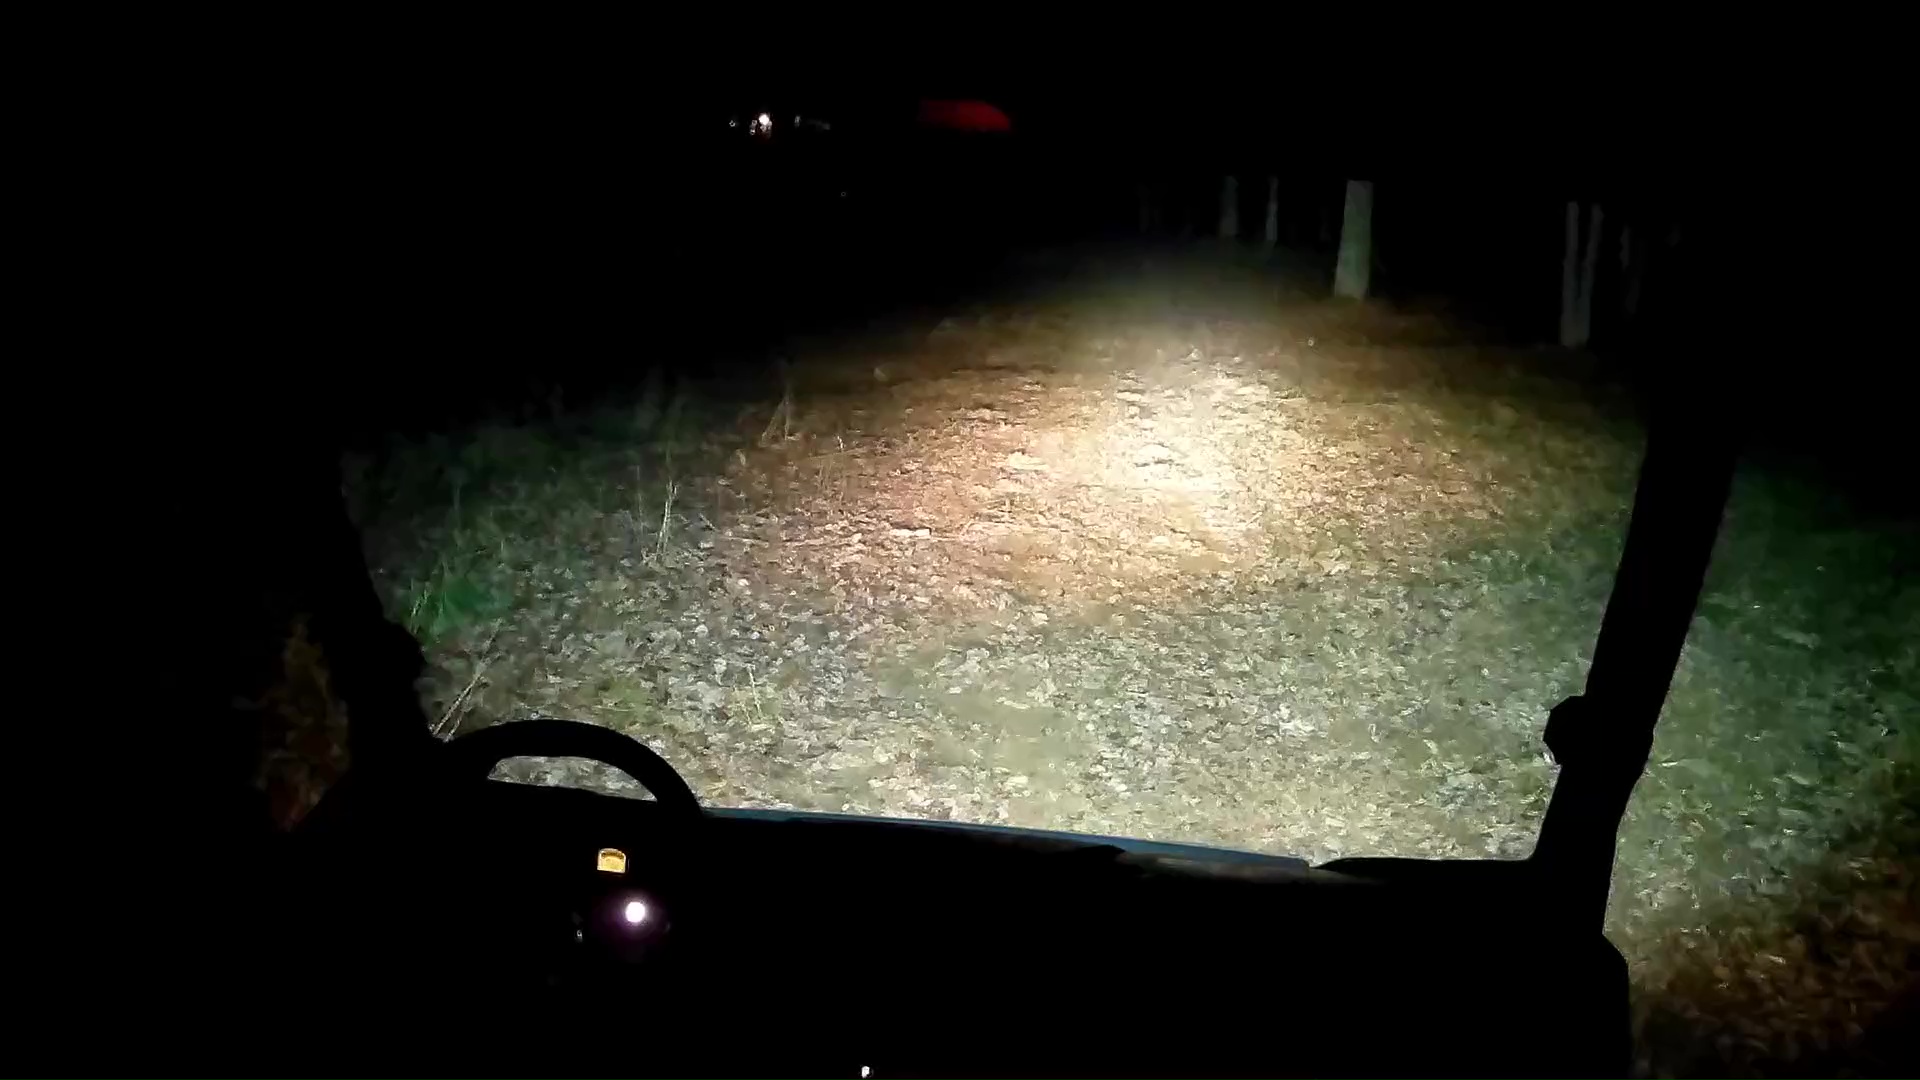
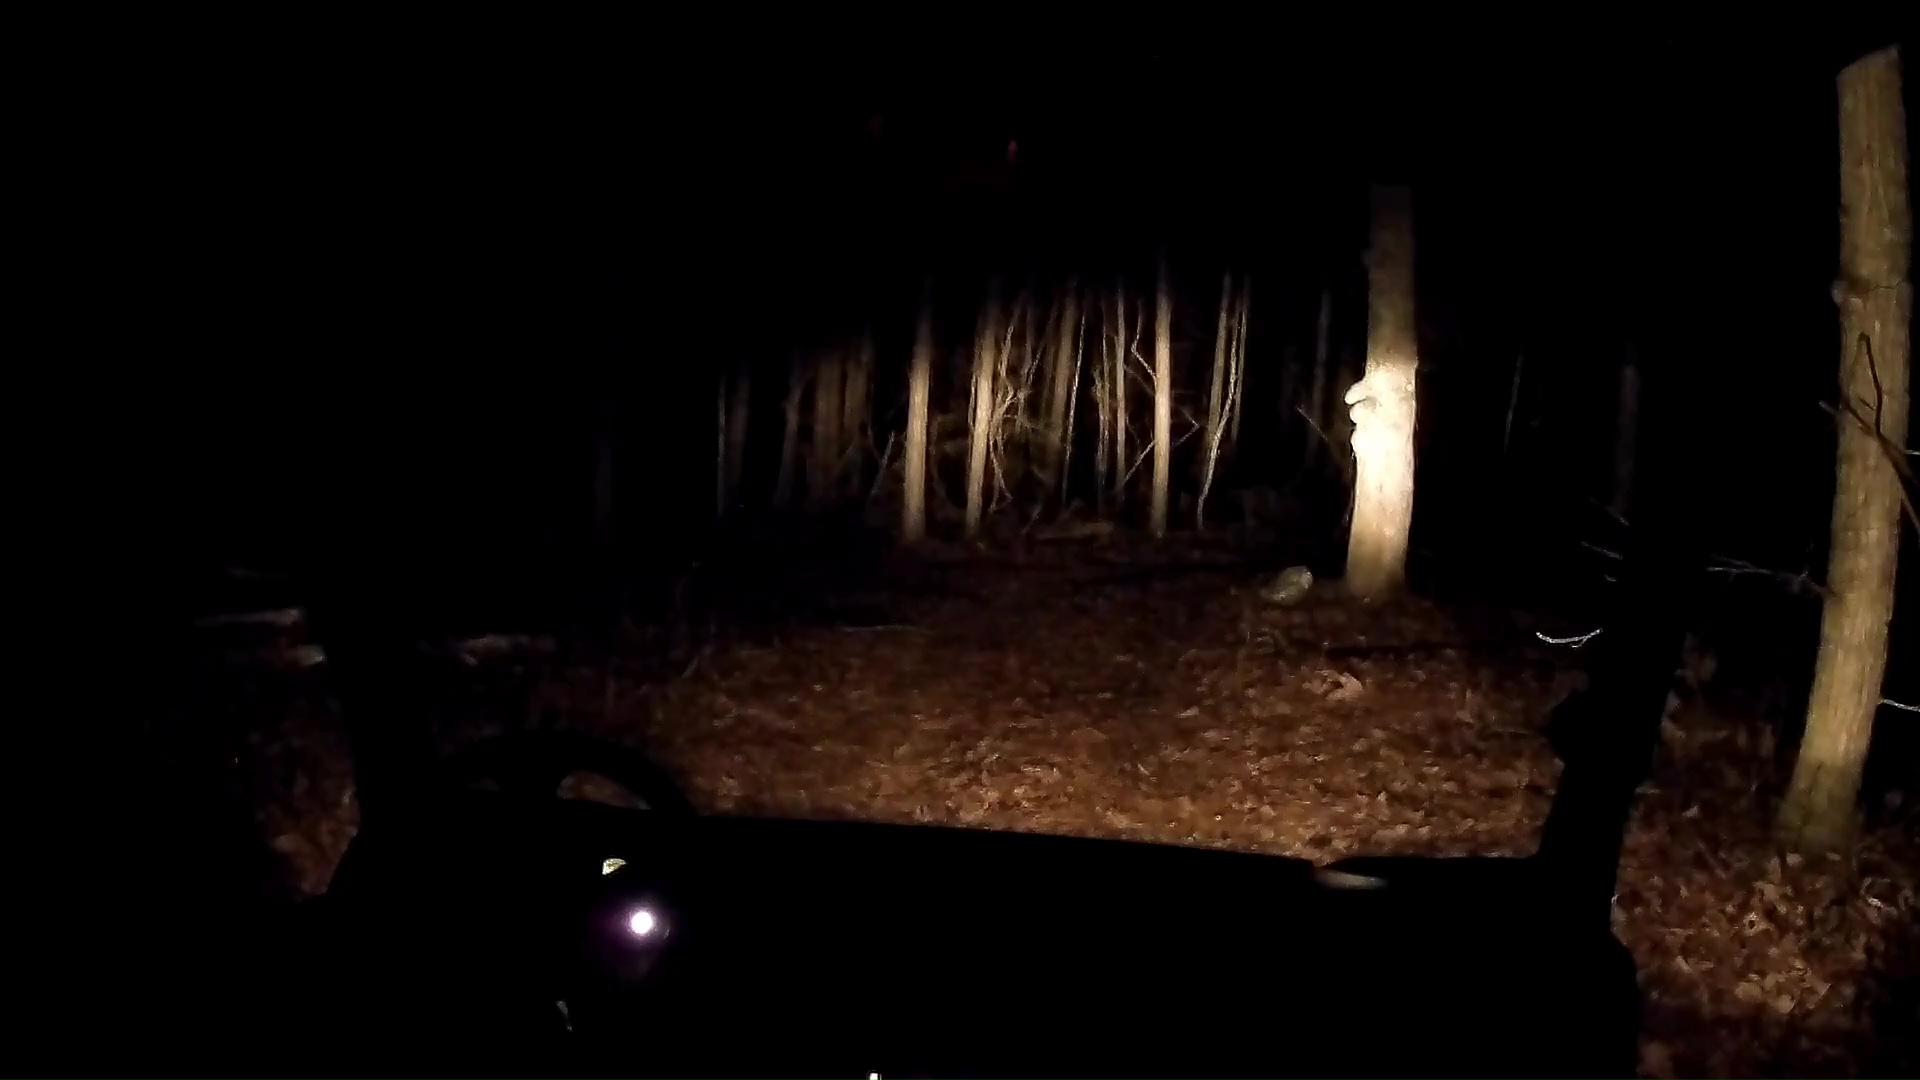
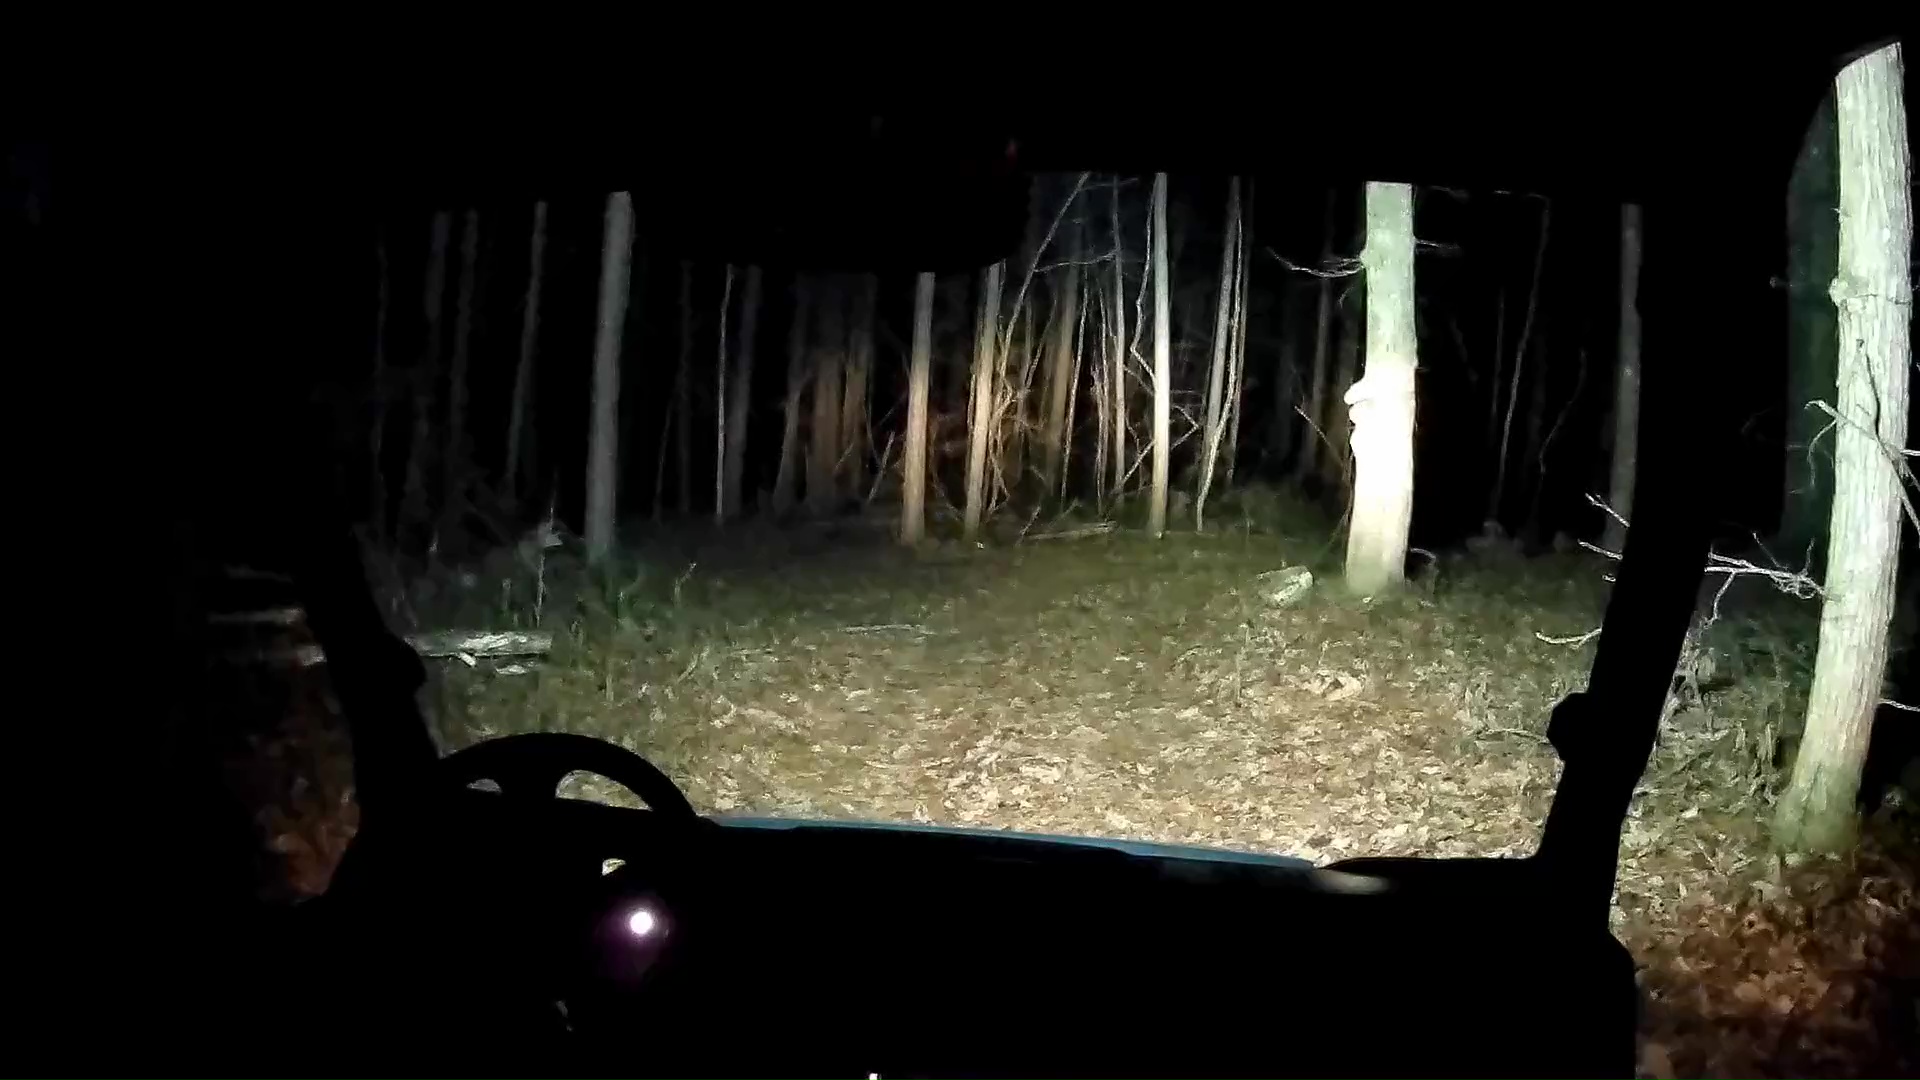
Finally, when it is nighttime I test out the lights. I head out to the meadow with just the stock headlights on at first. Now I turn on the light bar as well and suddenly my field of view is much wider and farther. I head for one of the trails through the woods and compare just the headlights, both headlights and the light bar, and just the light bar. The light bar makes a huge difference! Obviously, the combination of both is better. The rear lights literally make a night and day difference! There is more than enough light to back up by or even use as work lights. Nice!