
I decided to build a rolling plywood and wood storage cart so it can be moved around in the shop if needed. I wanted to build it with material I had on hand, if possible. Also, I wanted it to be simple to build and easily adapted for changing needs.
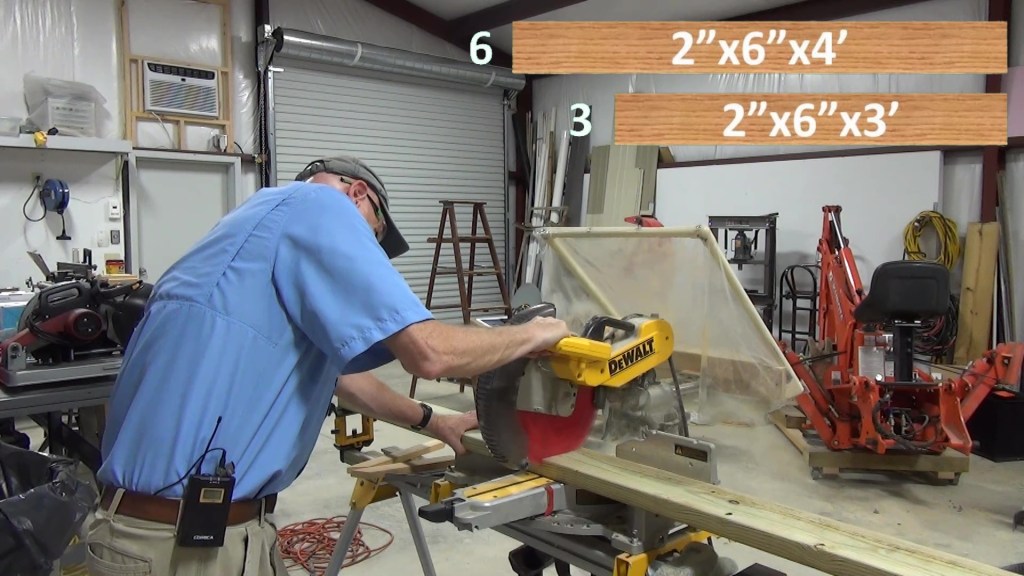
So I started picking through my lumber piles. I happened to have quite a few 2x6x10 pressure treated boards left over from a project, so I took a few into the shop. They certainly don’t have to be pressure treated but they are what I had available.
First, I cut six 4’ and three 3’ lengths of board.
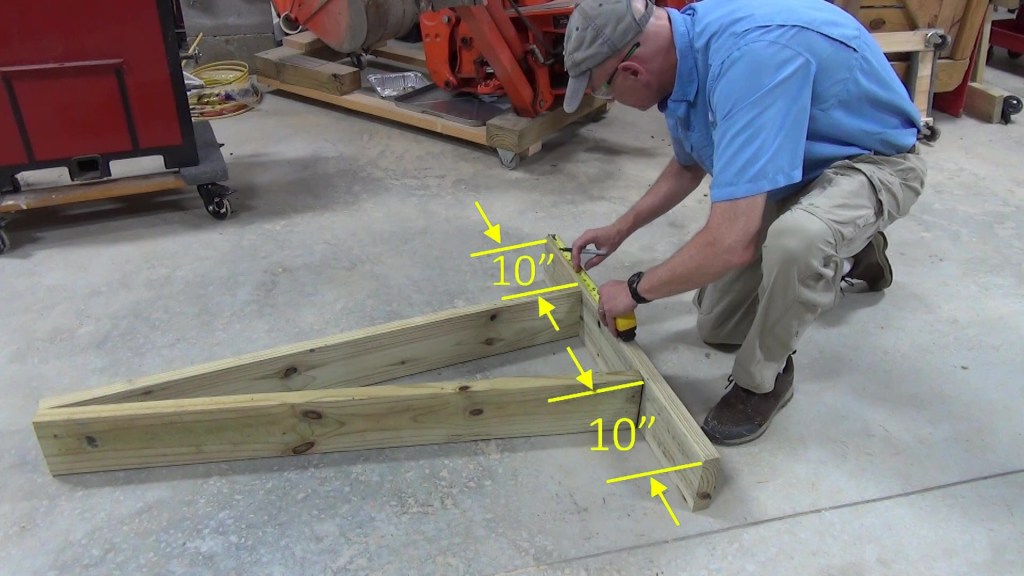
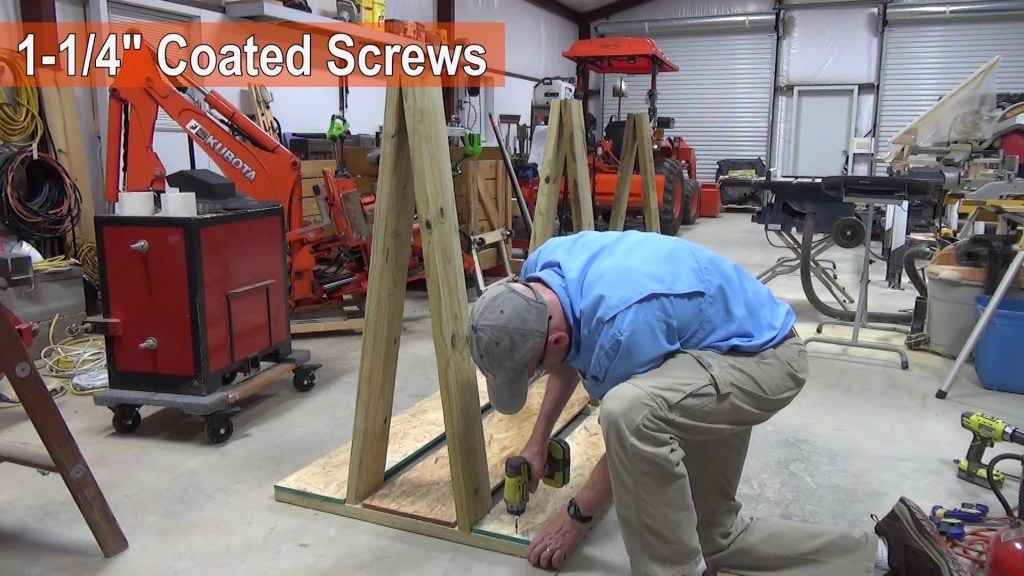
After cutting the 3 3-foot lengths, I start the assembly. The 3 foot lengths will form the base. Any longer and I felt the cart would take up too much floor space. The 4 foot lengths will serve as the leaning uprights. Also, I wanted 10” on either side so that it can hold a generous amount of plywood or lumber.
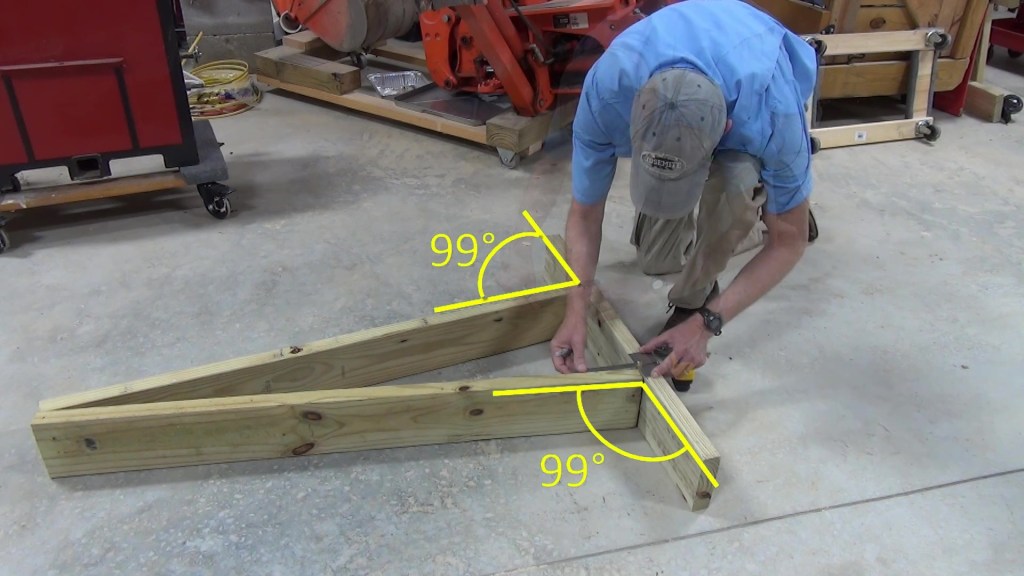
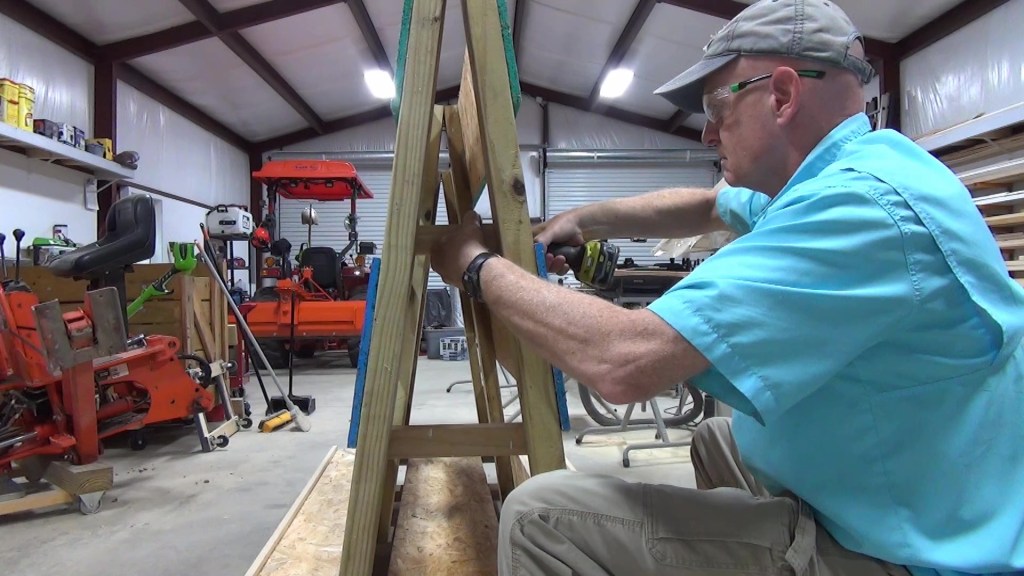
After making sure the pieces are lined up correctly, I measure the angle, which turns out to be 99 degrees.
That translates to 9 degree cuts on the bottom of the 4 foot boards for a flush fit with the base.
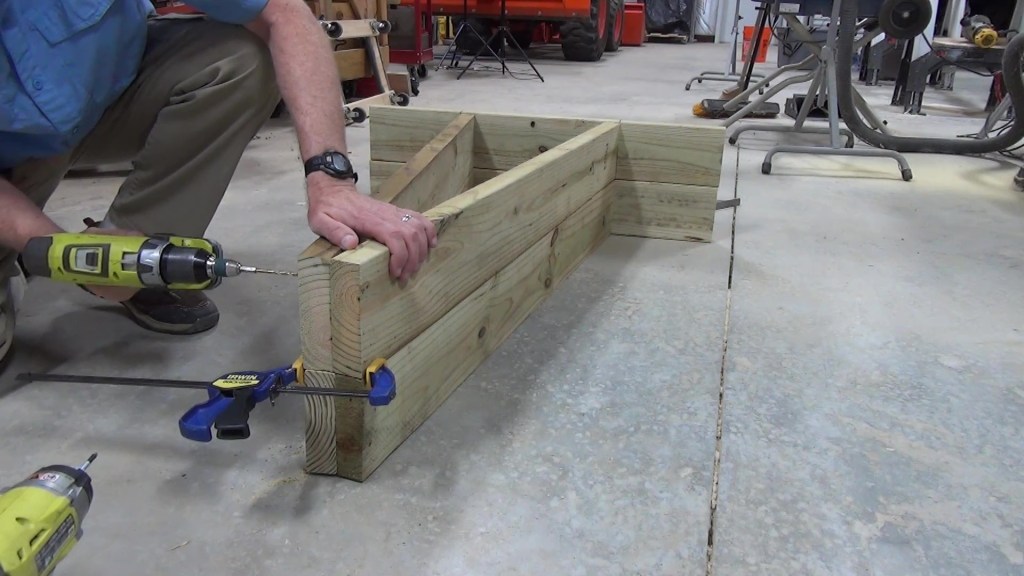
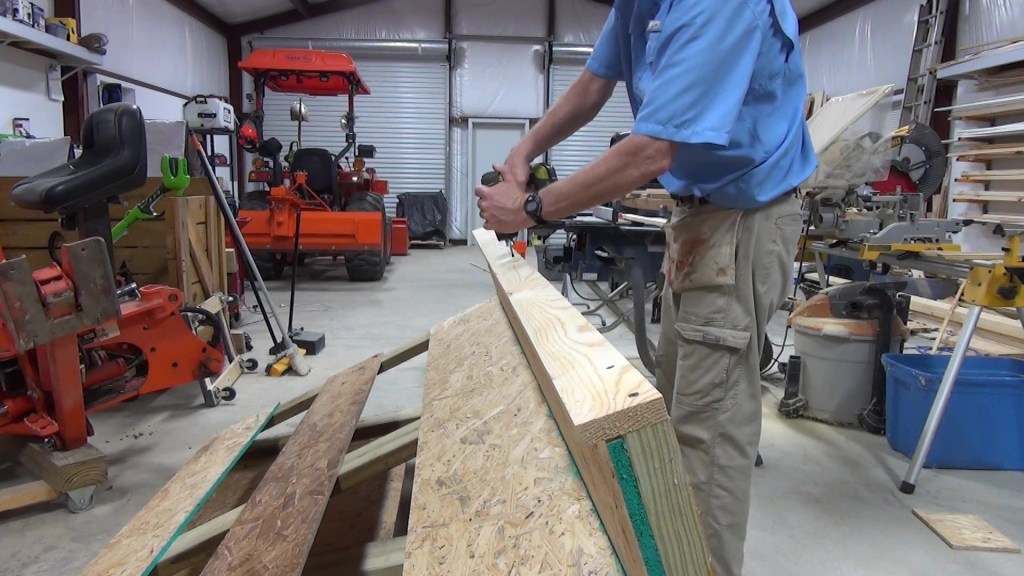
I use a framing square to make guidelines from the 10” marks. Then drill 1/8” pilot holes slightly to the inside of the line and angled about 9 degrees toward the upright. Next, I use 3” coated deck screws to secure the upright to the base. I repeat for the other side.

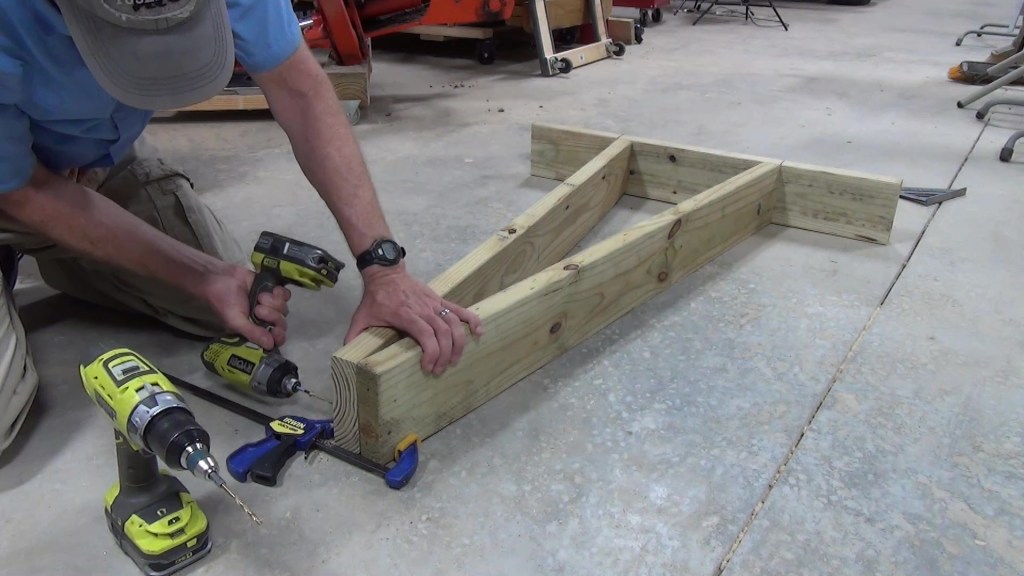
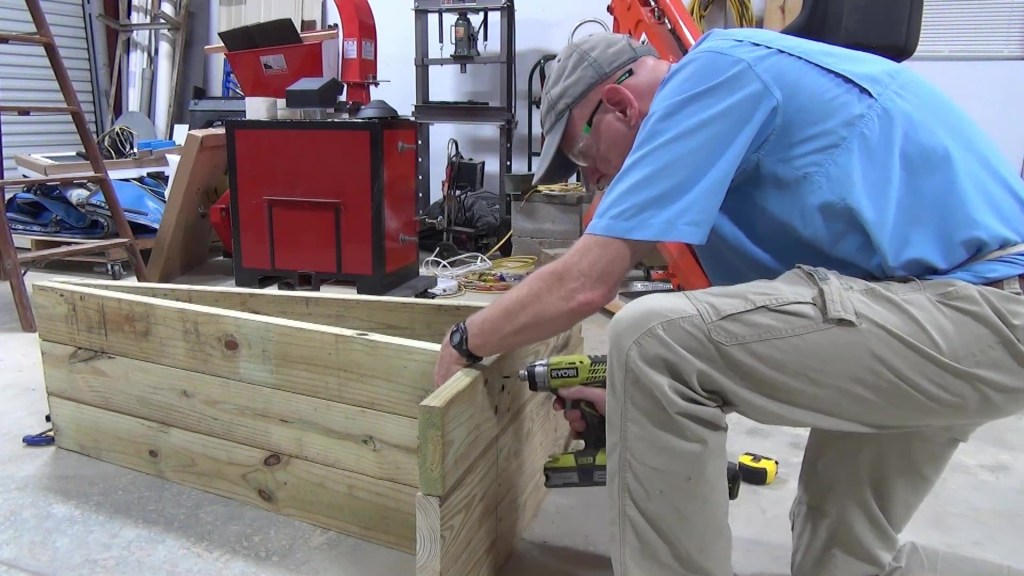
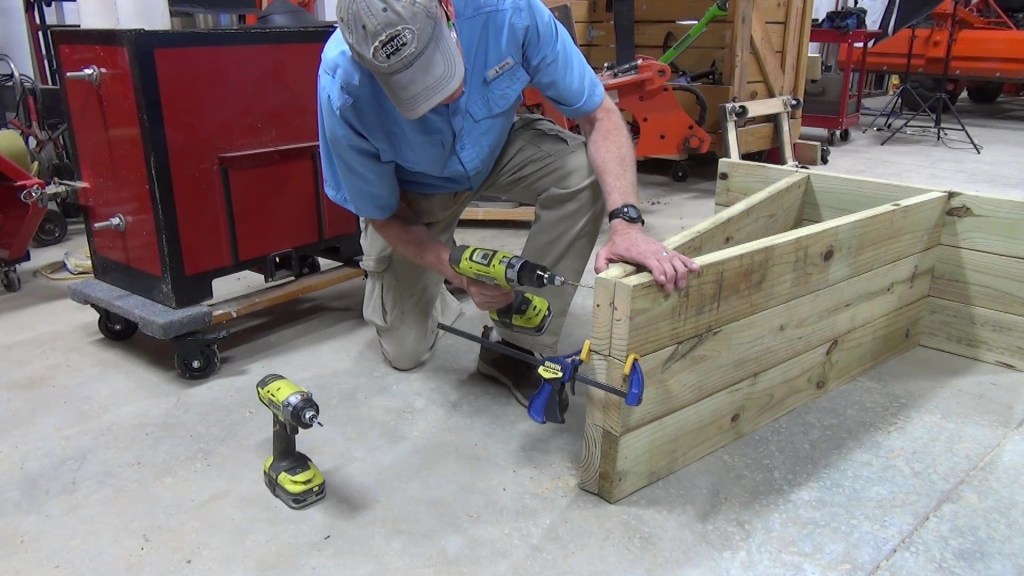
I line up the top ends of the uprights. Clamp them together. And again, drill pilot holes and use 3” coated deck screws to fasten them together.
To assemble the second frame section, I stack the pieces on top of the first frame section to make sure everything is exactly aligned and repeat the steps used on the first one. And again for the third frame section.

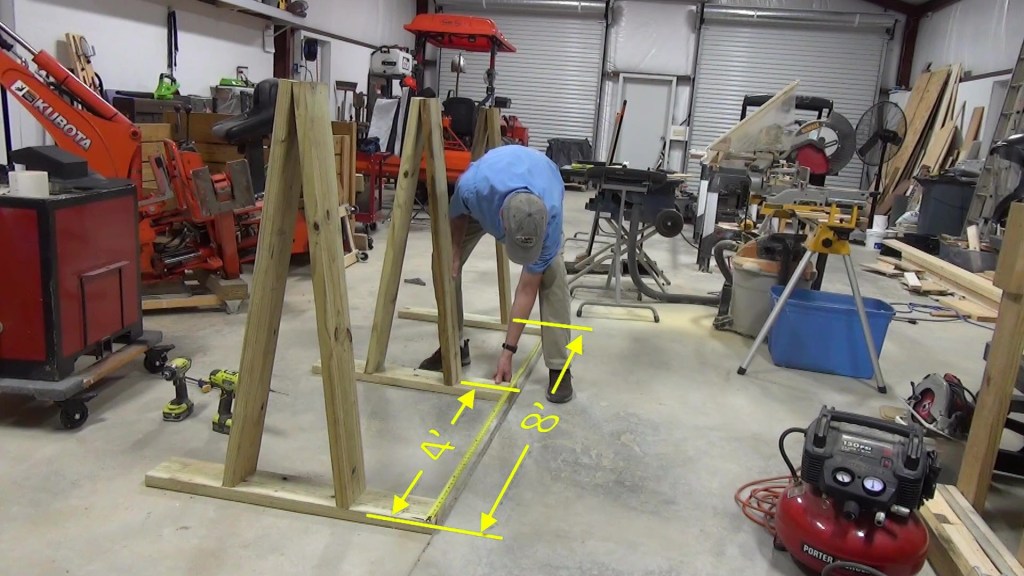
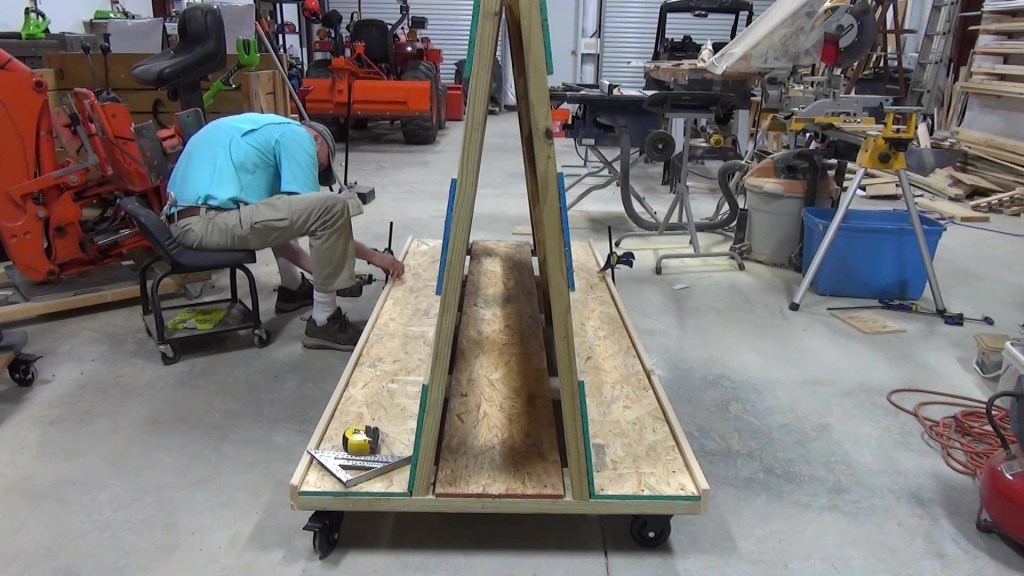
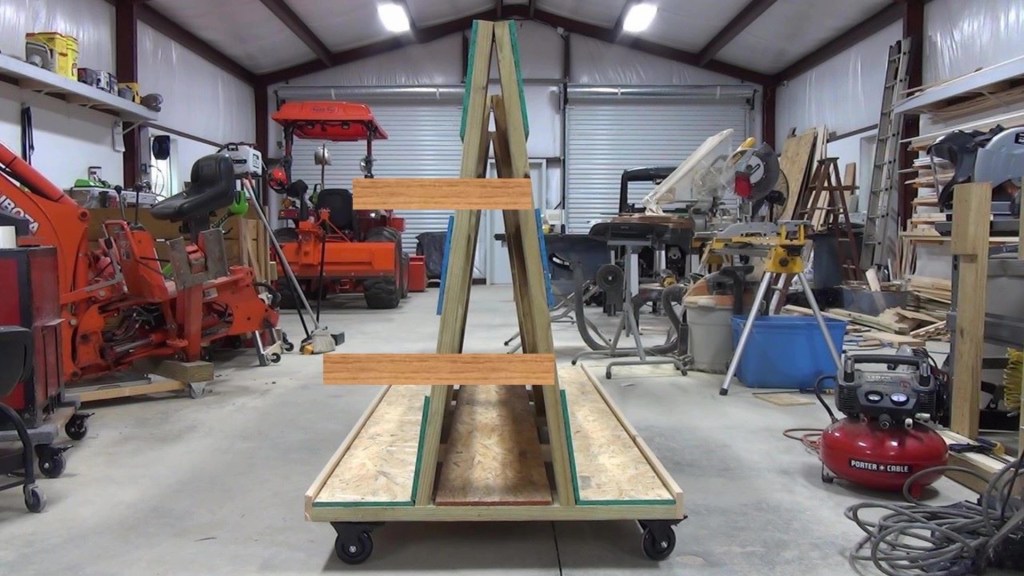
Then I stand the frame sections up and space them 8 feet apart with the center section exactly in the middle.
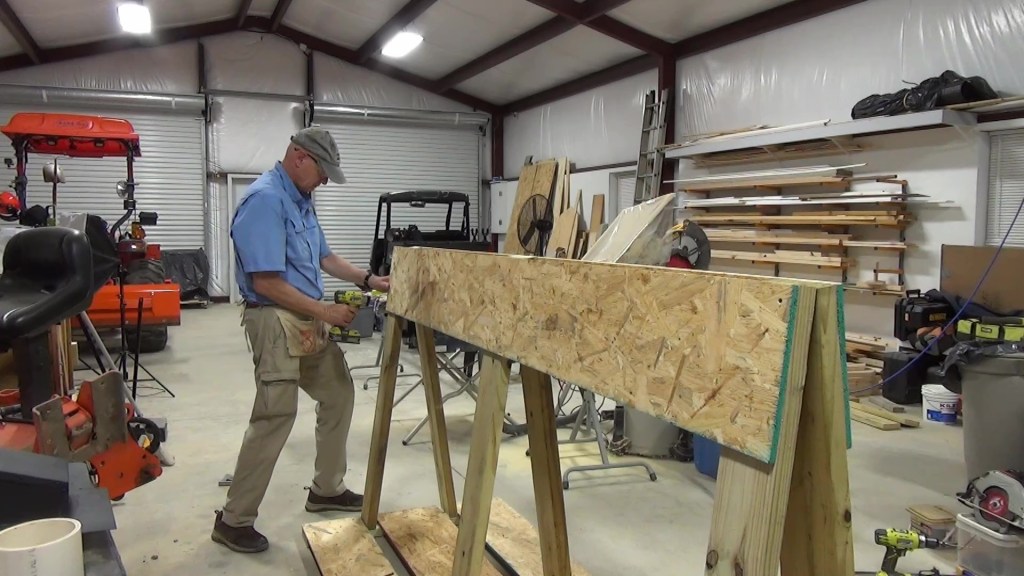
Next, I rip some 8 foot pieces of OSB board leftovers to 10 inches wide.
I place one on either side of the frames and make sure they are lined up. Then, I place a piece in the middle that already happened to be the right width. You’ll see why I put this in later in the video.
I take a final measurement to make sure the middle frame is still in the middle, then use 1.25” screws to attach the OSB panels. Six for each frame section.
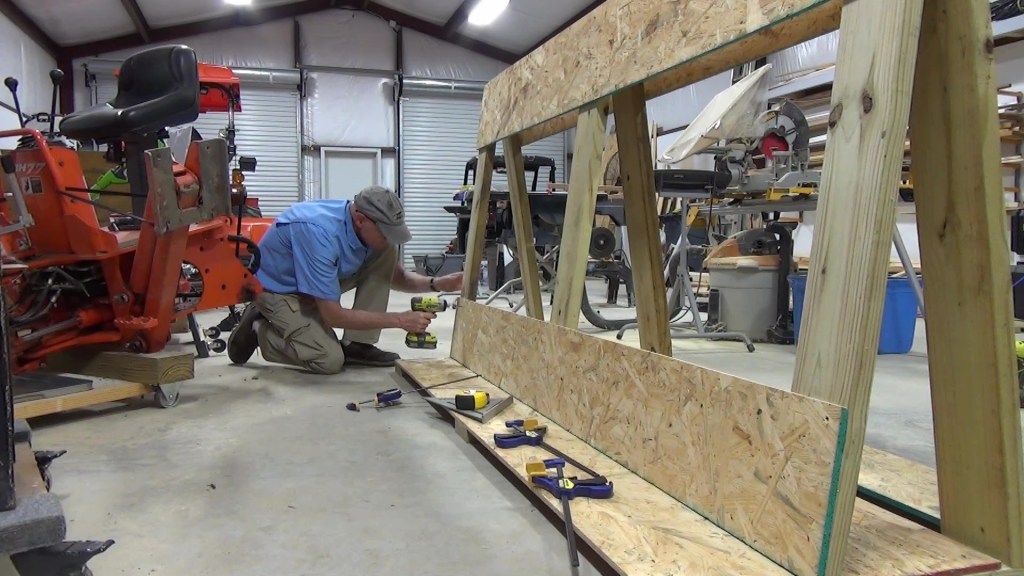
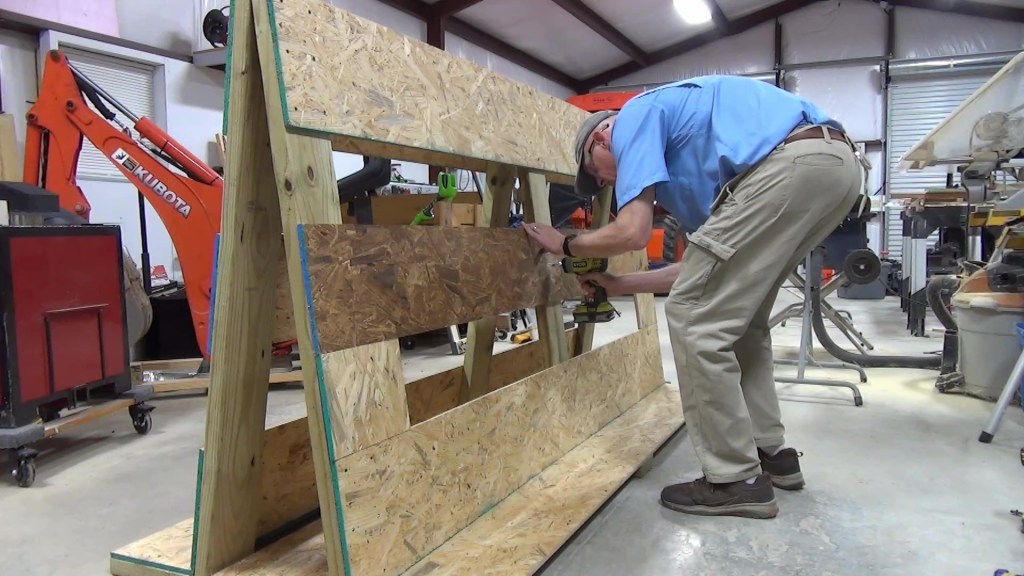
Then, I clamp the first of the 8’ x 1’ OSB side panels at the top of one side of the uprights. Now you could use a whole sheet on either side but I had several of these pieces on hand, so I decided to use 3 per side. I make sure the panel is square with the frame before attaching it with just one screw at first. Then I confirm square on the other end and add a screw. I make sure I’m still square on the first end, then check the middle frame for square before adding a screw. Now I can add the rest of the screws. Six in each end for racking strength and 3 in the middle.
I repeat for the other side.


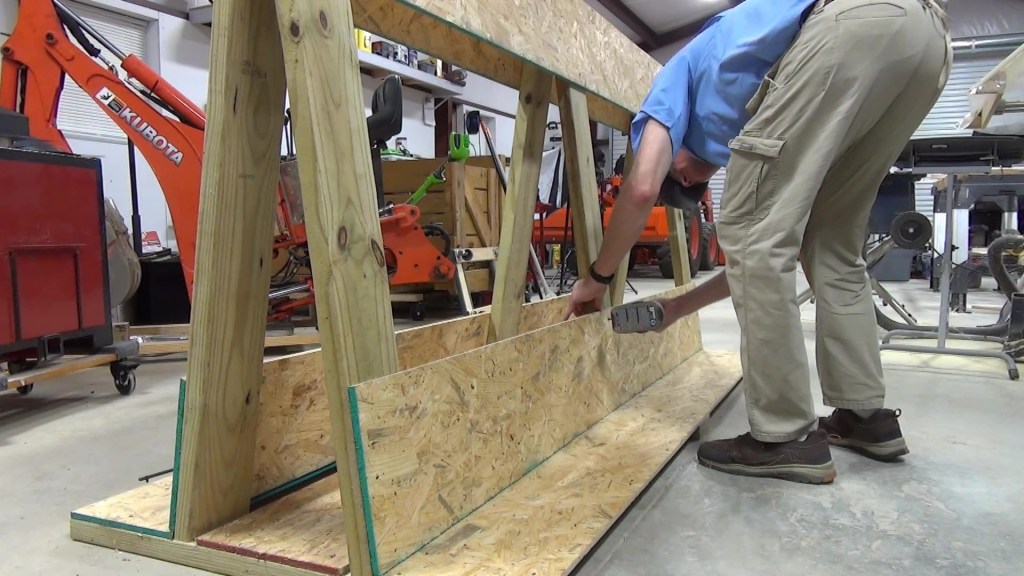
I add the first bottom panel, followed by second. Then add middle panels to both sides,
I flip the cart on it’s side to attach the first 1”x2”x8’ edge board with 2” coated deck screws. The edge boards will keep stored plywood from sliding off the cart. The pilot whole is especially important at the end of the board to minimize splitting.Next, I add my favorite locking casters to the bottom four corners. I position them to make sure I can get to the locking levers from both the side and the end of the cart. These are the only items I didn’t have on hand and had to order. They are GloEra 4” locking casters with a 1,200 lb capacity available on Amazon. I’ve used them on many of my implement dolly builds. I mark the hole position, drill small pilot holes and use #14 1.25” screws to attach them.
I flip the cart to the other side to install the other edge board and casters.
Next, I measure to the middle between the end and center frames to add 2”x4”x3’cross supports underneath. I clamp the cross supports on both sides then secure them with two 2” coated deck screws on each side.


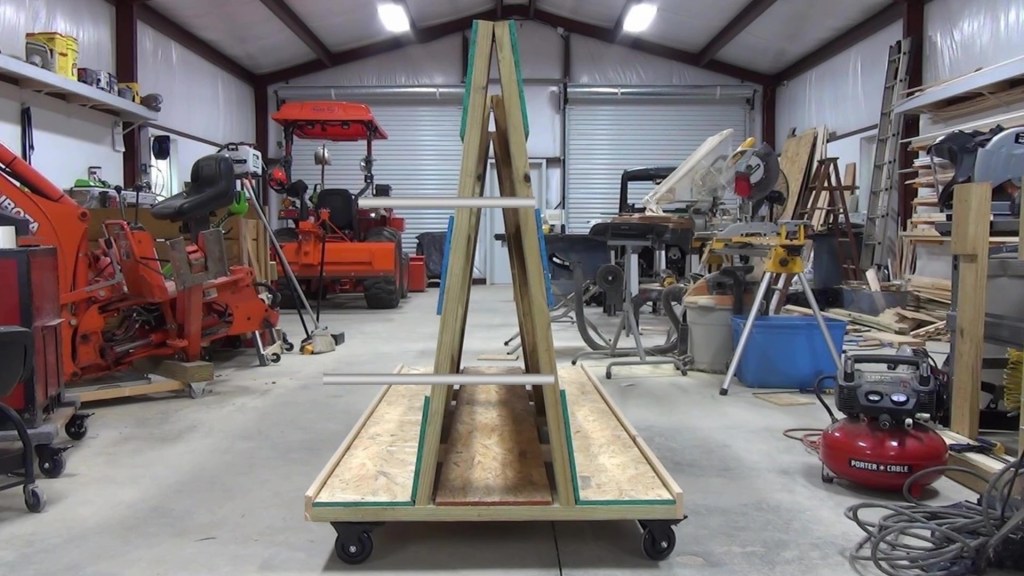
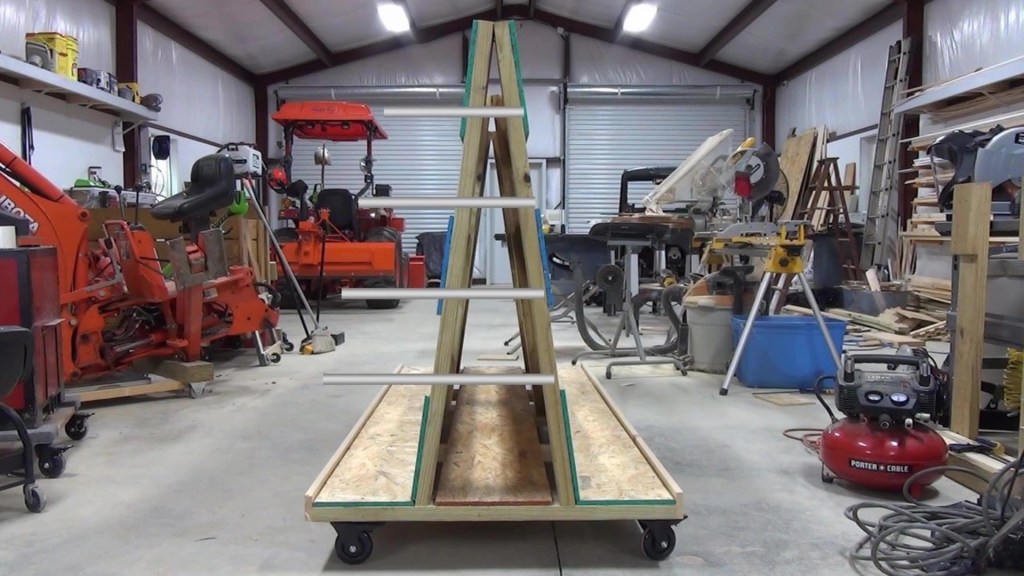
This makes a versatile platform that you can customize to your needs in many ways. For instance, you might want to add a vertical storage area on one side. Or you could use pieces of 2x4s to make supports for regular lumber. Or just on one side so the other can hold plywood and other panel lumber. Better yet, you could use lengths of pipe through holes drilled in the frame sections, which would give you many options on one side, or both sides.
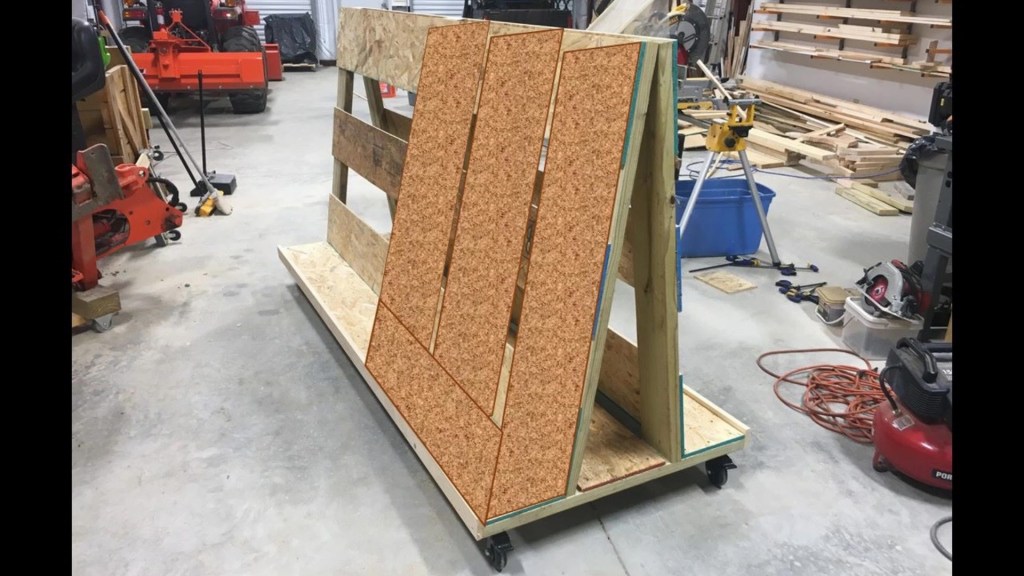
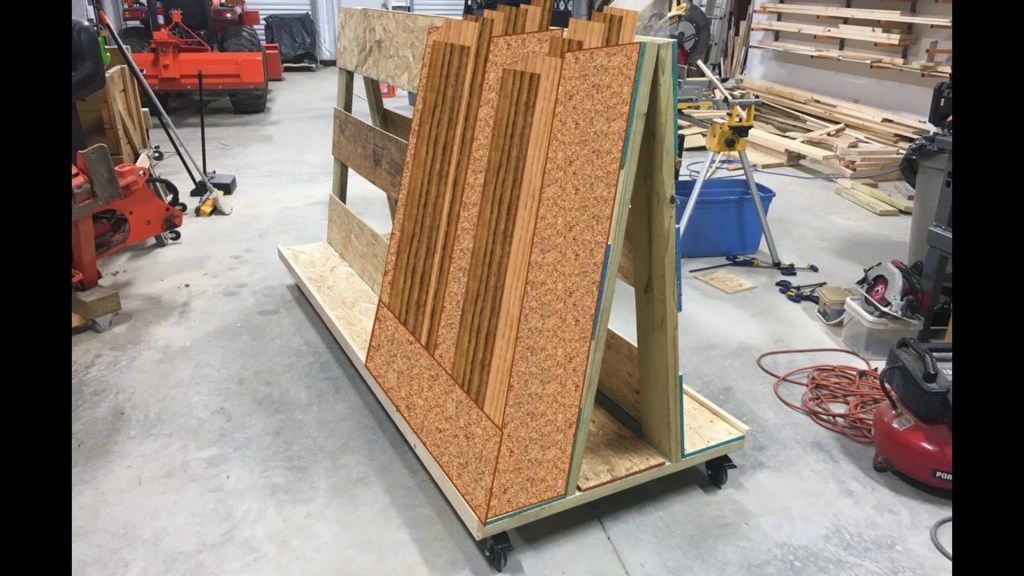


Since I already have a wall mounted lumber rack and I’m fairly sure I’ll need both sides for panel lumber, I’ll leave as is for now.
Next I attach some 2×2 cross pieces for some extra storage. These can be used to store long skinny pieces like dowls and trim as you’ll see shortly.
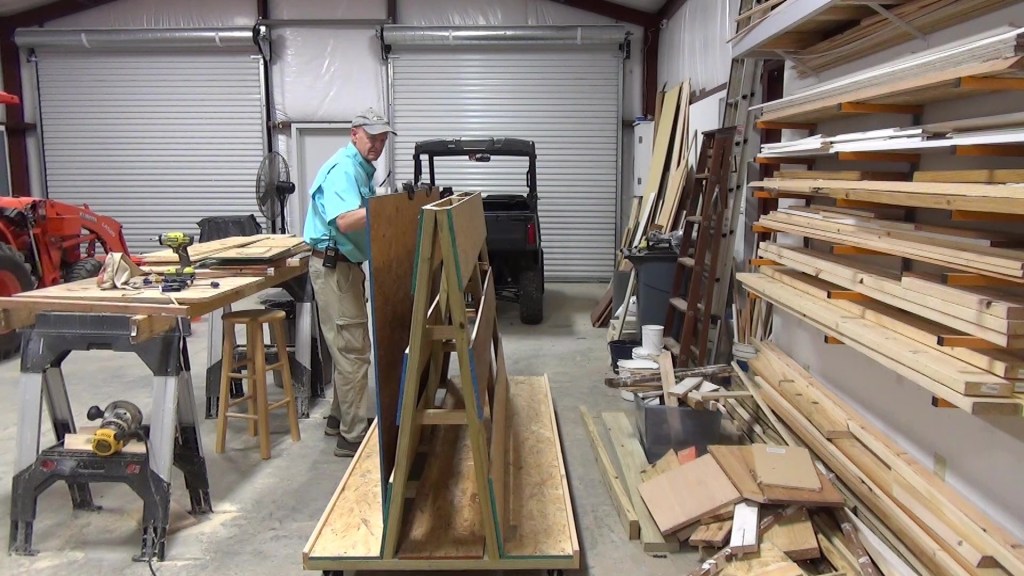
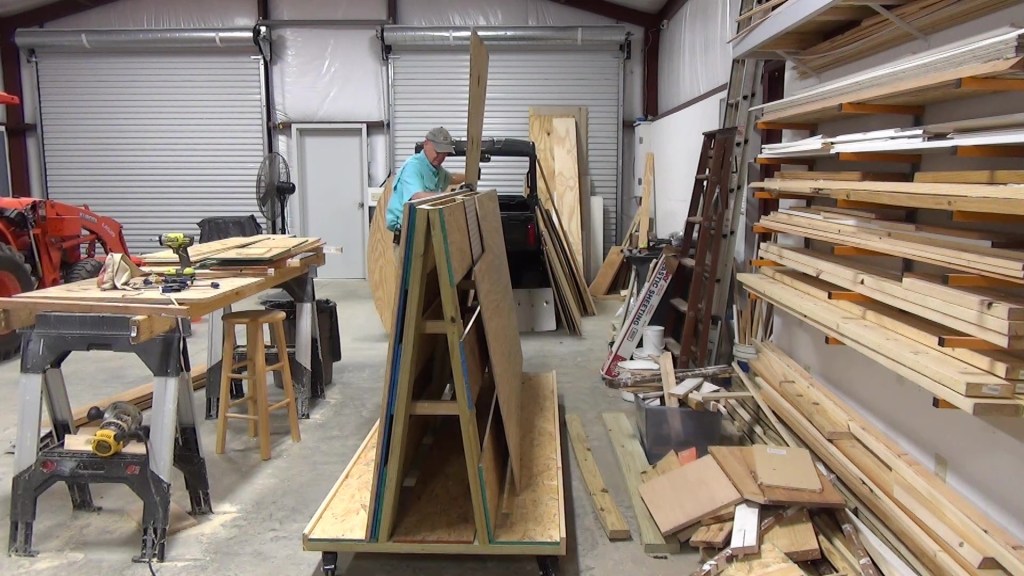
Time to move the cart in front of my wood rack, where it will normally stay.
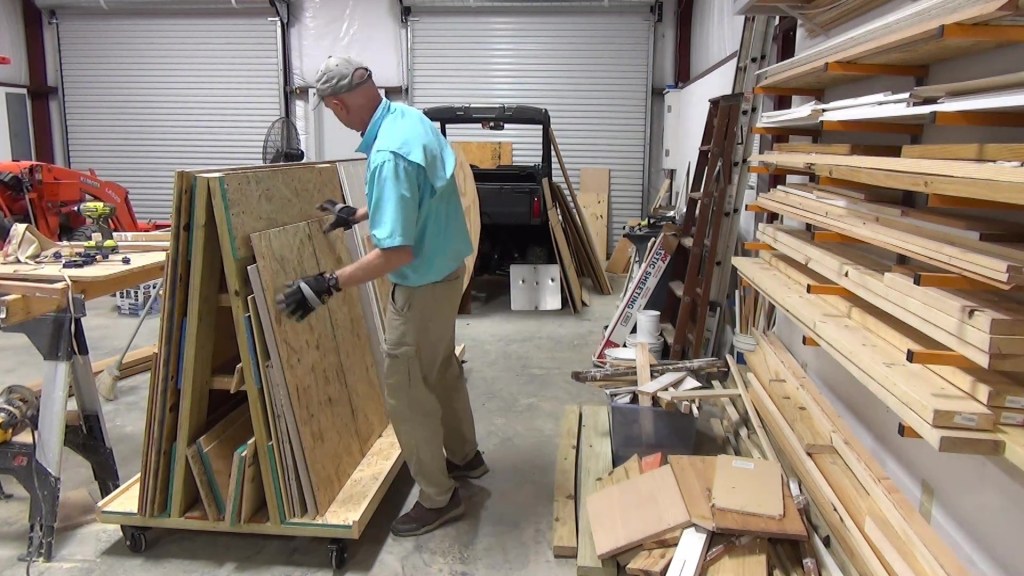
First, I have a full sheet of OSB panel I can put on the cart. After that, it takes a good bit of sorting to get to the other full sheets of panel, which I want to load on the cart first. Followed by the smaller scraps of panel. As you can see, that lower middle storage area is perfect for long narrower strips of panel. I move the cart to make it easier to load the other side. I’ve collected a LOT of scrap pieces over the years of projects! This cart will be a great solution for efficiently storing it for easy access. There’s even room for my drywall scraps.


Note: Links to Amazon products are Amazon Associate links that won’t cost you any extra, but will help support my efforts with a small commission on qualified products. Thanks for your support!
