Are you considering the Pat’s Easy Change system for your tractor’s 3-point? If so, then this post is for you. I’ll show you how to install them, and share some tips for alignment and use.
First of all, if you are undecided about whether the Pat’s Easy Change System or a Quick Hitch is best for you, you may want to check out my post titled “Quick Hitch vs Pat’s Easy Change: Which is Right for You?“ first. If you’re leaning toward the Pat’s Easy Change System, then you may find this post helpful.
I’ve had my Pat’s Easy Change System for about two and a half years now, and they have really proved to be rugged and reliable. Recently, I took them off to see if they were damaging my 3-point lift arms and I’m happy to report that they have not. The arms and swivel balls were still in fine shape. However, having them off gave me the opportunity to make a video and blog post on installation, setup and tips.
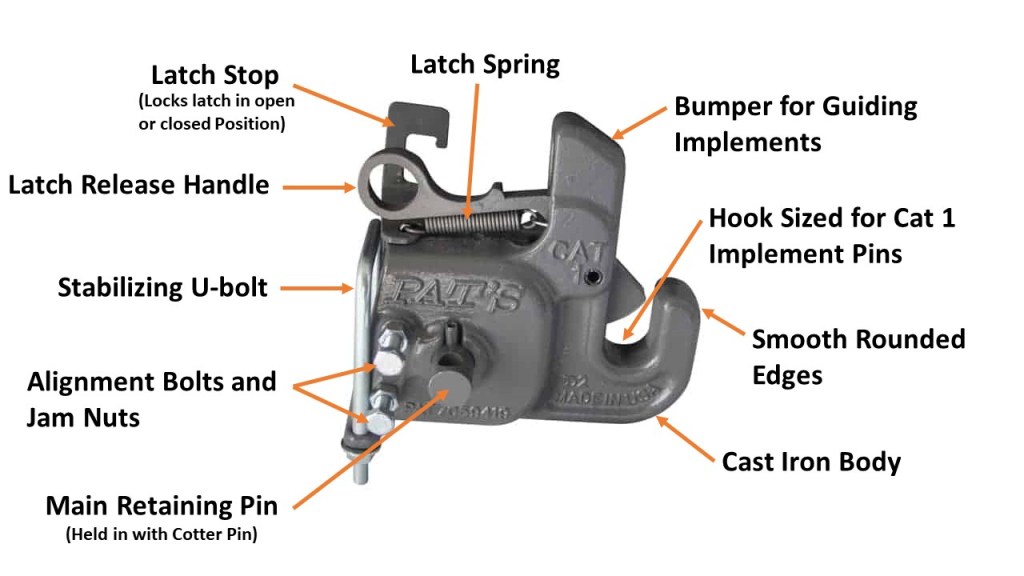
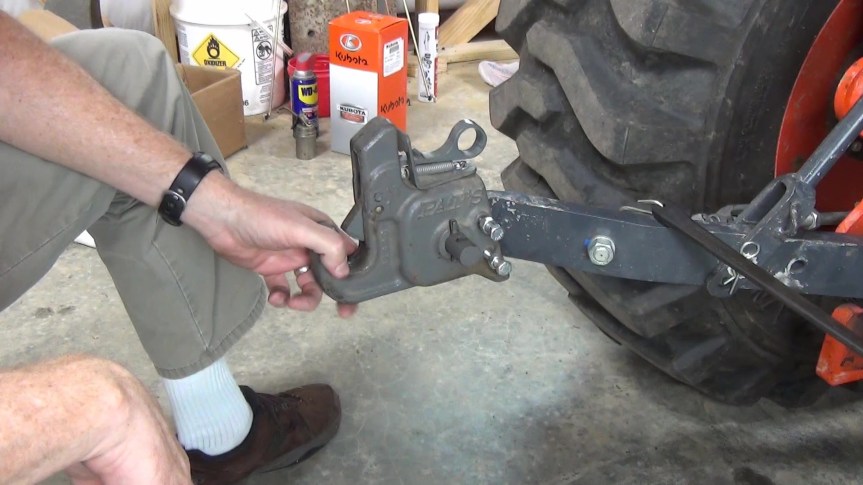
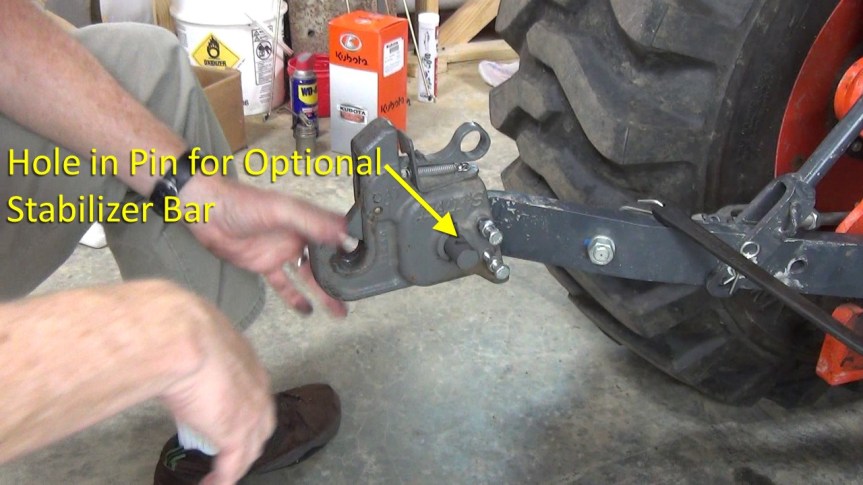
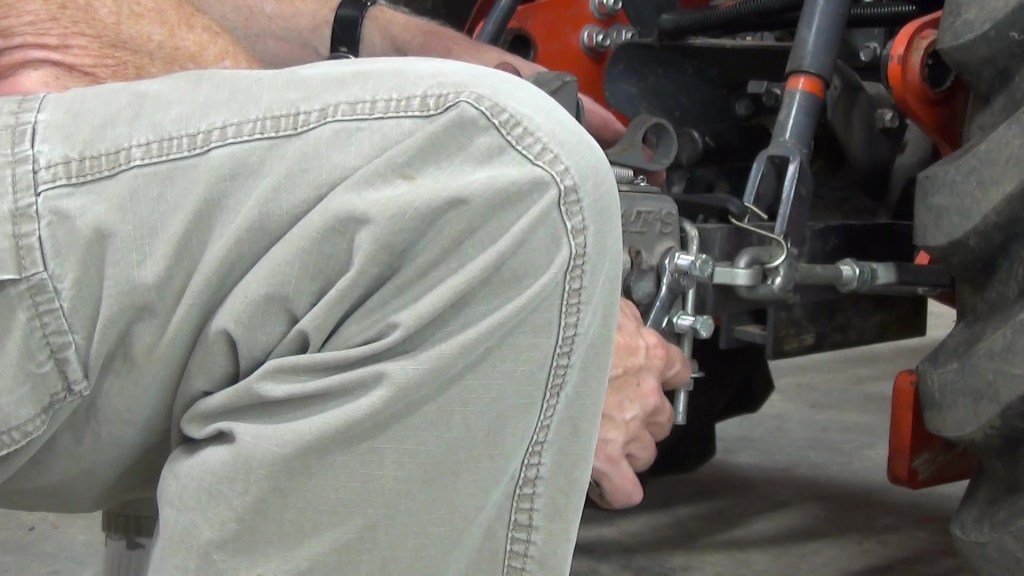
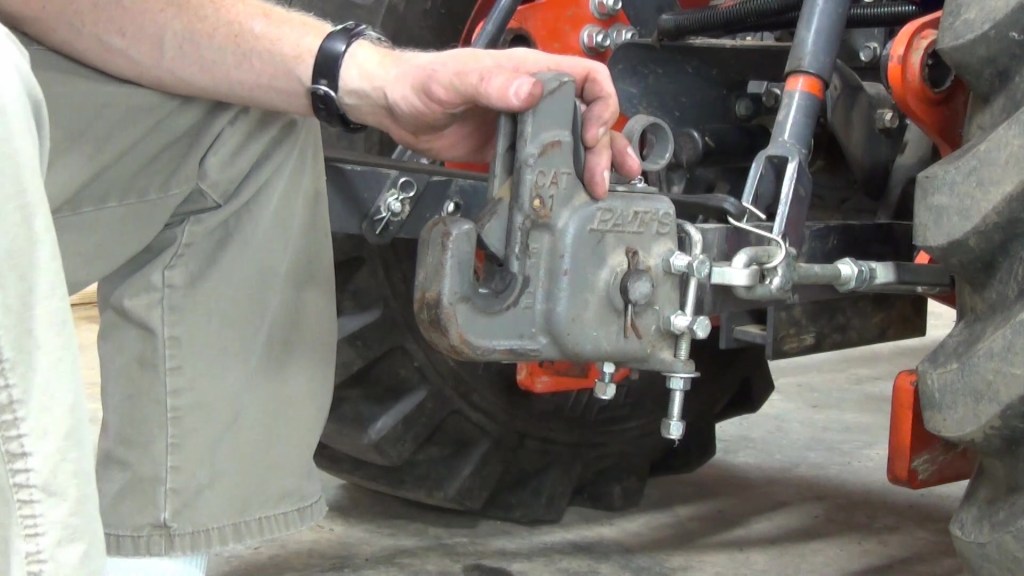
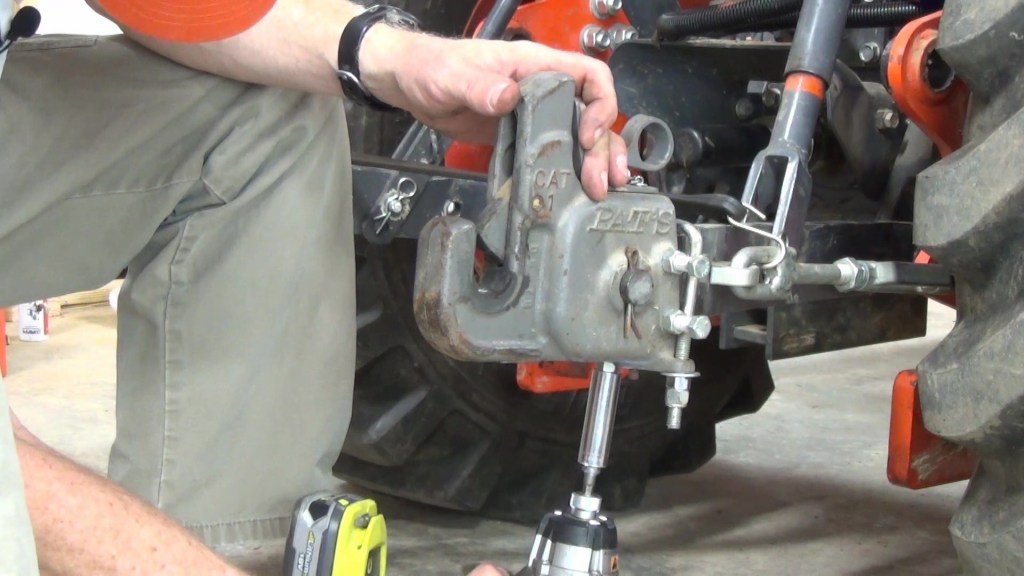
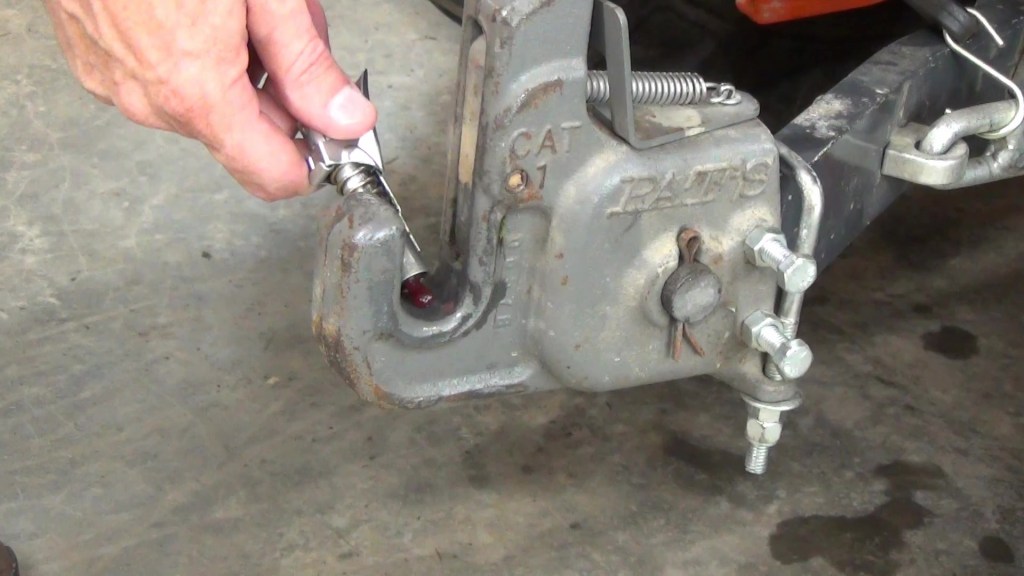
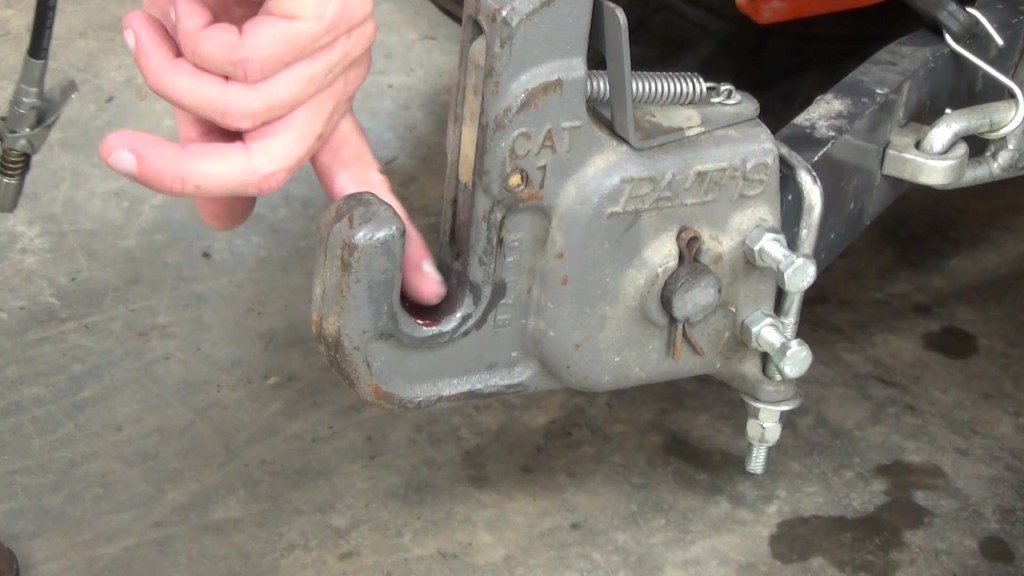
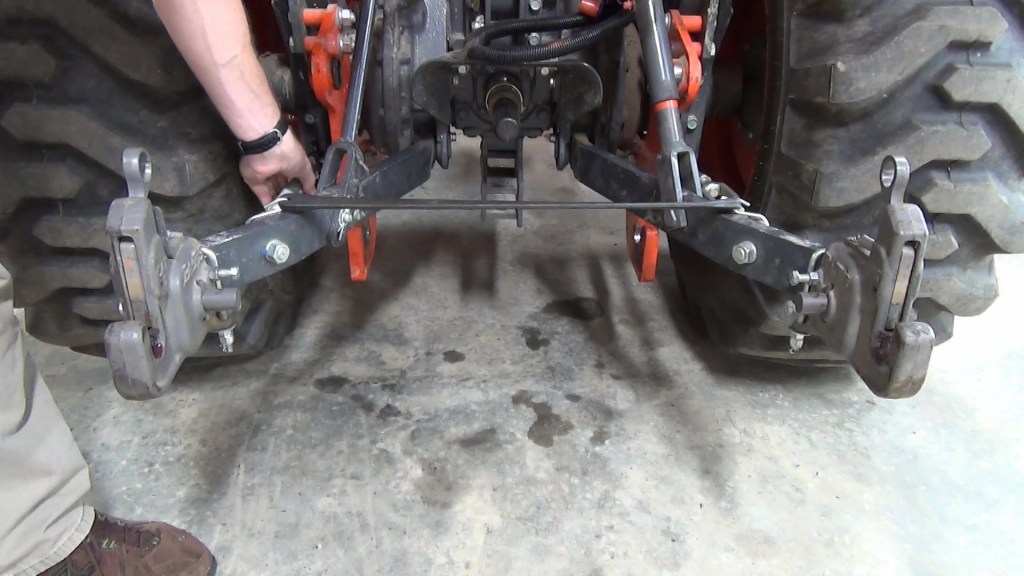
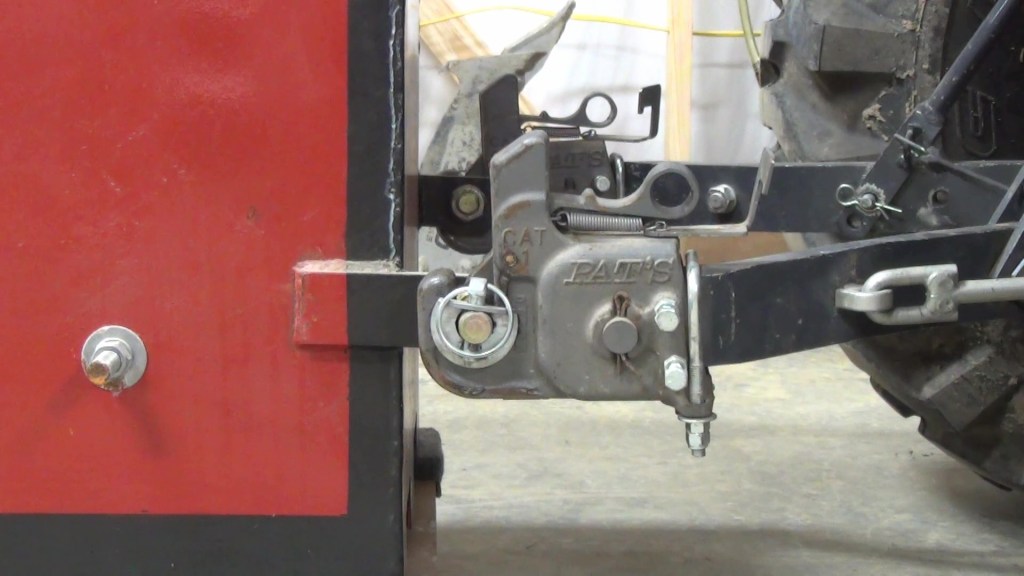
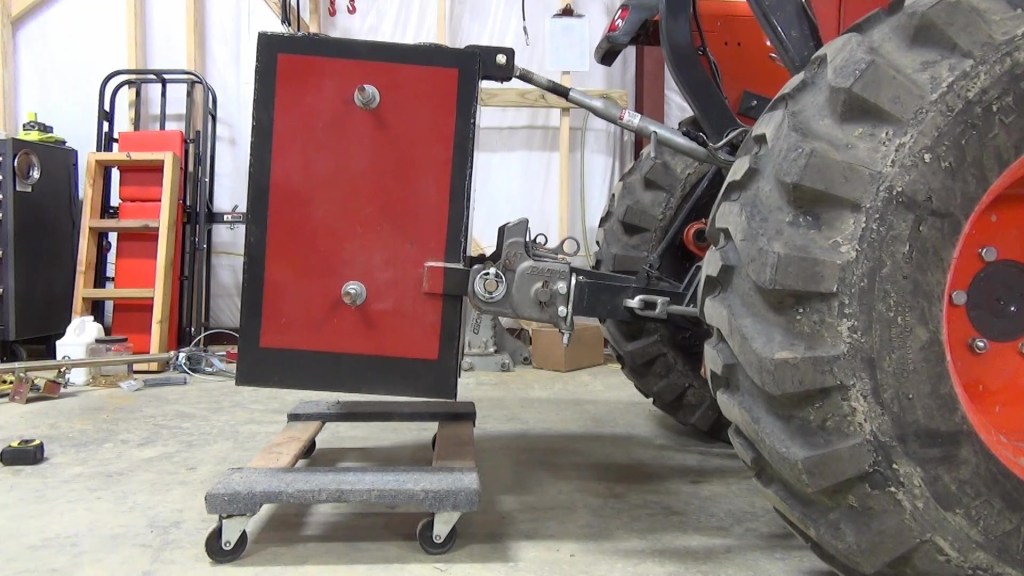
First, here’s a look at the main features of the Pat’s Easy Change System. This is the category 1 version. The hook body is made of ductile cast iron. It has smooth rounded edge to minimize scrapes to your implements. The hook is sized for Cat 1 7/8″ implement pins. It has a bumper to help guide the implement pin into the hook. There is a sturdy latch spring. It also has a latch stop, which can lock the latch in the open or closed position. The latch handle is easy to operate to open release the latch. The stabilizing u-bolt, in combination with some shims, insures the body stays in alignment with the 3-point lift arms. It has two alignment bolts and jam nuts on either side of the body. And finally, there is the main retaining pin, which is held in with a cotter pin on the other side.
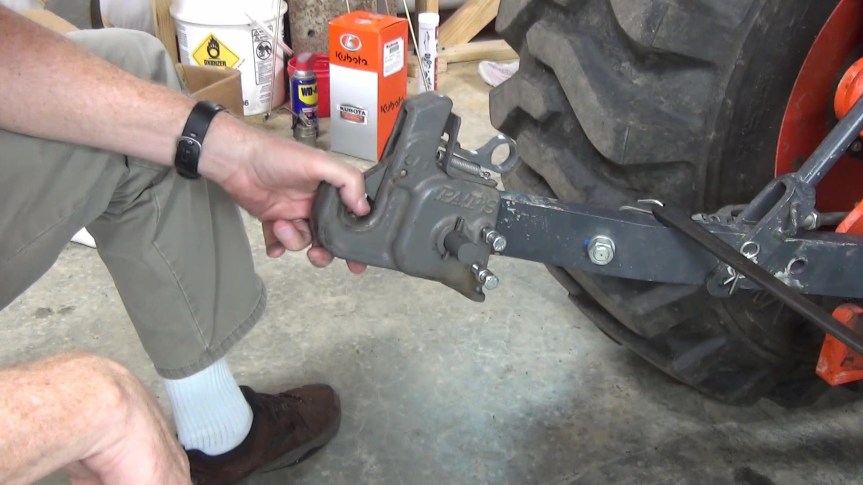
The Pat’s Easy Change System, attaches by sliding the main body over the end of the three-point lift arm and insert the retaining pin from the inner side of the main body. This is important for proper installation so that the hole in the retaining pin for the optional stabilizer bar is to the inside. More on this later.
As it is, the hook body can pivot up and down, but in fact it needs to be rigid and in line with the lift arm, so it needs a few extra pieces to do that.
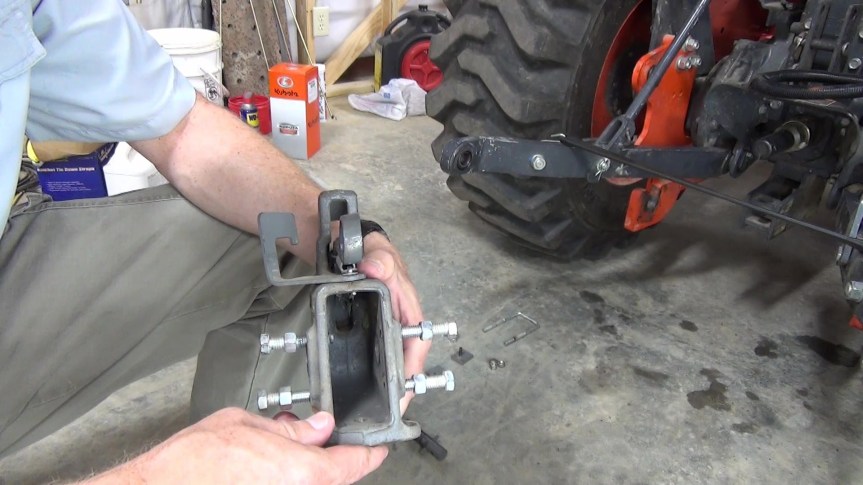
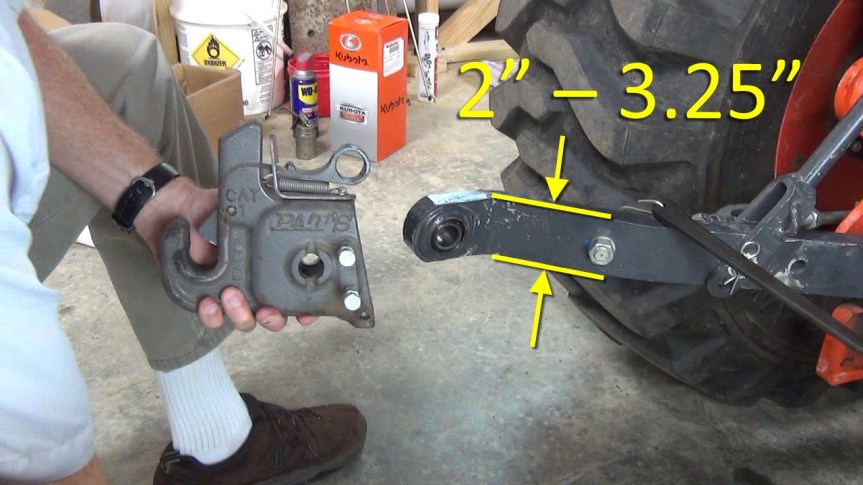
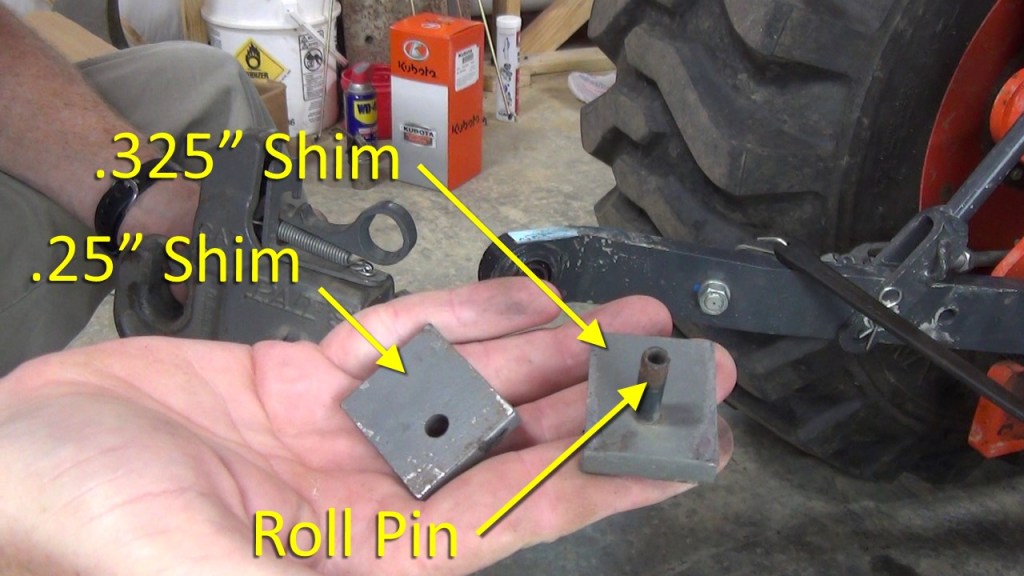
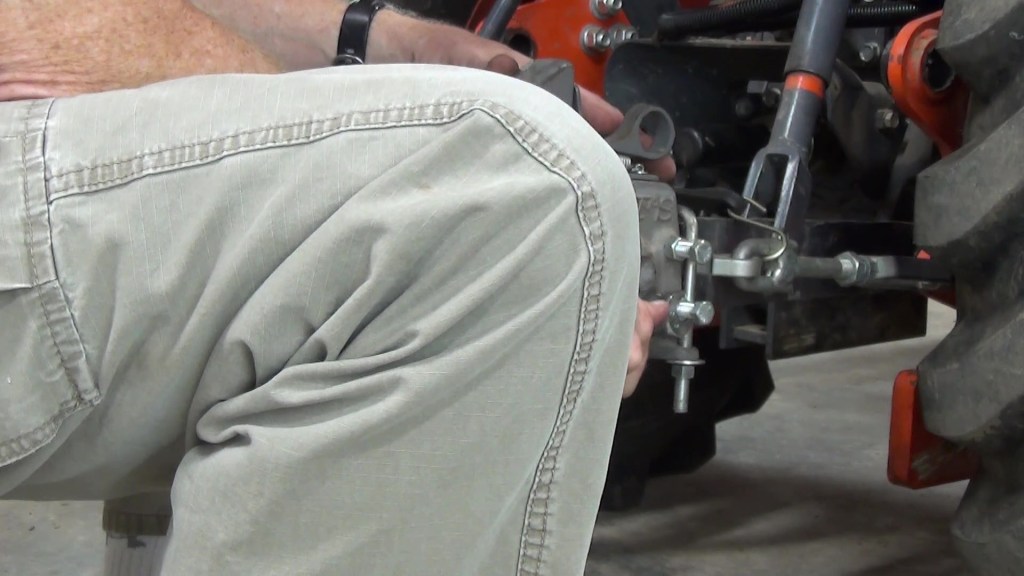
The Category 1 system is designed to fit lift arms ranging from 2″ to 3.25″ tall, so to take the slop out and make the hook body in line with the lift arms, two shims are provided. One is .25″ thick and the other is .325″ thick. They can be used individually or combined as needed. The provided roll pin is hammered into the shim of your choice and then goes into the hole in the bottom of the hook body. For my lift arms, the .325″ shims are the right ones to use.
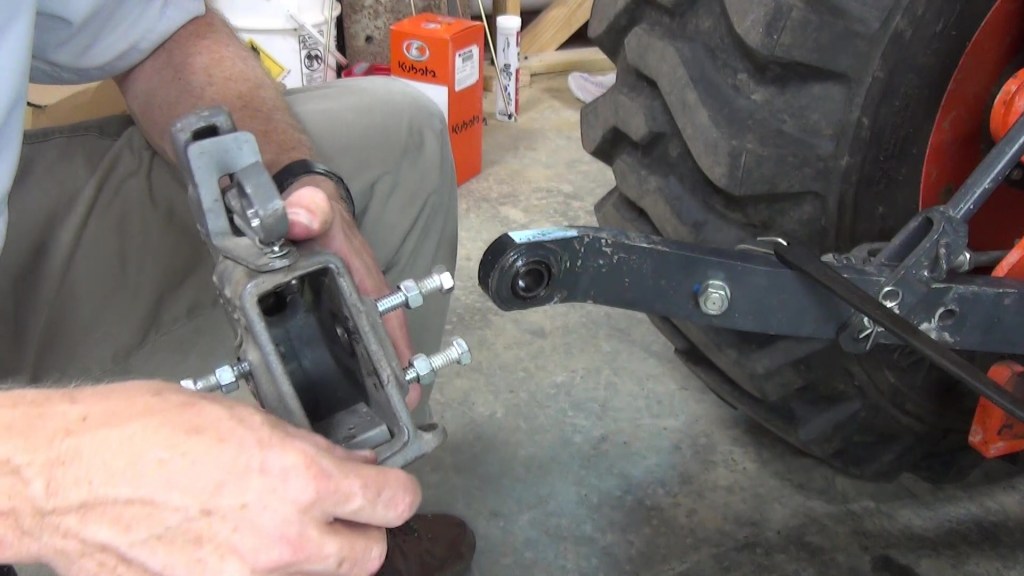
With the proper shim in place, place the hook body on the end of the lift arm. Insert the retaining pin. And then put the cotter pin on the other side and bend one leg of the cotter pin so it will stay put.
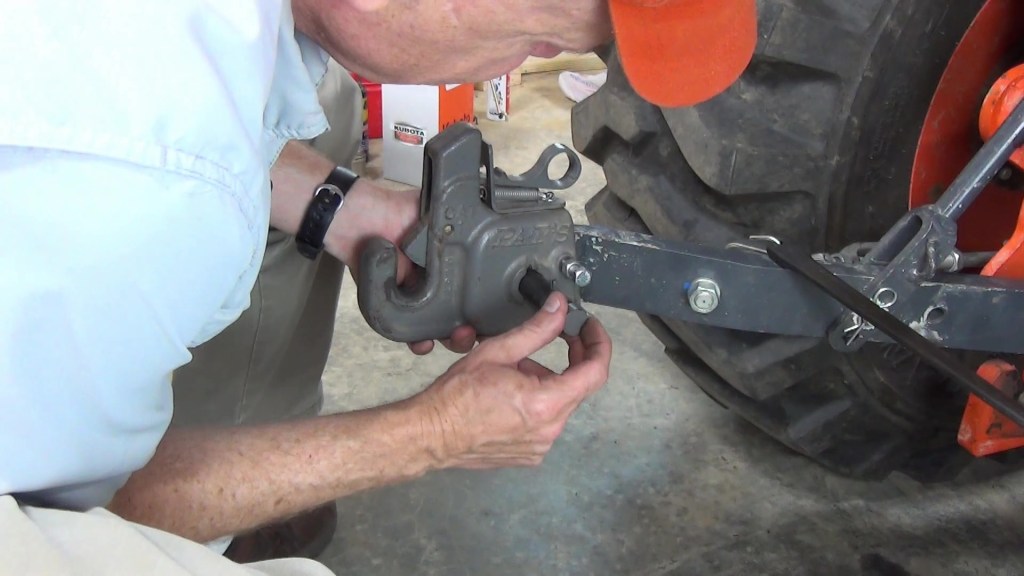
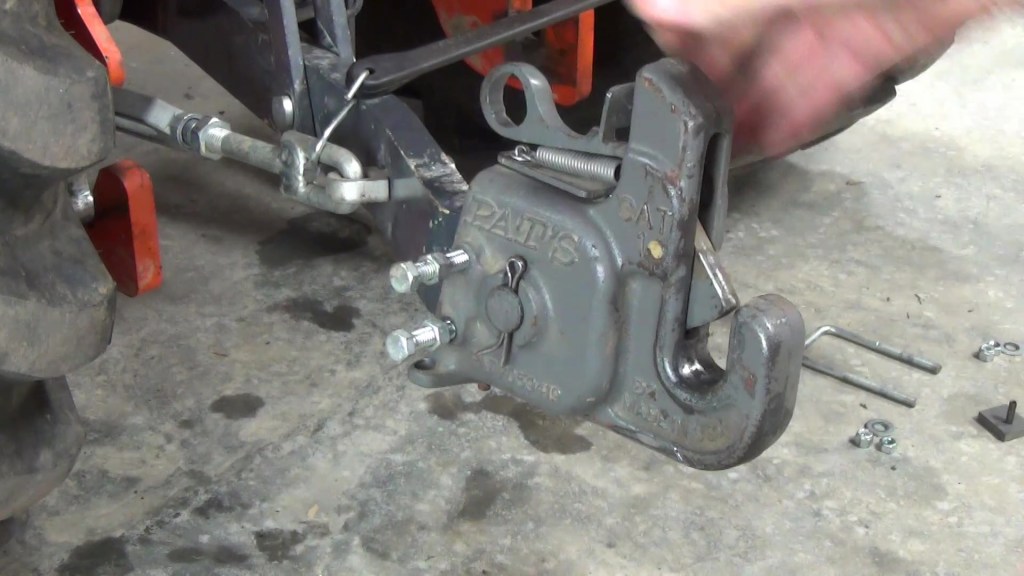
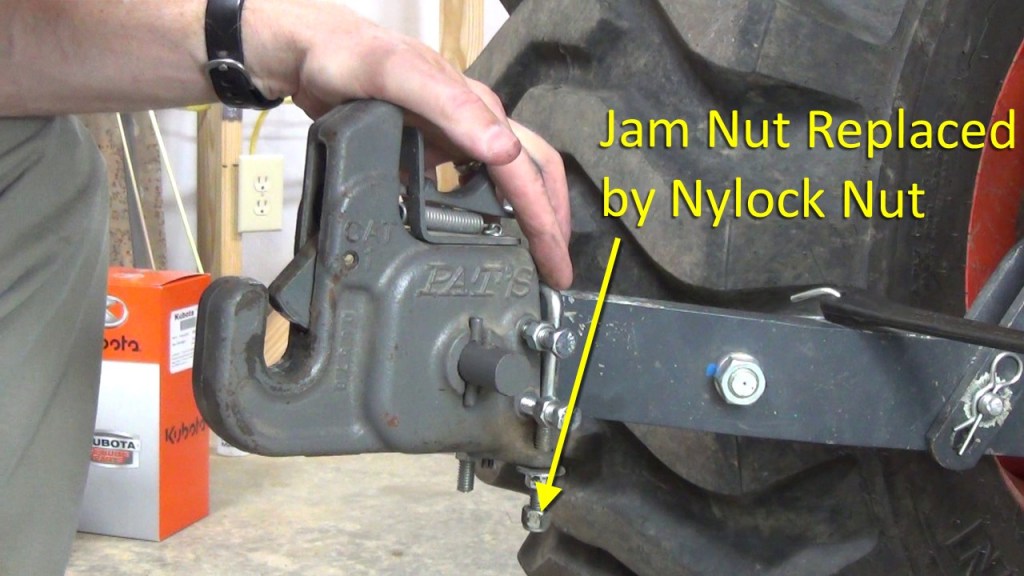
So now the hook body is in line with the lift arm but it can still pivot up. This is where the u-bolt come in. It prevents the hook body from tilting up. Since there is no down pressure from a lift arm, the u-bolt is plenty strong for this job. A washer, followed by a nut, and then a jam nut holds the u-bolt securely, however leave them loose for now.. One change I made was to substitute a nylock nut for the jam nut because I found they would work loose over time.
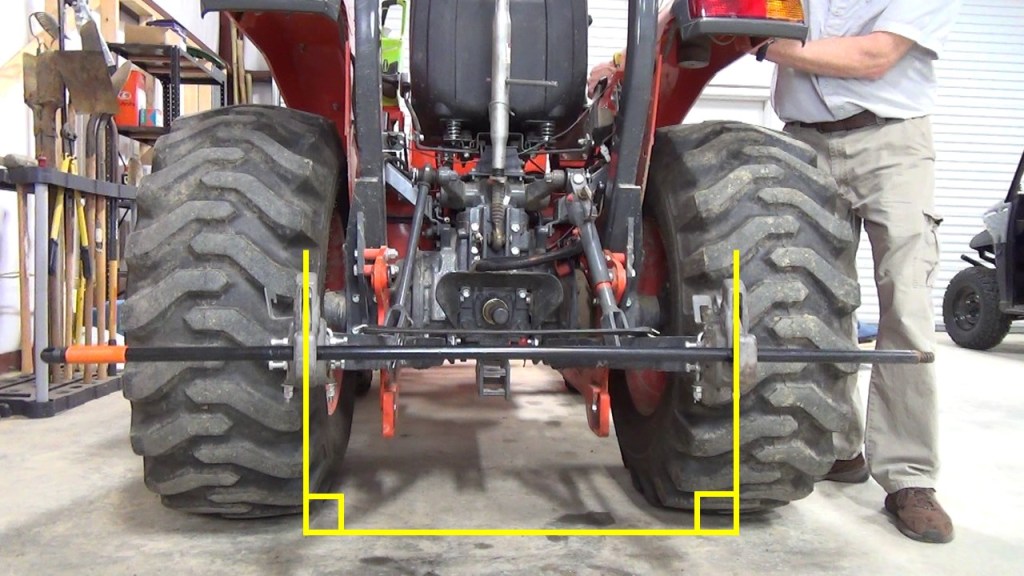
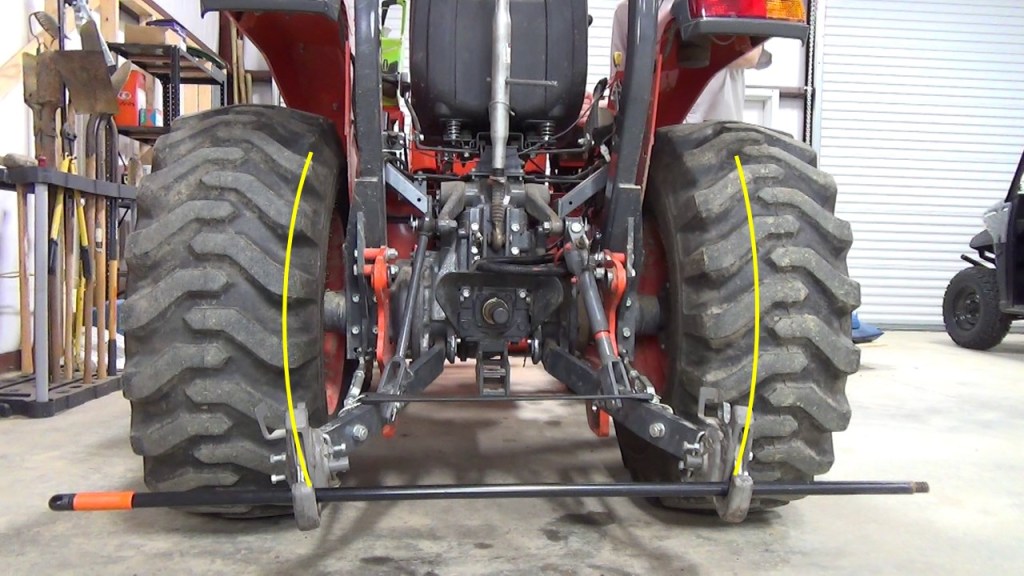
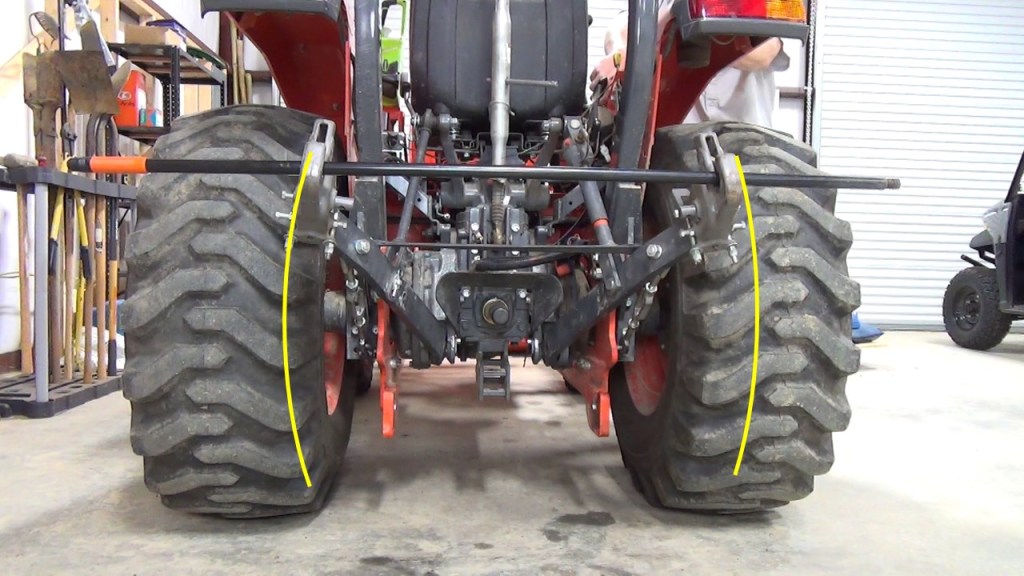
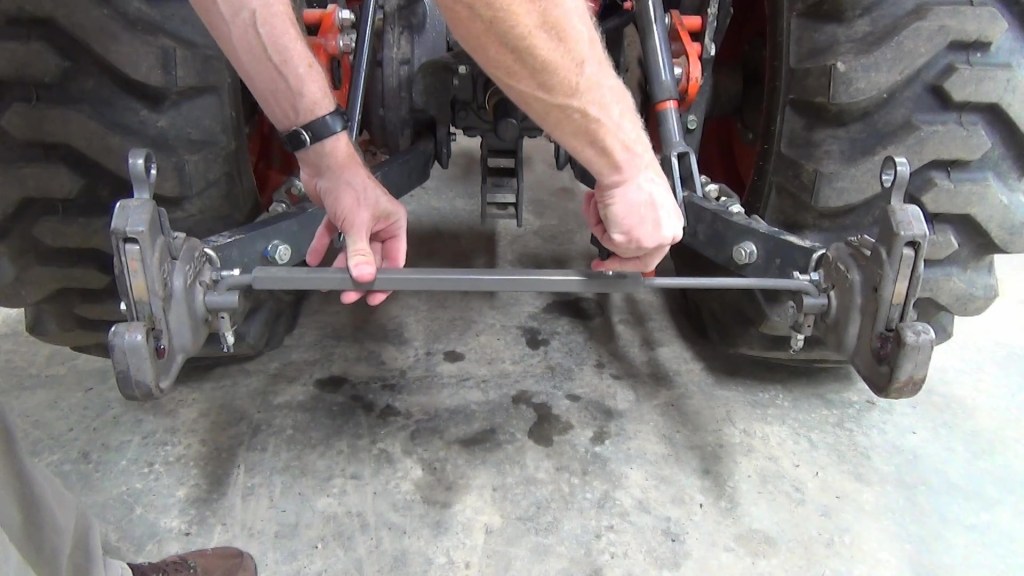
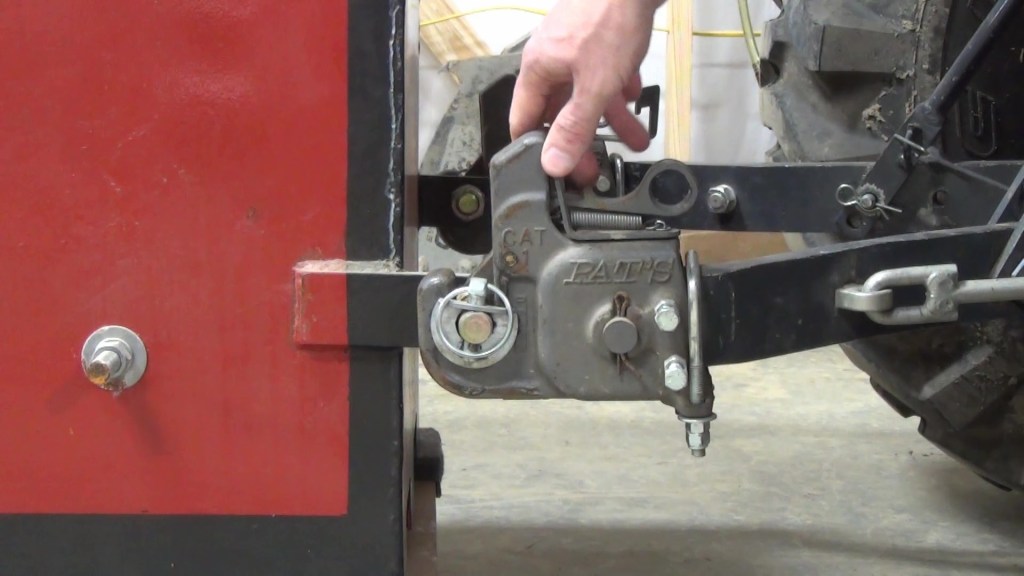
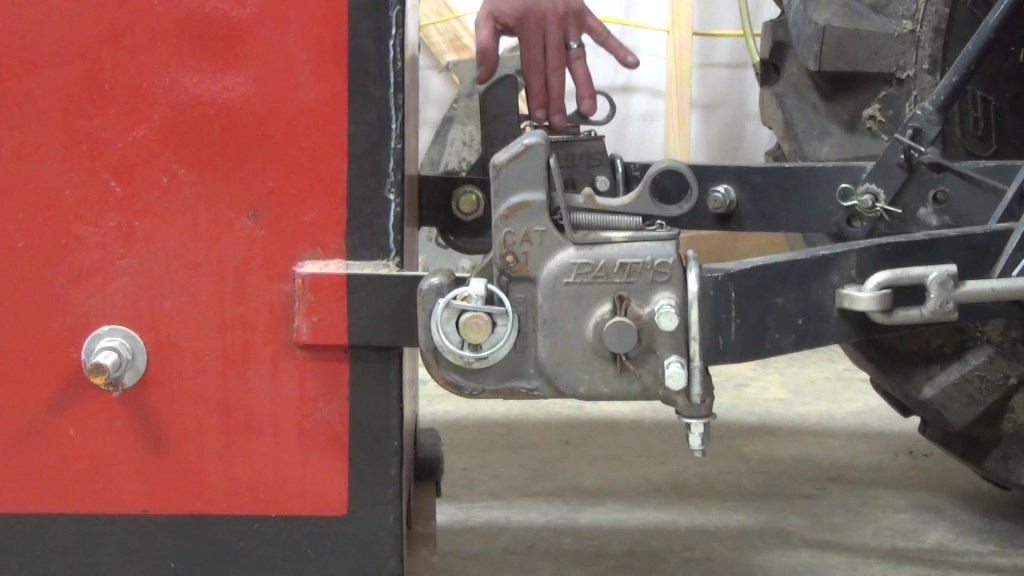
Next, adjust the four alignment bolts so that the hook bodies are in line with the lift arms and perpendicular to the floor. Once the hook body is correctly positioned, tighten the jam nuts on each bolt. Then you can tighten the u-bolt nuts. Followed by the jam nuts.
You can use a broom stick to help check the alignment. Adjusted properly, the Pat’s hooks are parallel to each other and perpendicular to the floor when the 3-point is at about mid height. However, note that depending on the geometry of your 3-point system, you may see that hooks follow a slight arc. That is, they may toe in toward each other at the top of the 3-point range and toe out at the lowest position of the 3-point. This has not caused me any problems hooking up to implements. The rounded edges of the hooks protect the implement pins from excessive wear.
The same is true if you are using an adjustable side link or leveling box to tilt an implement.
One thing I do to minimize wear on implement pins is to put a dab of grease in each hook.
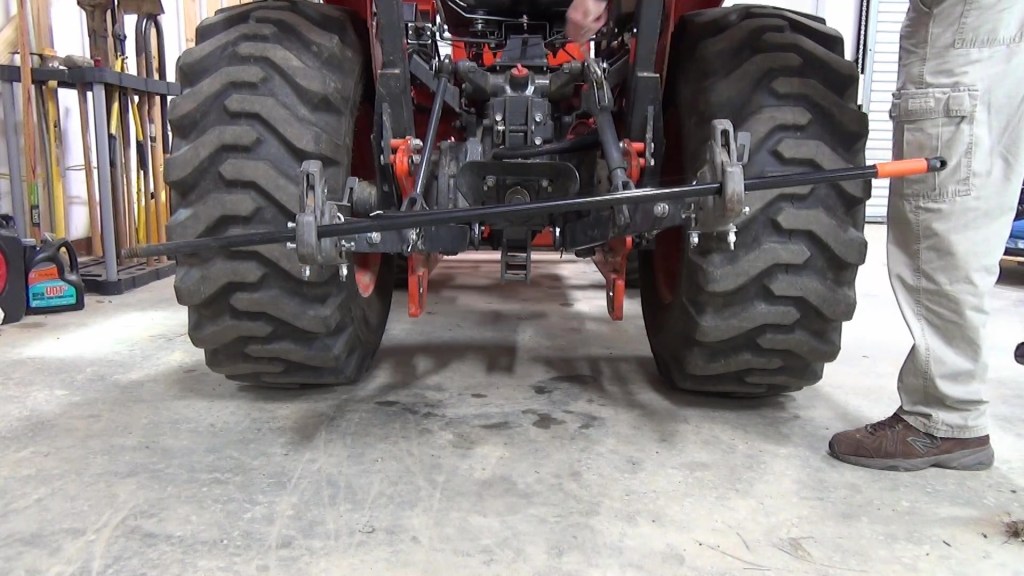
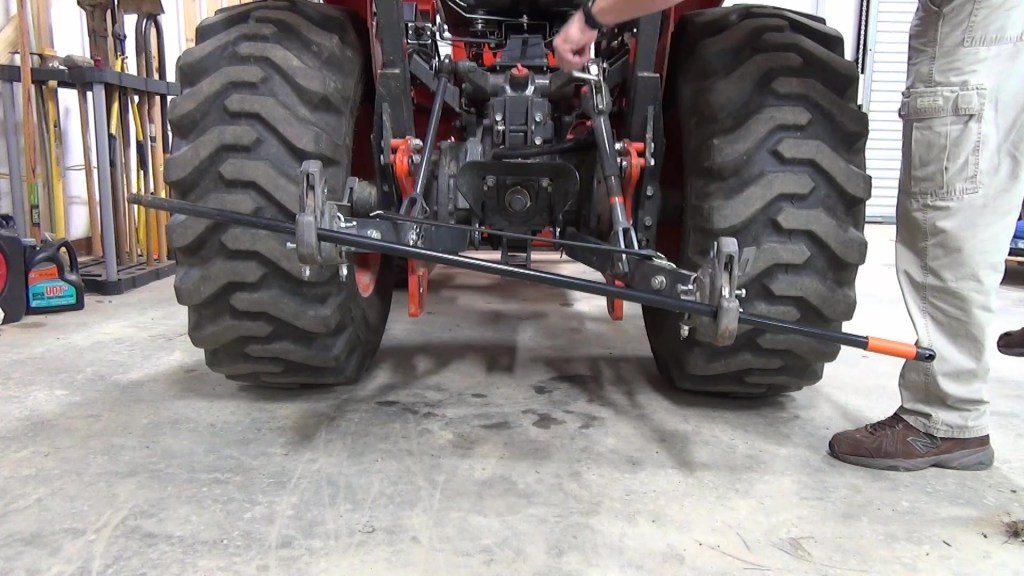
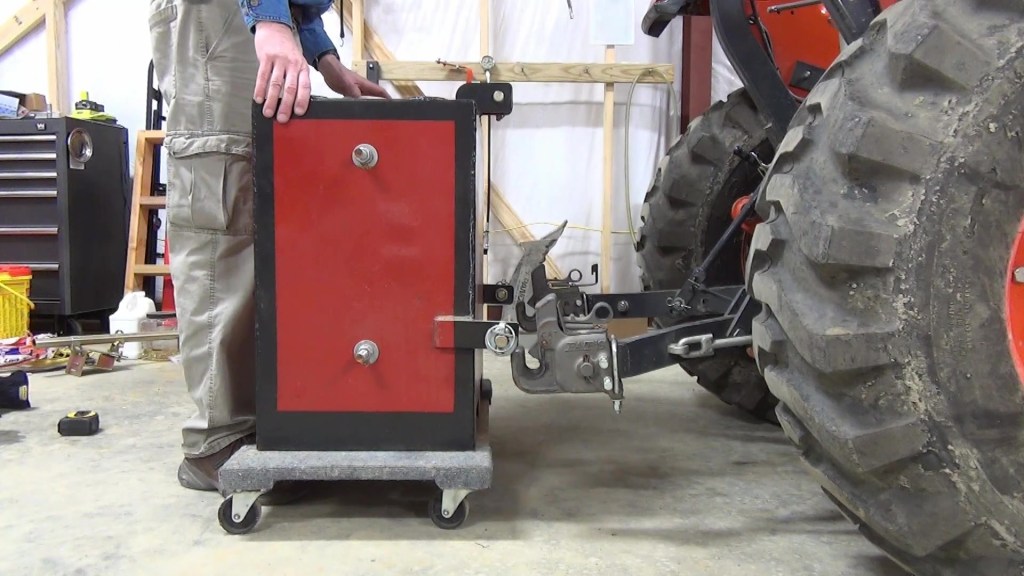
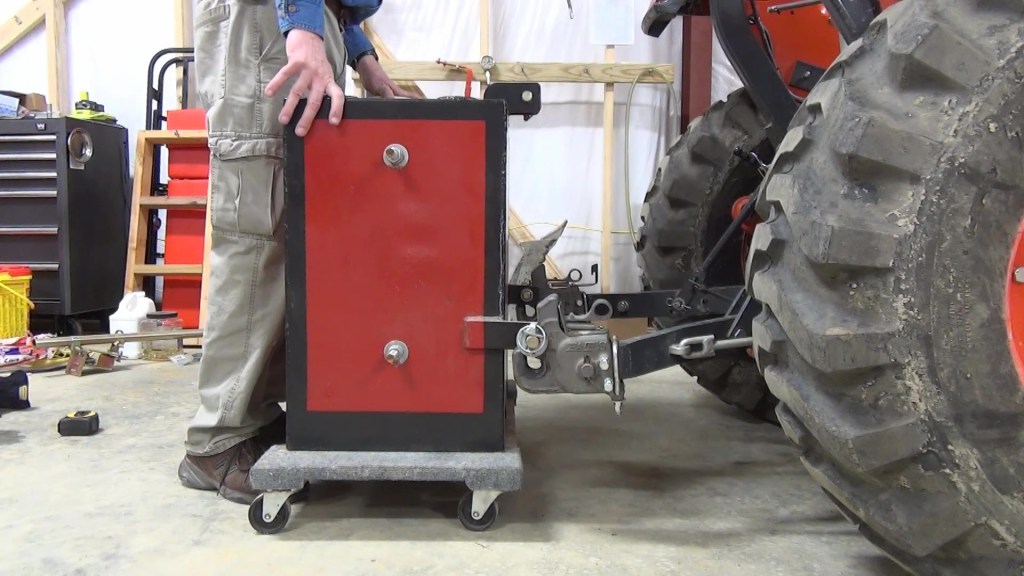
The Pat’s system can have some slop in the distance between the hooks so they have an optional adjustable stabilizer bar that can hold the distance between them fixed while you’re trying to hook up and implement. I prefer to use a rubber tarp strap between the lift arms and then adjust my sway bars to set the distance. This also sets my sway bars to the proper length as well.
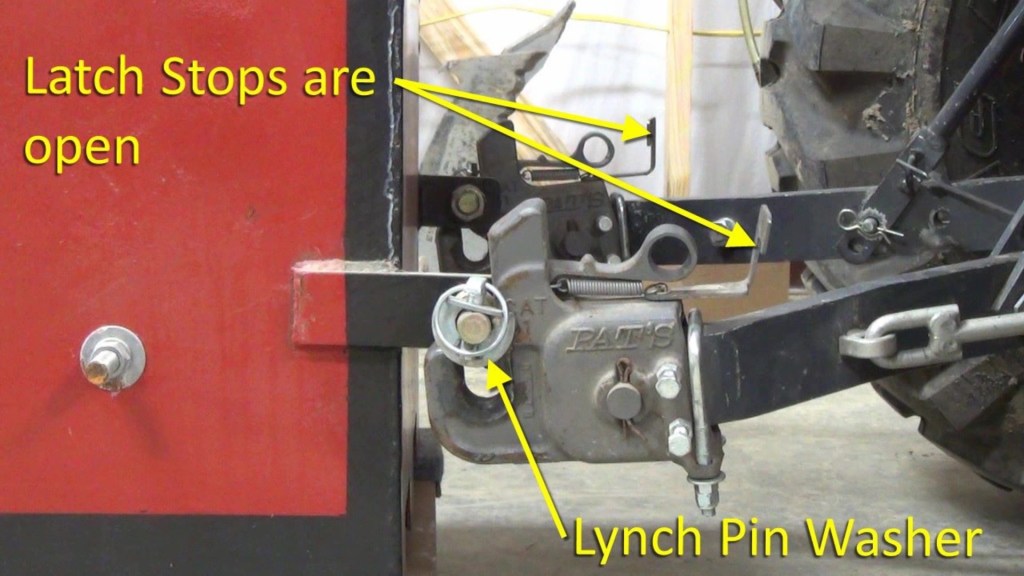
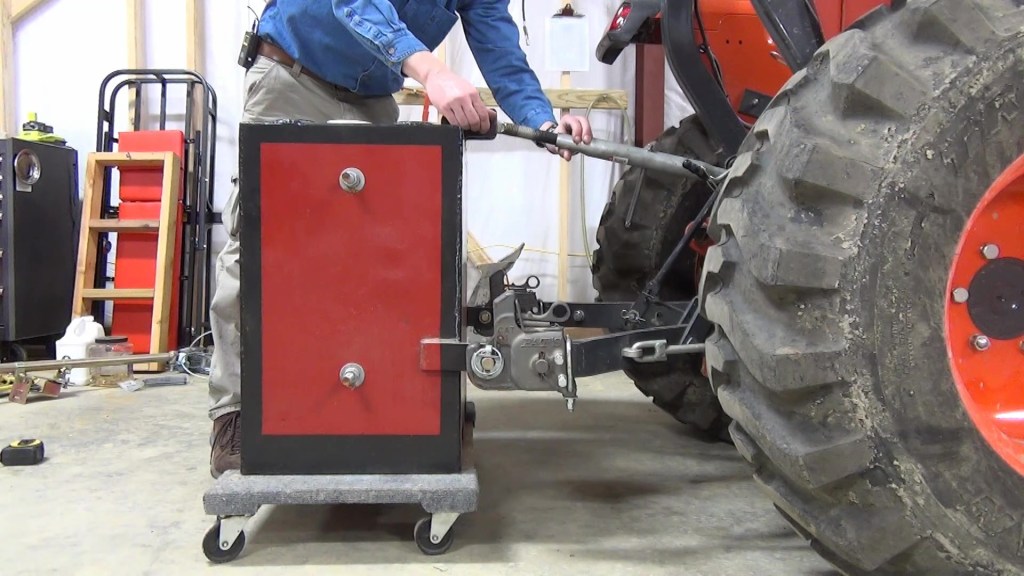
Hooking up to an implement is easy. Just back up the tractor to the implement or in this case, I push the implement to the tractor. Make sure you have lynch pin washers on the implement pins and your latch stops are open. Then raise your 3-point until the latches lock. Then swing the latch stops closed. Hook up your top link. And your ready for work. BTW, not all implements need lynch pin washers, such as my brush hog and box blade.
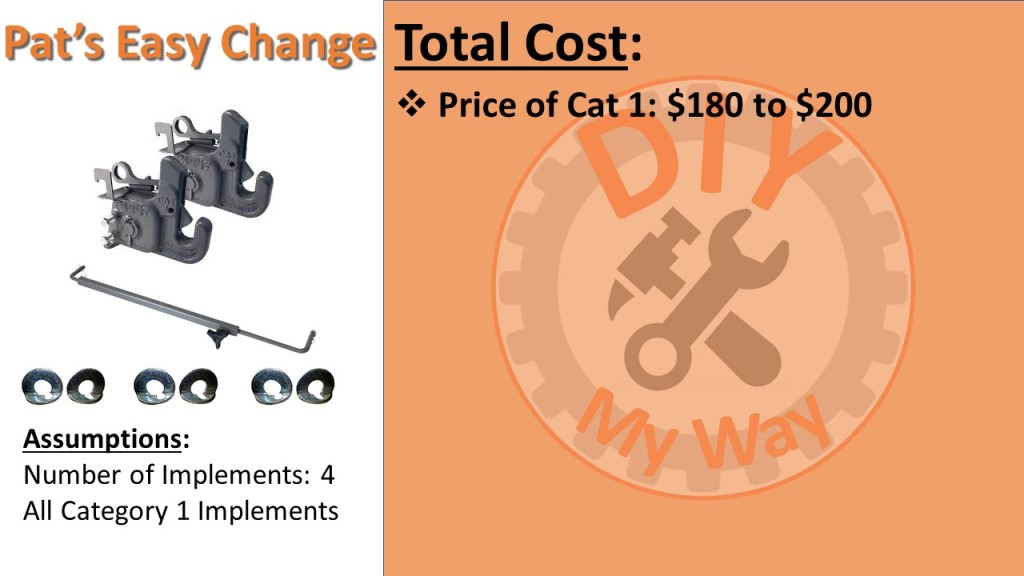
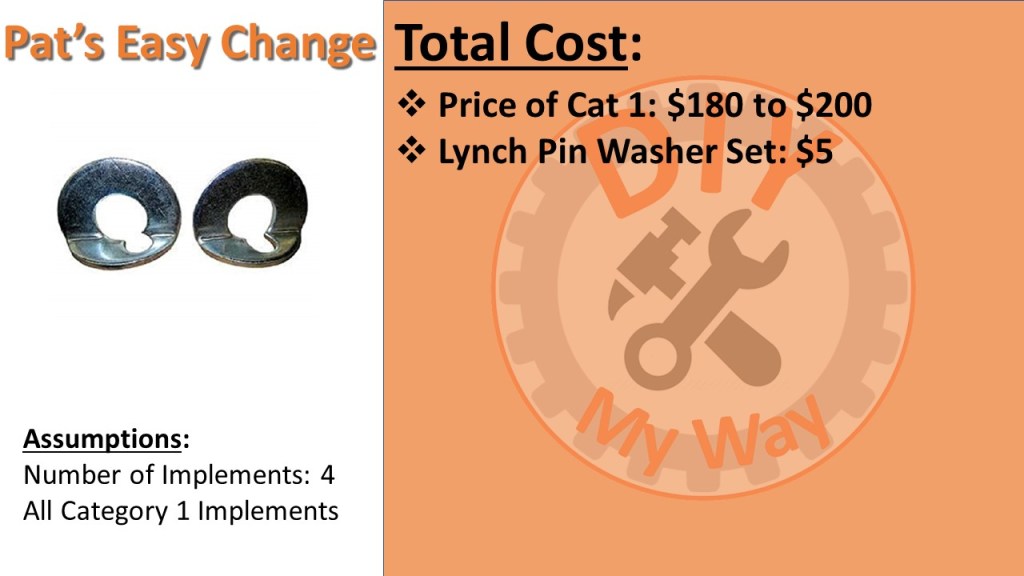
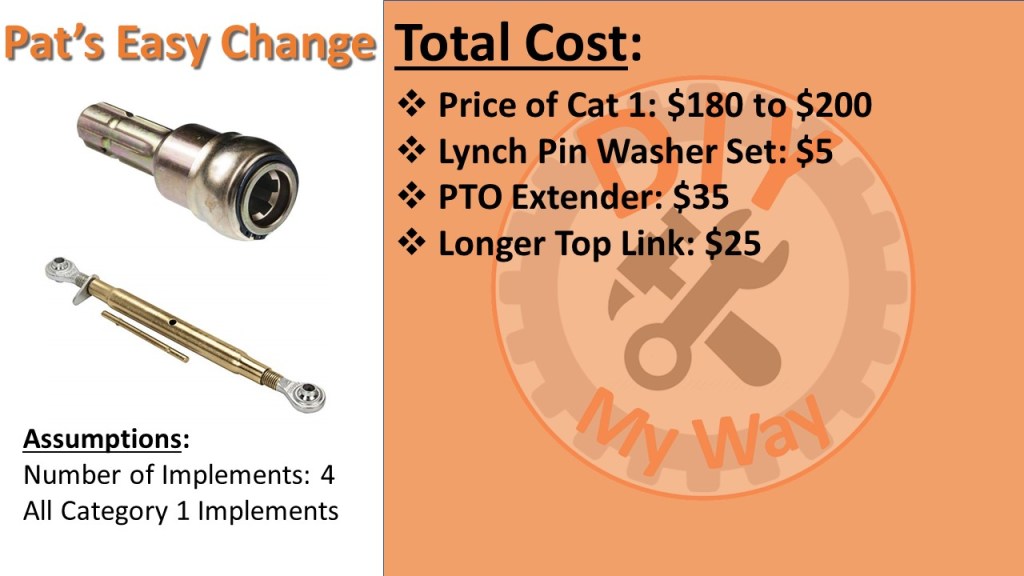
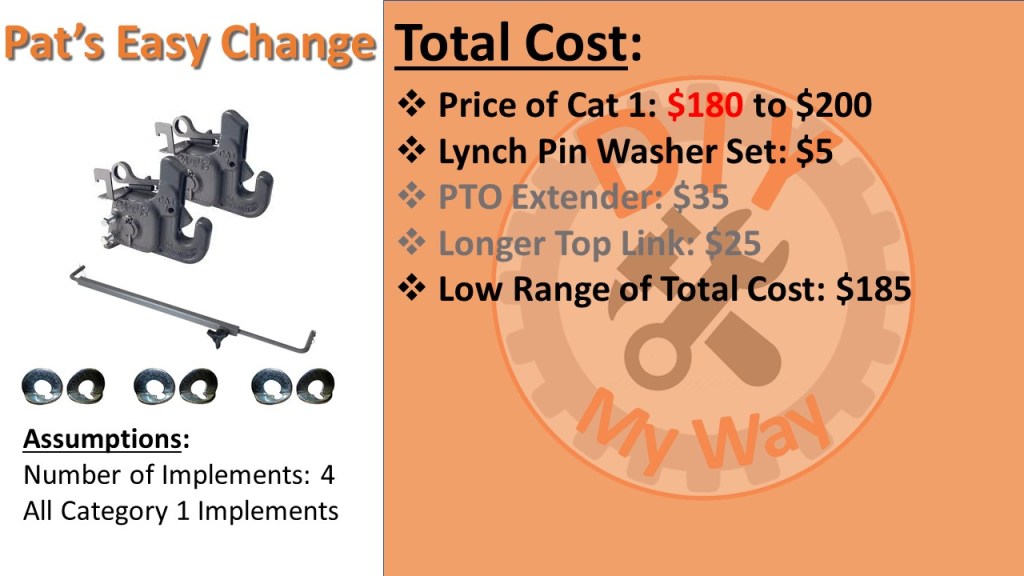
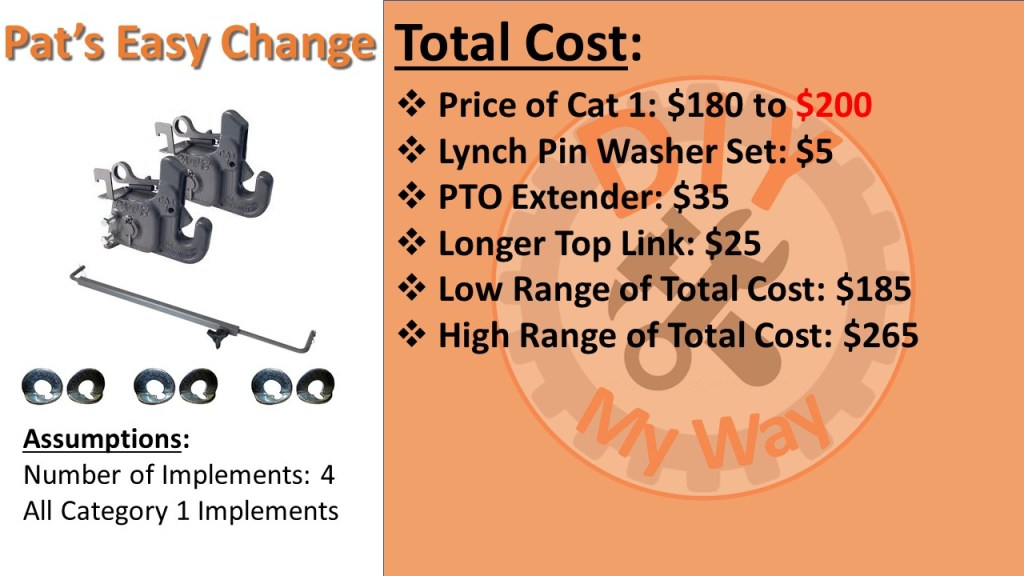
So what’s the total cost of the Pat’s Easy Change system? Well, let’s assume you have 4 implements and all are category 1. The Pat’s Easy Change system sells for between $180 and $200. That includes the adjustable stabilizer bar and 3 sets of lynch pin washers. So you would only need one more set of lynch pin washers which you can buy for about $5.
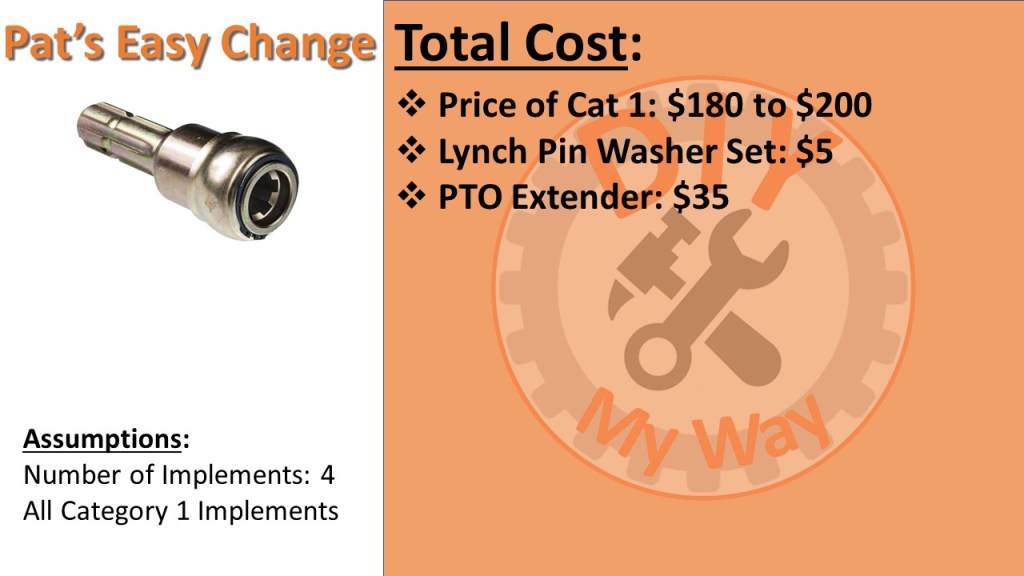
Since the Pat’s Easy Change system adds about 4” to the length of the 3-point lifts arms just like a Quick Hitch does, you may need some other accessories. For instance, you may need a PTO extender to avoid having to replace your PTO shafts if they are too short. You can get a PTO extender for about $35.
You may also need a longer top link, which could cost $25 or more.
So your low range of total cost could be as low as $185 if you don’t need the other accessories.
The high range could be about $265 if you pay $200 for the Pat’s System and buy all the accessories.
I have found the Pat’s Easy Change System to be a great value and time-saver. It is especially nice that this system is compatible with all implements, rather than having to worry about what implements are compatible with it, like with a Quick Hitch.
Note: Links to Amazon products are Amazon Associate links that won’t cost you any extra, but will help support my efforts with a small commission on qualified products. Thanks for your support!

One thought on “Pat’s Easy Change System: Review, Installation & Tips”
Comments are closed.