
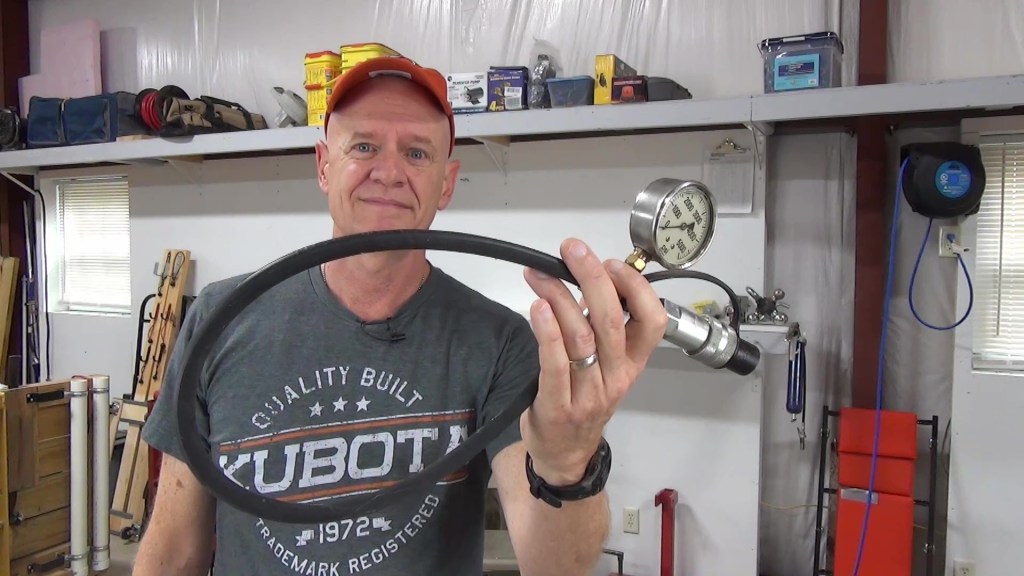
Check the hydraulic pressure in your tractor is the best way to know if you are get all the bang you can for your buck.
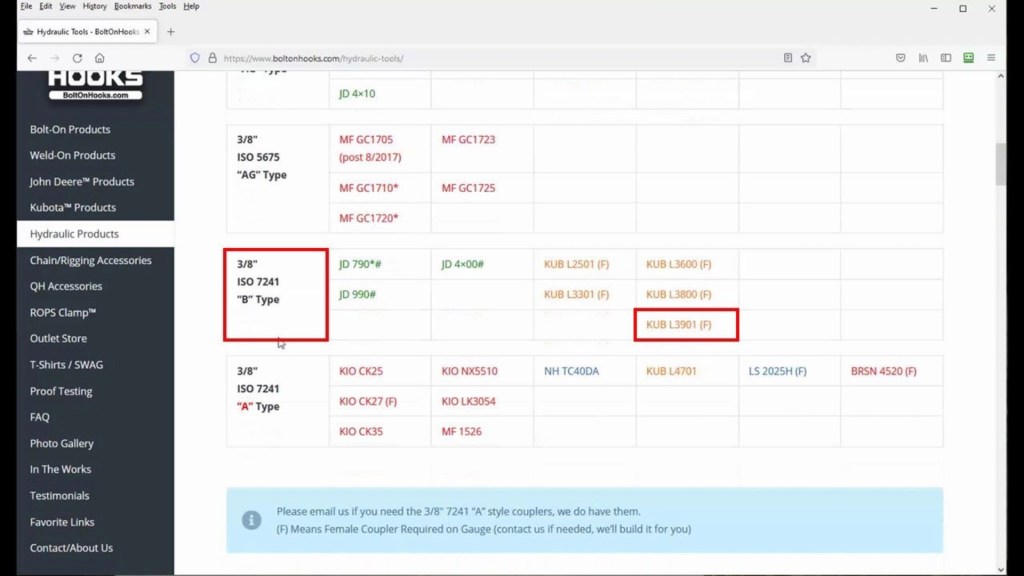
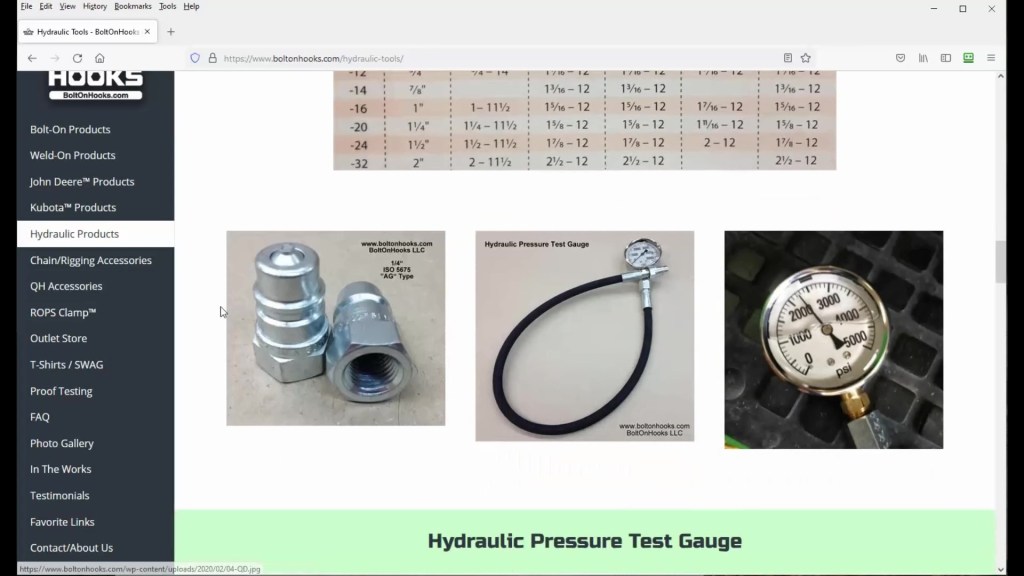
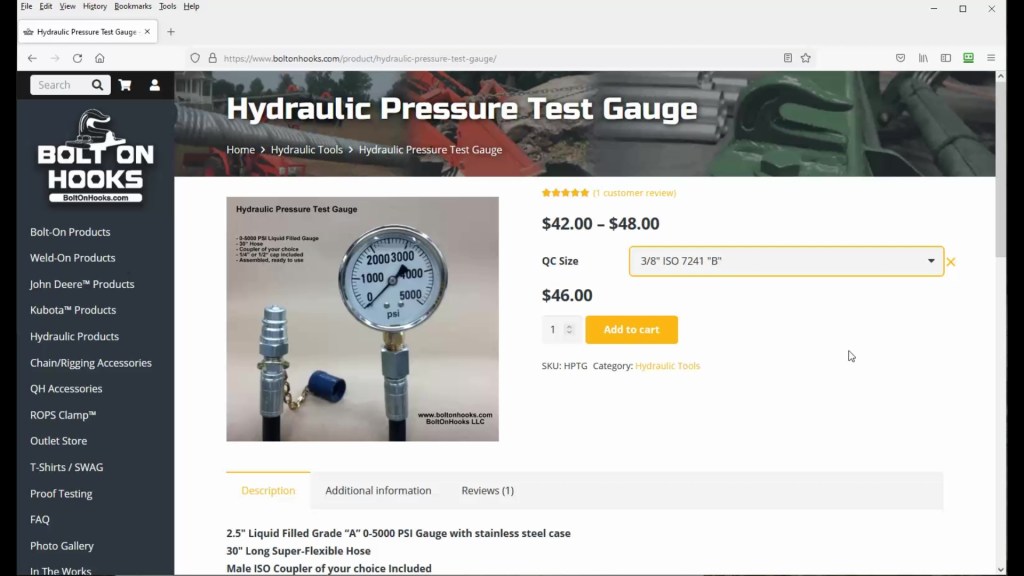
If you don’t have a hydraulic pressure test gauge, I recommend you get one from BoltonHooks.com. They have a section for hydraulic products, including hydraulic tools. That section provides charts to help you determine the type of connector you’ll need for your tractor. For instance, since I have a Kubota L3901, the required connector is a 3/8″ ISO 7241 B Type. Scroll down farther to get to the Hydraulic Pressure Test Gauge, then click select options. Choose the required connector from the drop-down list. If you are unsure of which connector you need, don’t hesitate to contact the good folks at BoltonHooks.com. They’ll be happy to help you pick the right connector for your tractor.

To get an accurate measurement of your tractor’s hydraulic pressure, you first need to get the hydraulic fluid to operating temperature. The best way to do this is to drive your tractor around for a while and use your front-end loader.
Once you’ve got the hydraulic fluid to operating temperature, turn off the tractor, lower your FEL, and release the hydraulic pressure on the couplers by moving the joystick in all directions.
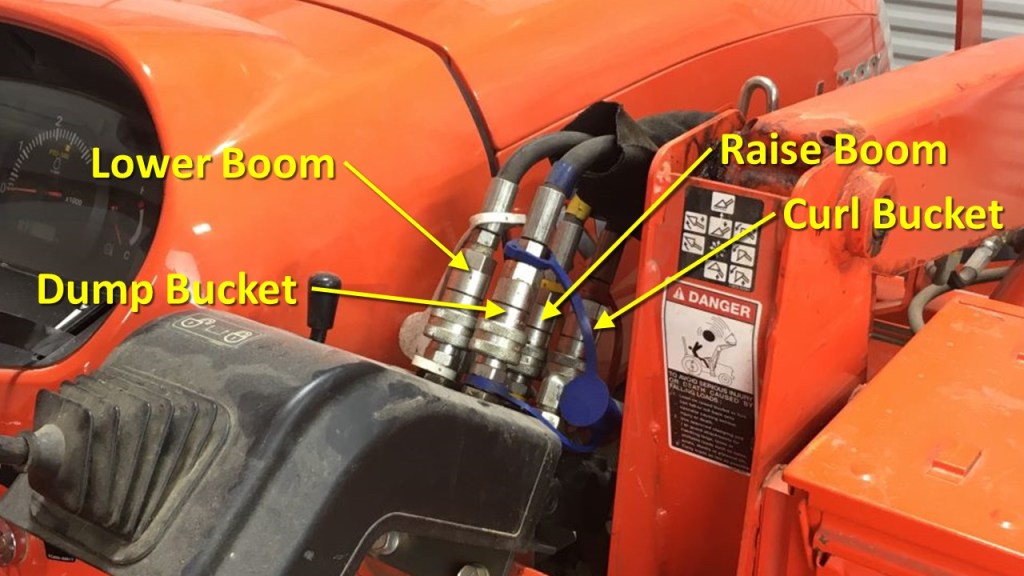
You have 4 connectors to choose from, which are typically color coded. You can consult your manual or follow the hoses to verify which function each connector controls. In the case of my LA525 loader, the white capped one lowers the boom. The yellow one behind it raises the boom. The blue one dumps the bucket and the red one behind it curls the bucket. I used the lower boom connector.
When working with high pressure hydraulics it’s always a good idea to wear eye protection and gloves when handling the pressure gauge and couplings to avoid injury.

With the engine off and the loader resting on the ground, disconnect the connector of your choice. Then connect the gauge to the port on the loader valve. Start the engine and throttle up to at least PTO speed. That’s 2500 RPM on my tractor. Your manual may state a specific RPM for the test. If so, set the engine speed to that.

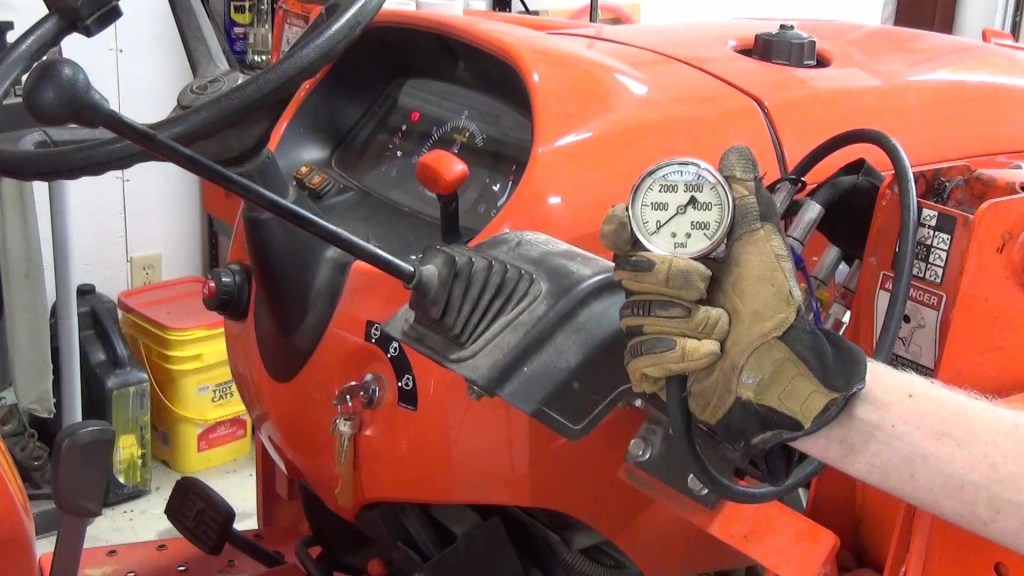
With the gauge in hand, move the joystick in the direction that operates the connector function you chose. In my case it is up to lower the boom. The boom won’t actually move since the flow is deadheading into the gauge.
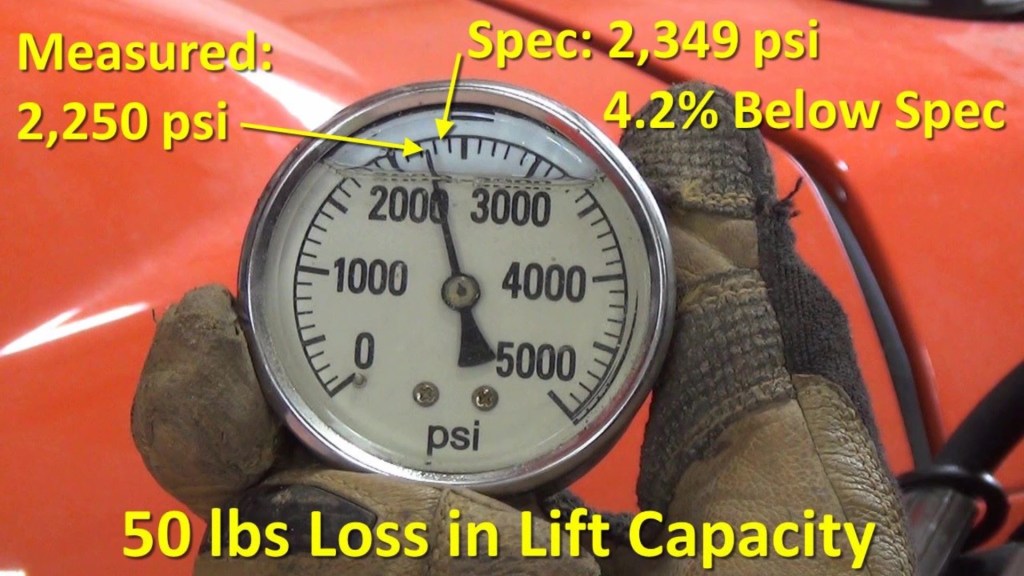
The gauge is measuring about 2,250 psi. The spec in my tractor manual is 2,349 psi, so I’m about 100 psi shy of the spec which translates to about 4.2% below spec. And that translates to a lose of about 50lbs lift capacity, so it may not be worth shimming the relief valve for just 50lbs more. On the other hand, sometimes 50 lbs more maybe all I need to lift a heavy load.

After testing, throttle back to idle, turn off the tractor and relieve the pressure in the system. Then disconnect the pressure gauge and reconnect the coupling.
If you find the couplers won’t reconnect, you can relieve the pressure on the male end with a hammer and a rag. Place the rag over the male connector and give the tip a sharp tap with hammer. If you can push the tip in by hand, you have succeeded. For the female connector, you’ll need a bolt. A 3/8″ bolt 3″ long or similar will do nicely.
Place the end of the bolt on the end of the connector tip in the female connector. Wrap the rag around the bolt and coupler. Then give the bolt a solid whack with the hammer. You should be able to connect the couplers now.


