
Our property is slowly being taken over by English Ivy and Poison Ivy. I’ve been fighting both for a while now with a backpack sprayer, the brush hog and landscape rake. But it’s not enough and not efficient. It’s time for the nuclear option! After some research, I settled on this 26-gallon NorthStar spot and broadcast sprayer.
I chose this ATV Broadcast and Spot sprayer in part because it looked like it would fit perfectly in the bed of my Polaris Ranger EV and in my tractor carryall.
As of the time of this post, it can be bought on Amazon or from Northern Tool for $269.99. Shipping is $31.58 bringing the total to $301.57. You can also read the sprayer’s manual. I’m a big believer in reading the manual of products I am considering whenever possible.
What you get for your money is a 26-gallon sprayer, with a 2.2 GPM pump that produces up to 70PSI, runs on 12V DC and requires 8 amps. It can run continuously with a 100% duty cycle.
It has a Regulator for adjusting the output pressure and a pressure gauge. This model as a 2-nozzle boom that they say sprays a 6.7ft swath, but I found that out of the box it was spraying a swath of 10ft, which was good to see. The nozzles are adjustable so I think it can spray wider than 10 feet and it can certainly be adjusted to spray narrower.
Each boom has a flow control valve for fine control of the amount of spray coming from each nozzle.
The spray gun has a maximum vertical spray distance of 19ft and 30ft horizontal.
The sprayer is 15” high, 27.9” wide and 18” deep.
Finally, it weighs 50 lbs.

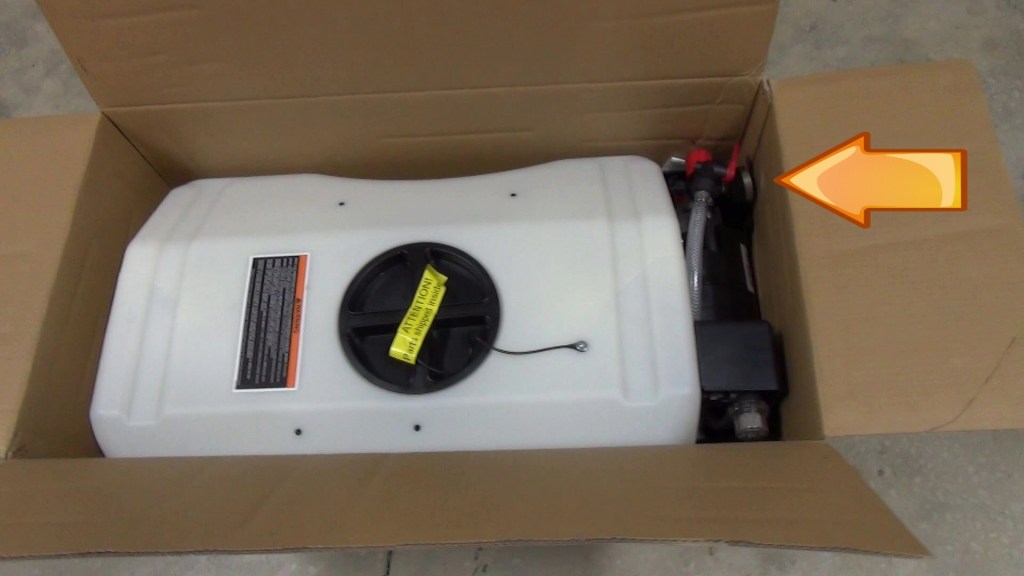
It ships in a box that’s just big enough for the sprayer and has no extra protection, which is okay except for this side where the pump, regulator and pressure gauge is. In fact, the pressure gauge was damaged, as you can see in the picture below, but it still worked.
I found it easiest to turn the box on it’s end, unscrew the cap and pull the sprayer out. Since it’s going to first be used on my Polaris, I decided to assemble it in the cargo bed. BTW, in case you didn’t know, the Ranger’s tail gate is easily removed to best accommodate the sprayer which makes strapping down the tank easy.
The rest of the pieces are stored inside the tank and the heavier metal pieces are bubble wrapped bubble wrapped.
A Little Damage 
Getting it Out of the Box 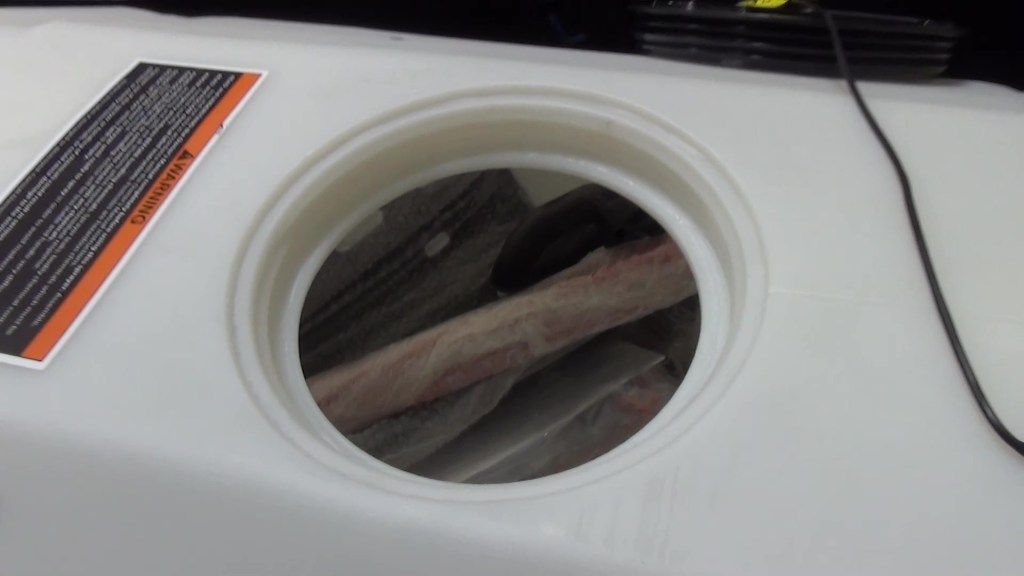
All Other Parts are Store in the Tank
The manual seems to be well detailed for assembly and use.
And here’s the slightly damaged pressure gauge which I had to bend back into position:

It seems to work fine but I may request a replacement.
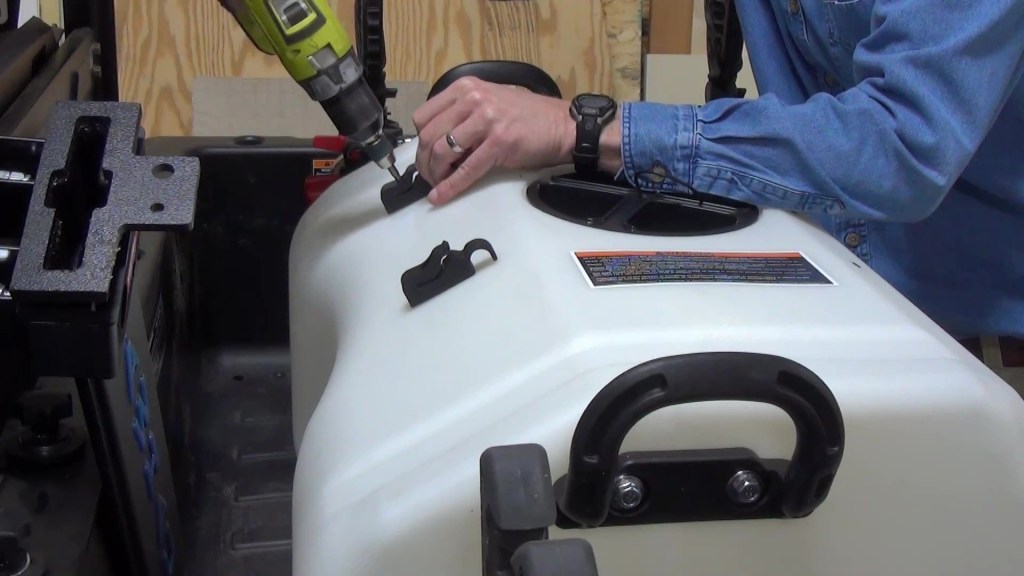
Assembly is straight forward. First the handles go on. They attach with 5/16” bolts requiring a ½” wrench or socket. I’m using an impact wrench only for speed, being careful not to over tighten. The threads in the tank are plastic and would strip out easily.
Next the spray gun clips go on with Philips head screws. Again, not too tight.
The hose wrap is installed next.
Then route the hose under the spray gun clips. Put the hose clamp on the end of the hose. I take the slack out of the clamp first. Then slide the hose onto the regulator output. And tighten the clamp firmly with a screwdriver.
The spray gun snaps into the clips, though not easily the first time. After the clips stretch a bit, it gets much easier.
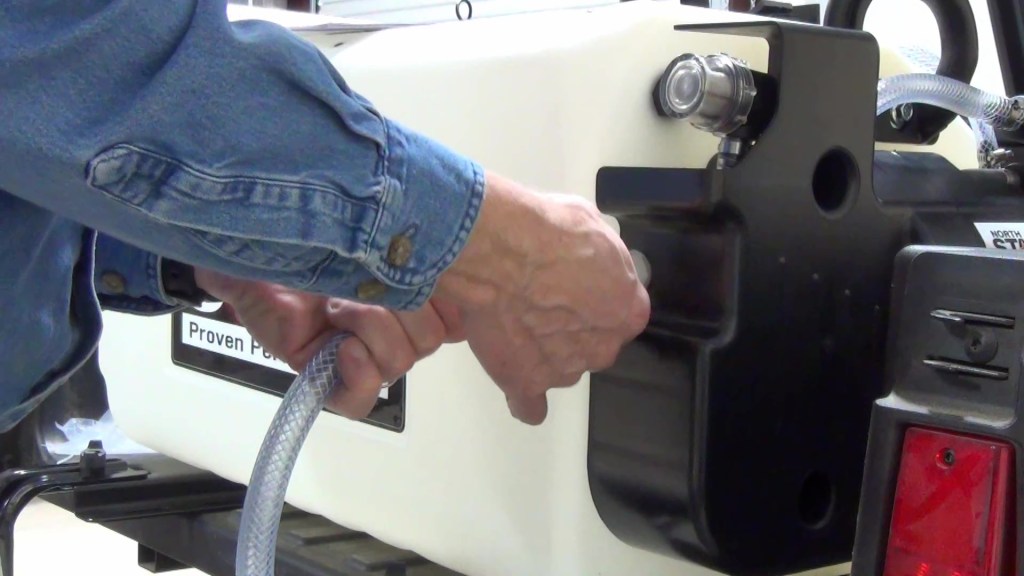
Next the boom tank mounts are attached. I was pleasantly surprised at the heavy gauge steel used for them as well as the rest of the boom hardware. They are attached using 5/16” bolts and washers, requiring a ½” wrench.
The vertical boom mounts are attached with generous sized locking knobs. Installing the boom assemblies requires 5/16” carriage bolts and a locking knobs.
As mentioned in the specs, each boom has a flow control valve to control of the amount of spray coming from each nozzle.
Then the boom hose threads onto the boom connection port.
Installation Slide Show:


The manual says the booms should be 21” from the ground and lo and behold they are. You’d think this thing was made for a Polaris!
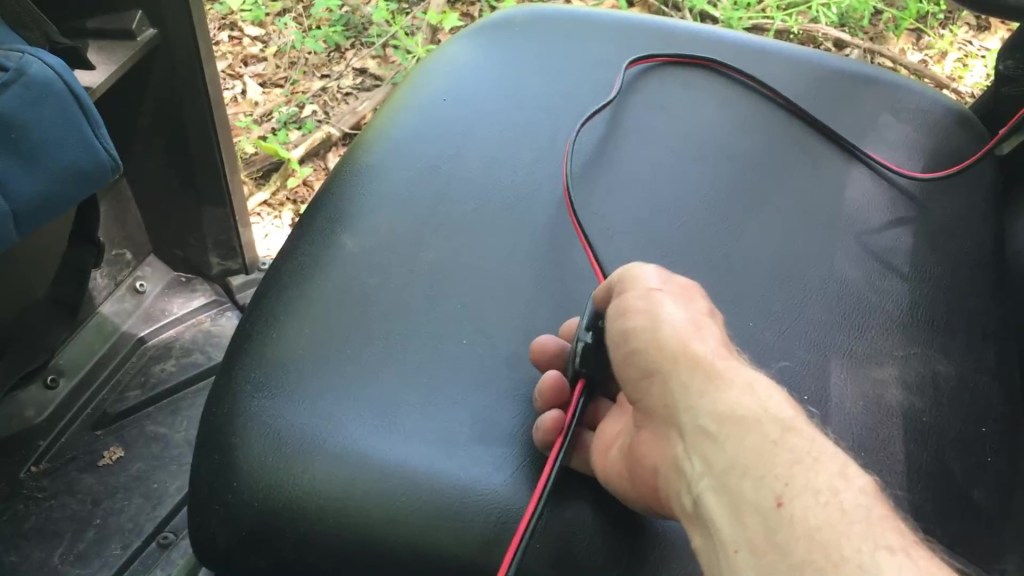
The sprayer comes with an 8ft electrical cord with a built-in on-off switch and uses a standard 12v automotive connector in case you need to add an extension to it. The connector plugs into the back of the sprayer. I then connect the alligator clips to the positive and negative terminals of one of my Ranger’s batteries.
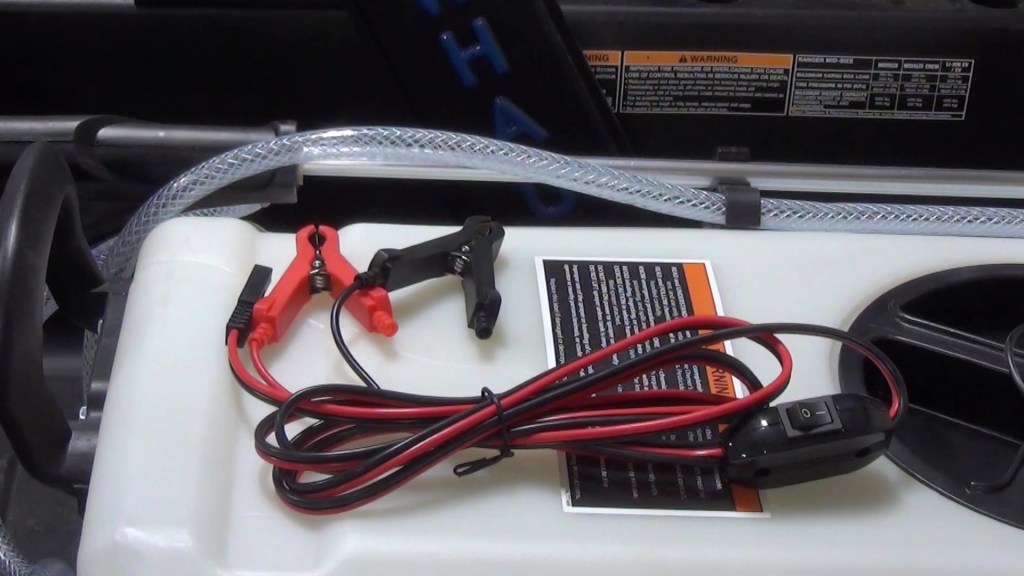
Battery Cable and Switch 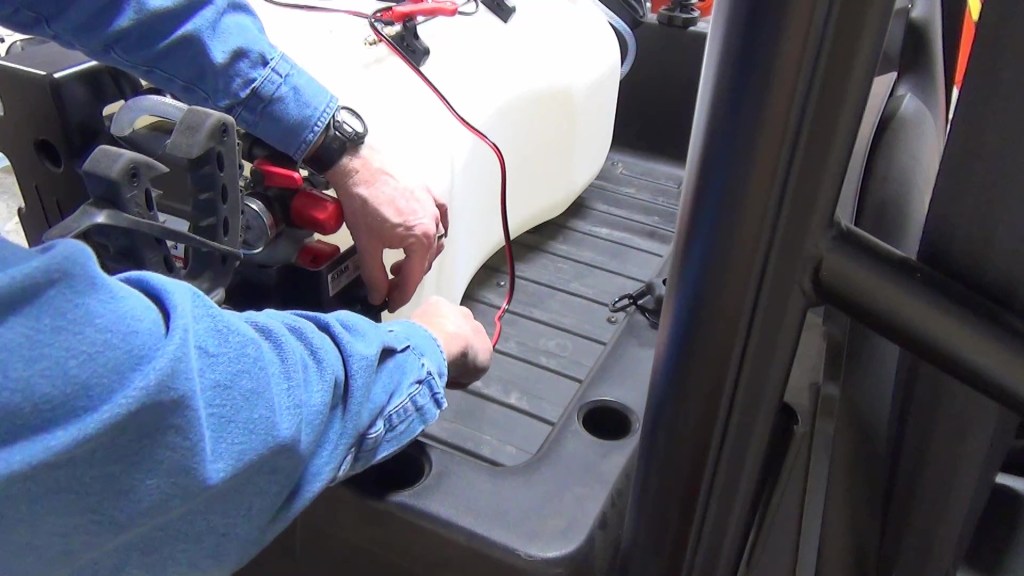
Connecting to the Sprayer 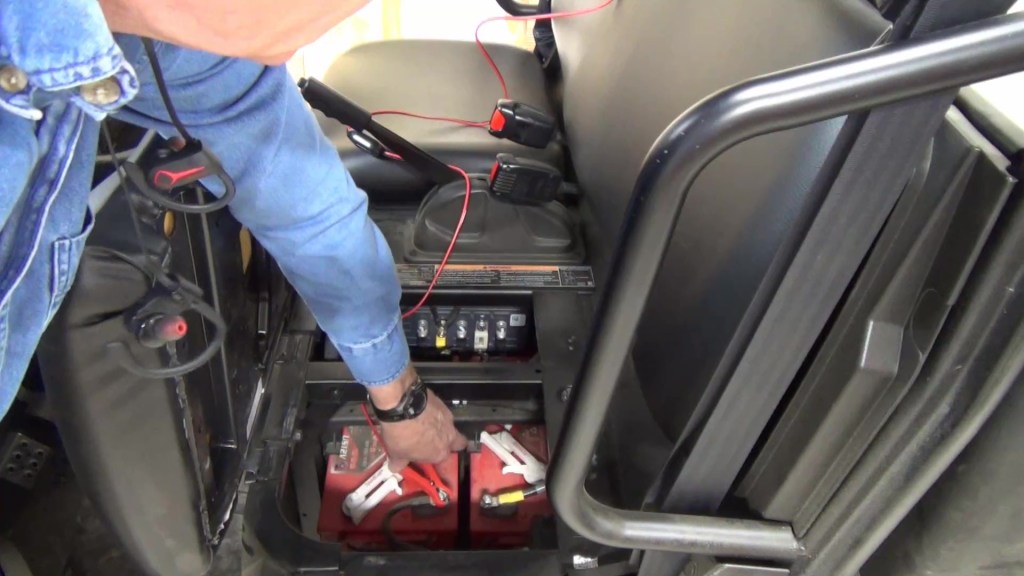
Connecting to the Battery
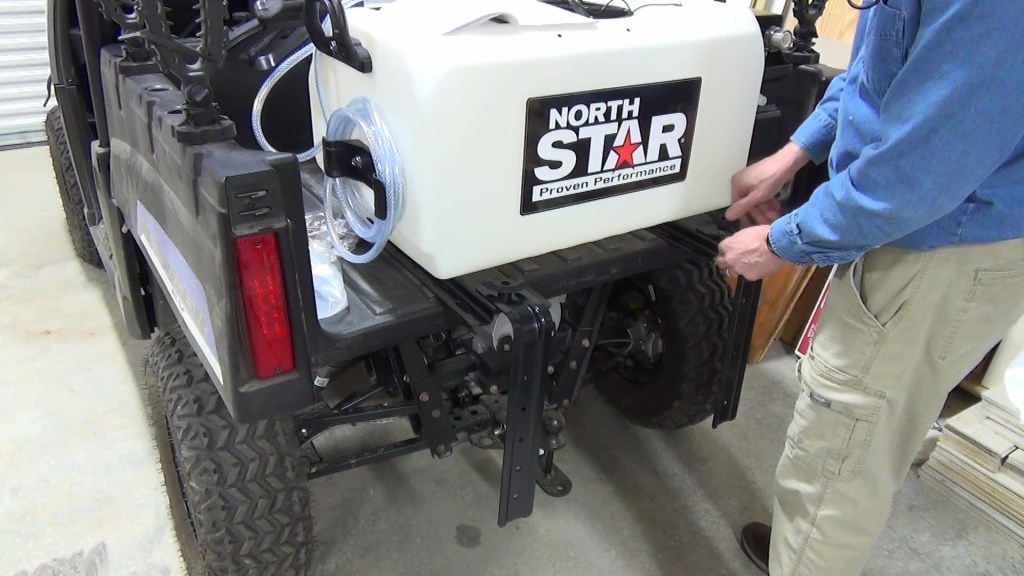
Before filling the tank and hitting the trails, the tank must be securely strapped down. This is easy to do with some Lock & Ride anchors and ratchet straps. The rear strap hooks conveniently hook into the steel bed support channel.

Hooking to a Lock & Ride Anchor 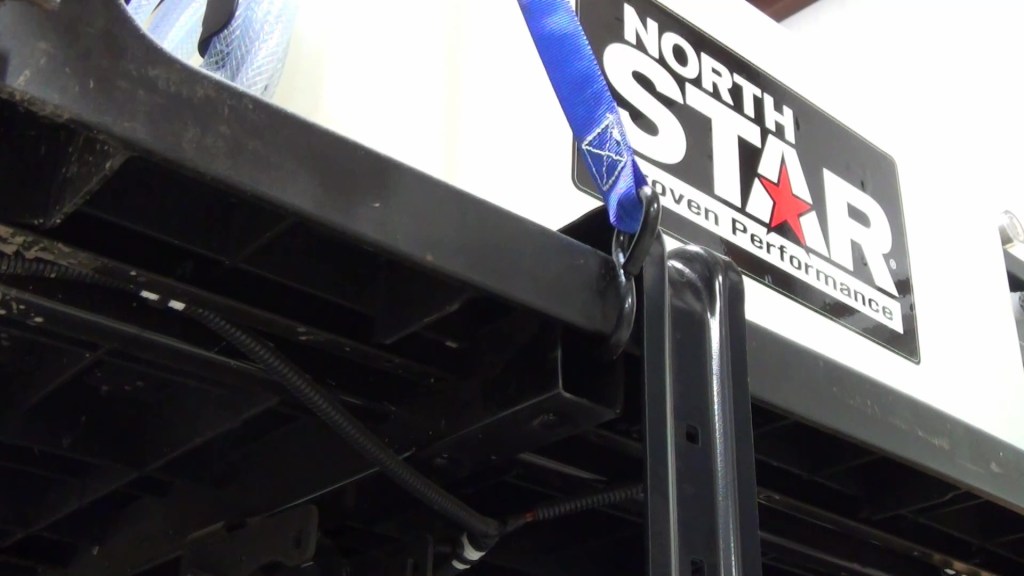
Hooking to the Cargo Bed Frame 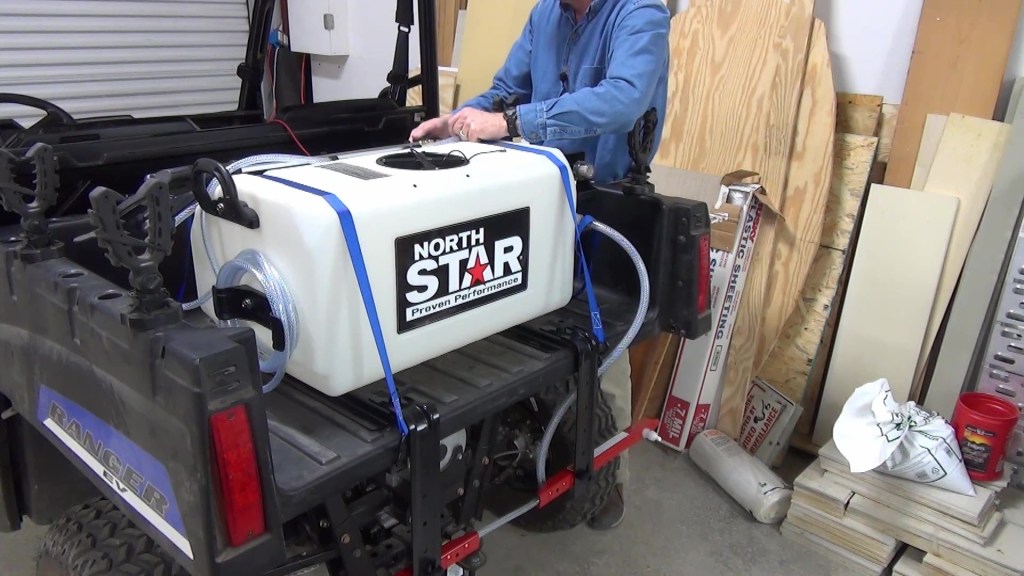
Tightening the Ratchet Straps
Next, I pulled the Polaris outside and put in a few gallons of water to test with and get a feel for the sprayer’s operation. Then I mixed up 26 gallons of a strong batch of RoundUp to try out on the trails.
After some tweaking of the nozzles, I pull into the trail head and turn the sprayer on. The width looks perfect for the trails, covering everything on the trail and a little to the sides. In the picture below the sunlight shows the spray pattern. There’s even a rainbow!
Normally a speed of 4 to 5 miles an hour is optimal for this sprayer.
The On-Off Switch is Convenient 
A view of the Spray Pattern 
Switching from Broadcast to Spot Sprayer
When I come to any area with no vegetation, I can turn the sprayer on and off as needed.
When I need the spray gun, I switch the valve from the boom to the spray gun. Of course, the video is best for seeing the sprayer in action, but the pictures below will give you get a decent idea of how well the gun works. BTW, that plant in the wire cage is a baby big leaf Magnolia. We have three planted along the creek. The cages keeps critters from eating the leaves. Obviously I have to be careful not to get RoundUp on it!
I think this sprayer and I are going to get along just fine!

Spraying Poison Ivy 
Medium Width Spray 
Narrow Long-Distance Spray
After use, if there is any chemical mix left in the tank, I drain it into another container or my backpack sprayer. In fact, it so happens that the drain cap is the same thread as a garden hose so I put a hose valve on it for easy draining. It’s best to run water through the tank before putting it in storage, then drain the spray gun, hose and boomer sprayer. Also, I disconnect the boom hose so that it can drain as well.
It’s a good idea to rinse the intake filter after each use and the small filters behind the broadcast nozzles.

A Garden Hose Valve is a Nice Mod 
A Short Section of Hose… 
…Let’s you Drain Leftover Chemicals 
Draining the Spray Gun 
Draining the Boom & Hoses 
Be Sure to Clean the Intake Filter
The boom supports come off easily for storage. The best place to store the locking knobs is on the bolts.
I use a cable manager to bundle up the electrical cable and strap it to the gun hose on the top of the sprayer. Then it’s ready to go on the shelf until next time. If you are storing in a place that could freeze follow the manuals instruction for using RV antifreeze to protect the sprayer from freeze damage.

The Booms Can be Folded Together 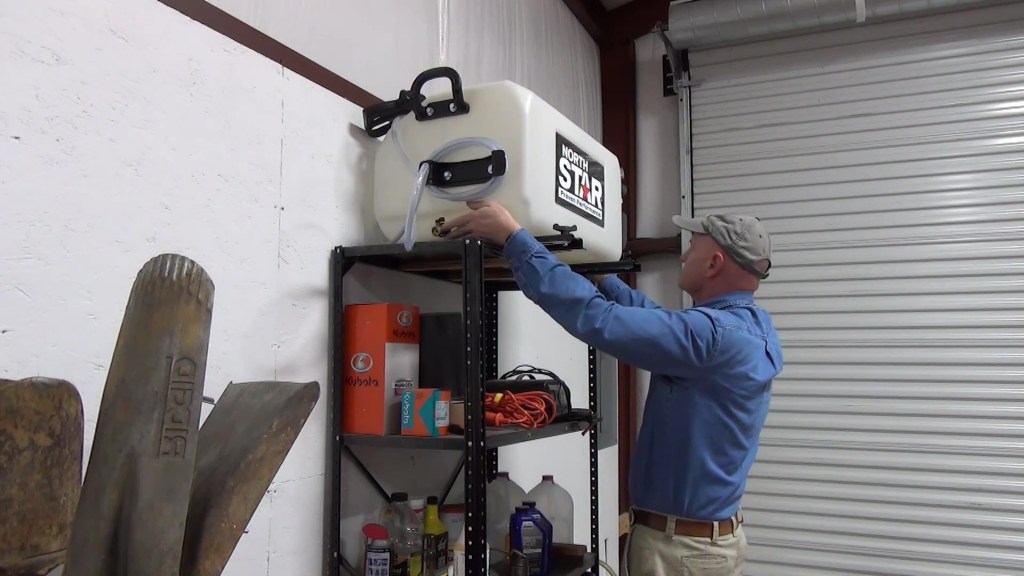
Until Next Time… 
… the Tank Goes on the Shelf
