
Soon after I got my Kubota L3901 (A.K.A. “Big Orange”), I knew I wanted a place to keep him out of the weather. My best option at the time was to build a lean-to shed off the back of my carport. The challenge for building this shed was getting the headroom and space I needed within space available.
The loader bucket is the widest part of my tractor at 5 and a half feet across. I found that I could set posts 11 feet from the back wall and comfortably have enough space on either side of Big Orange. The 11-foot width allowed me to use 12-foot 2 x 6 roof rafters and have a decent overhang.
As for headroom, I wanted it tall enough so I wouldn’t have to fold down my ROPS to get the tractor under the shed. The tractor is 91 inches tall with the ROPS up. The more clearance the better, but there was a trade between headroom and the length of the shed. The farther up the carport gable I went, the shorter the ledger board would have to be for the rafters attach to.
I mounted the ledger boards so that the bottom of the rafters would be 101″ from the round. The roof is at a five-degree pitch so that the clearance at the posts is 91″. However, in the middle where the tractor lives, there is four and a half inches of clearance on the low side.
Getting that 101″ height on the high side of the shed meant the total length of my ledger boards could only be 21 feet to fit in the gable space. So the total length of the shed is 22 feet, including a 6 inch overhang on each end.
The very first thing I had to do was to remove a big remove a big rock from behind the carport to be able to use the area for a tractor shed. It was too big to dig out so I need a way to break it up enough to get it below grade. This is where Dexpan expanding grout came in handy. I have a video and a project page on that rock removal job you might like to see that involves drilling several holes in the rock, mixing the Dexpan, then letting it do its magic.
With the rock out of the way, I used a combination of my tractor’s front end loader, backhoe and box blade to clear and smooth out the ground behind the carport.
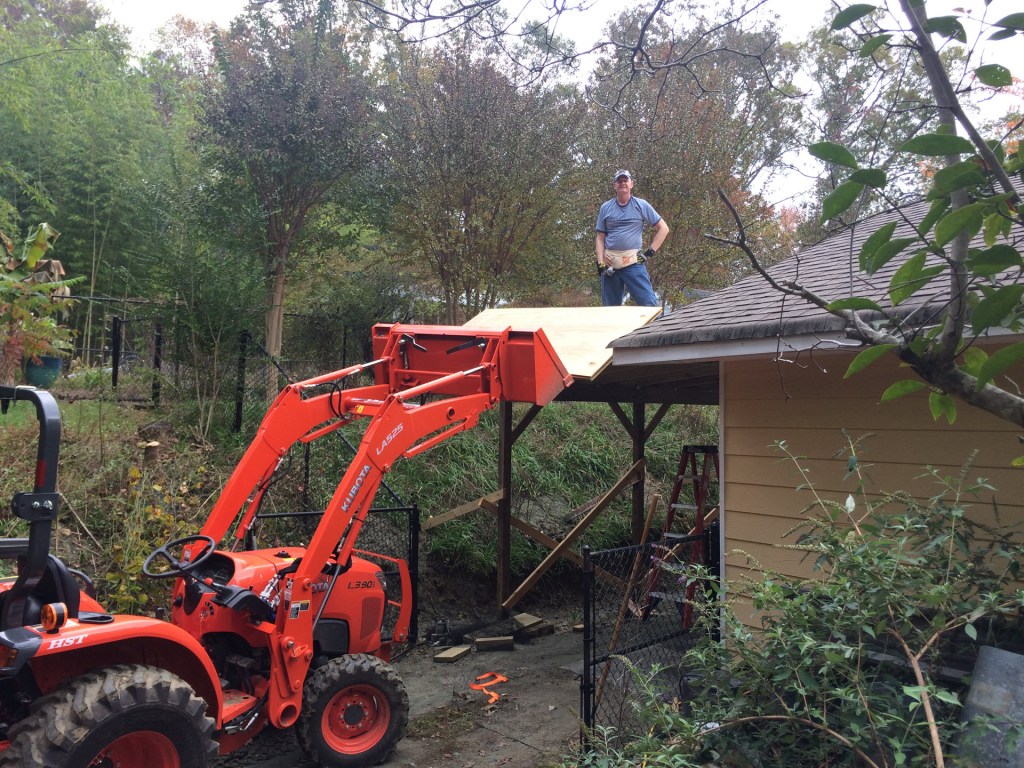
The first thing to go up was the ledger boards and rafter hangers. The ledger board is a pressure treated 2×10 attached with 3/8″ by 6″ long galvanvized lag screws and washers. The lag screws are screwed into the top plate and upper plate of the wall in a staggered pattern as shown in the picture below.
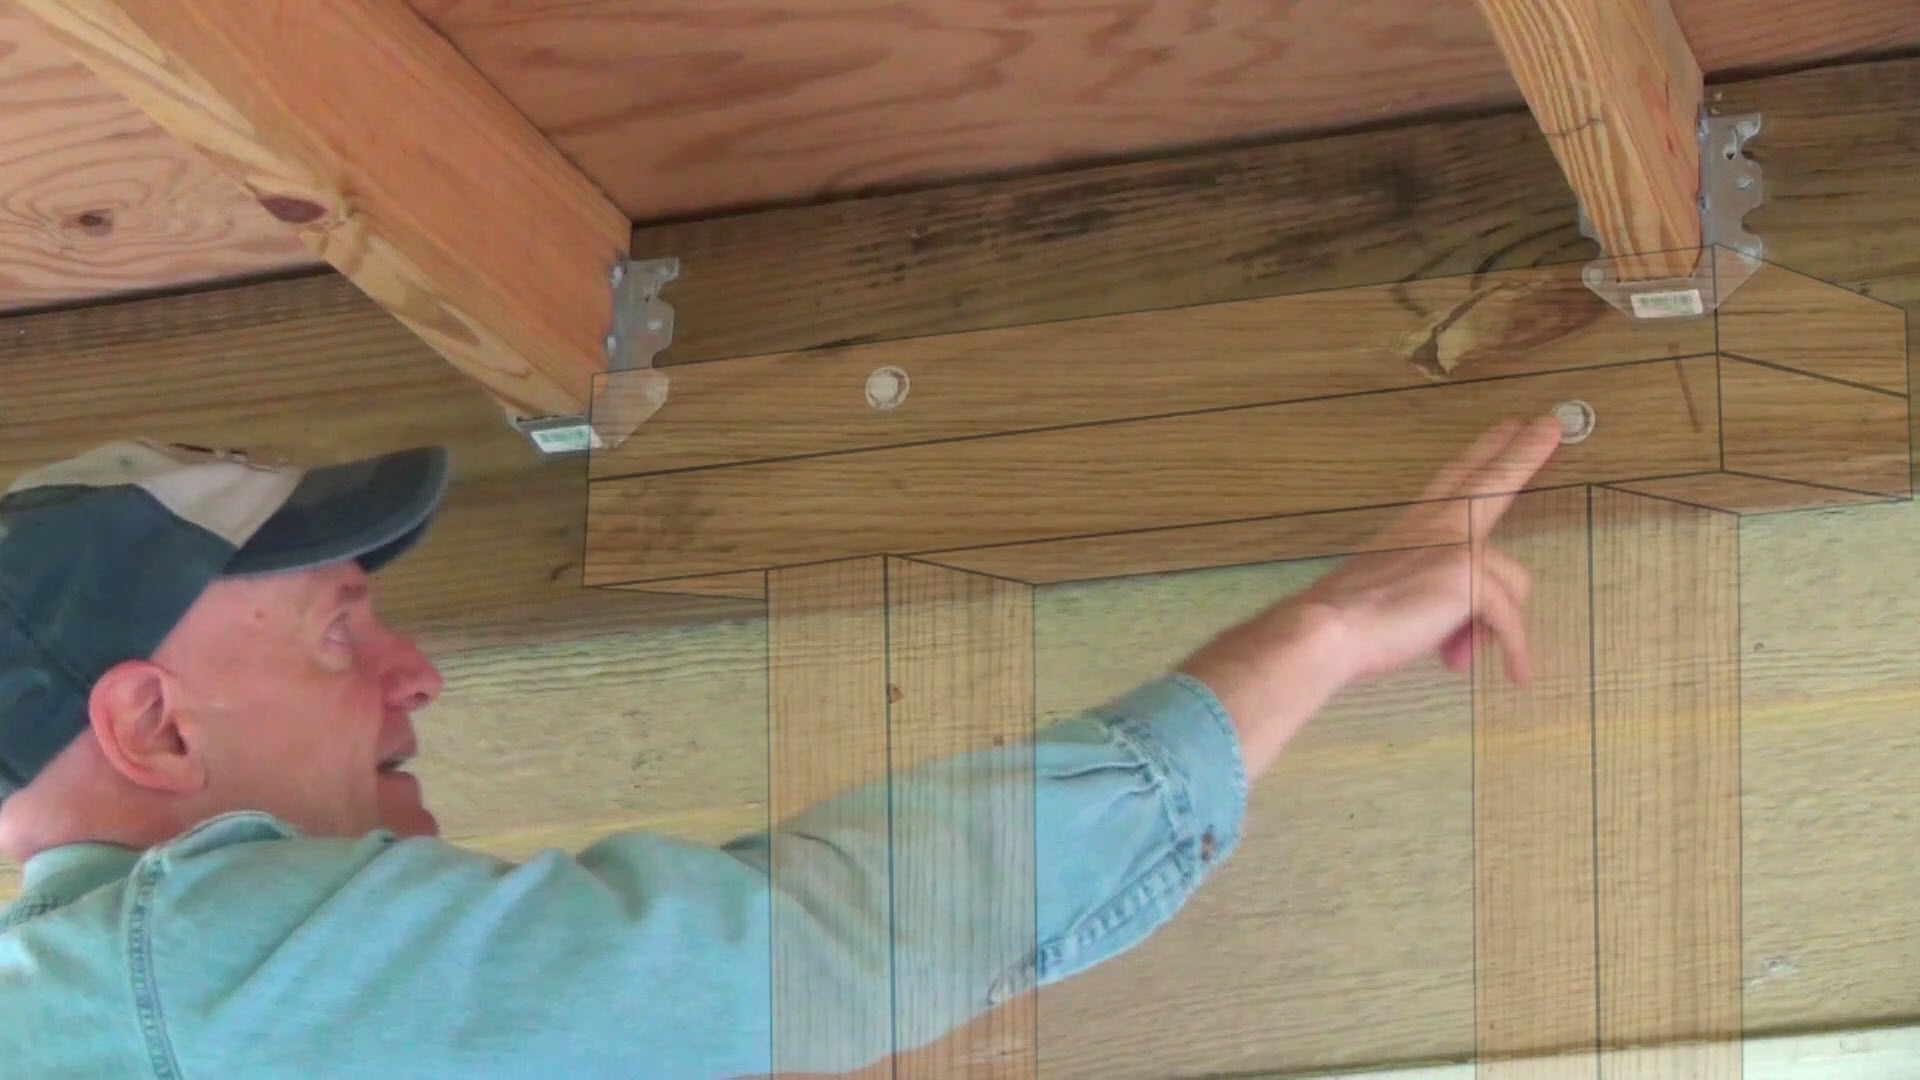
The rafter hangers were mounted 24” on center.
Next, with the help of my wife I set four 4 by 4 by 10 feet pressure treated posts eleven feet back from the back of the carport, right at the edge of what will be the French drain ditch. We used various random pieces of lumber to support the posts during the build.
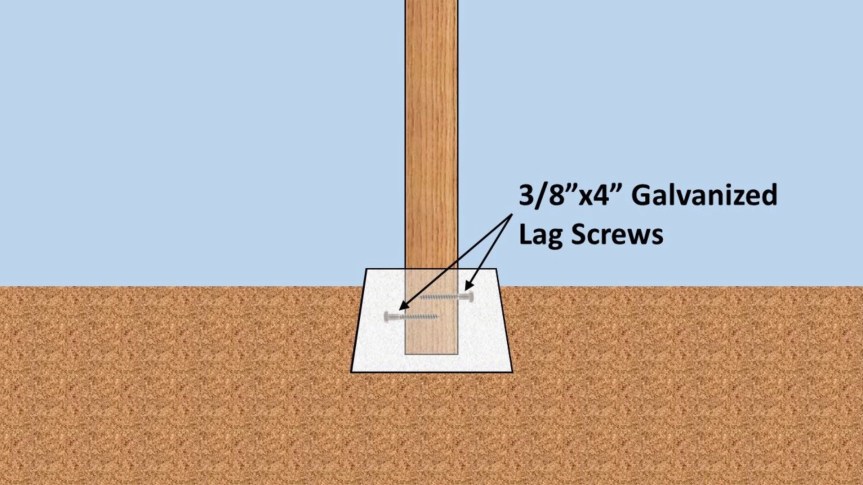
The posts were set in concrete piers and I made the pier forms from 5 gallon plastic plant pots with the bottoms cut off, which by the way was my wife’s idea and she had plenty of them to donate to the cause. I also put two 3/8” by 4” long galvanized lag screws in the bottom of each post to help anchor them into the concrete.
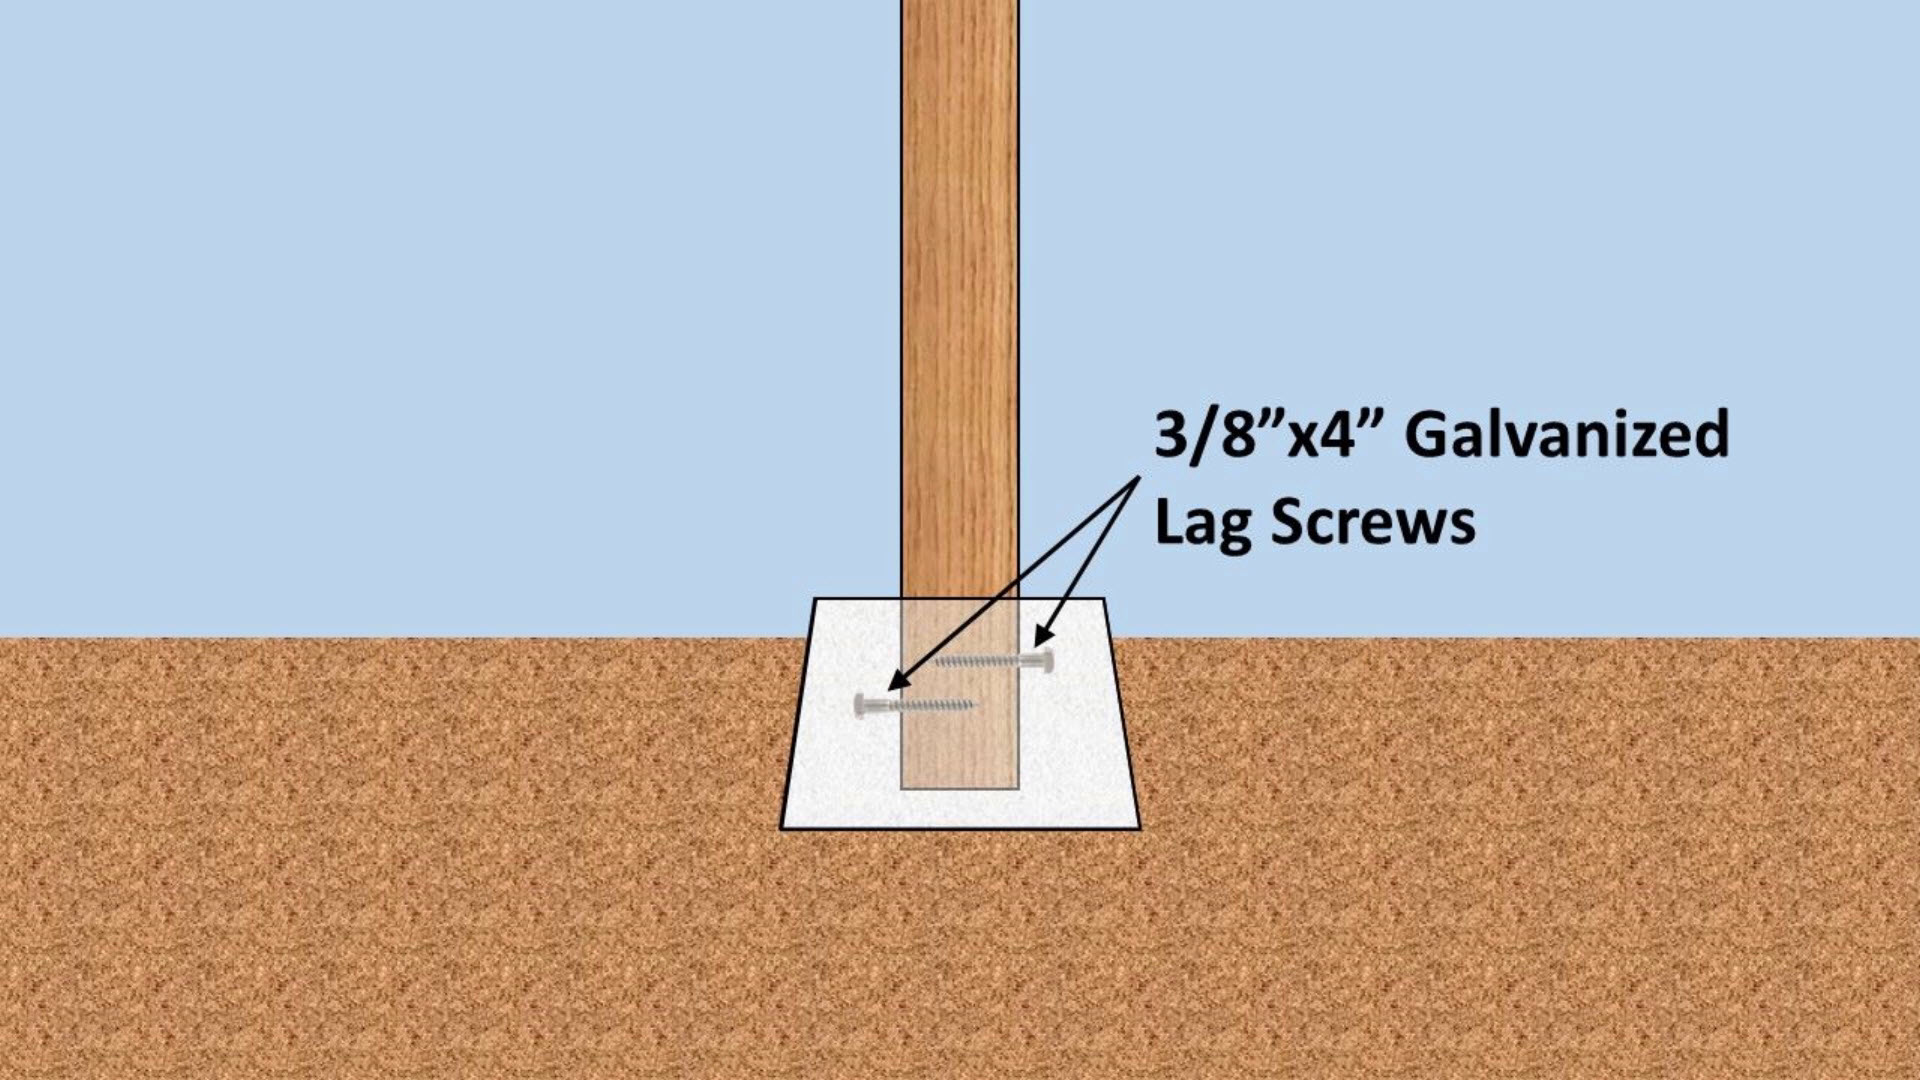
The ledger boards on the posts were mounted so that the roof would have the 5 degree pitch I wanted. They are attached using 3/8” by 4” galvanized lag screws and washers.
With the ledger boards in place the 2 by 6 pressure treated roof rafters go up quickly, attached with galvanized tie brackets made by Simpson. I then added blocking between the rafters midway along the span for extra rigidity.
I chose to use plywood for the roof decking even though I was planning on a metal roof, mainly because I didn’t want worry about keeping my feet on the purlins while installing it. You can see in the picture below that Big Orange is eager to help me build his new home. I had the Titan clamp-on pallet forks on the bucket for holding the sheets of plywood.

Once the roof decking was on, I added the diagonal post supports to firm thing up even more. The diagonals are 2×4 pressure treated lumber. They are attached to the posts with 3/8” by 6” galvanized lag screws and washers with opposite screws angled a bit to avoid colliding in the middle. The screws heads are also countersunk. The top of the diagonals extend behind and to the top of the ledger boards and are secured with three 3” coated deck screws each.
After the roof decking went on, I put on roofing felt, since I didn’t have the metal roofing sheets yet. I should mention also that this was built over the course of a few weekends.
The metal roofing came next. I used twelve-foot length sheets which work out nicely. The flashing next the carport is attached with the same screws that were used on the roof panels. And I applied a generous amount of metal roofing sealant behind the edges of the flashing as well as on top of the flashing seams. Both ends of the flashing are cut to match the carport roof pitch.
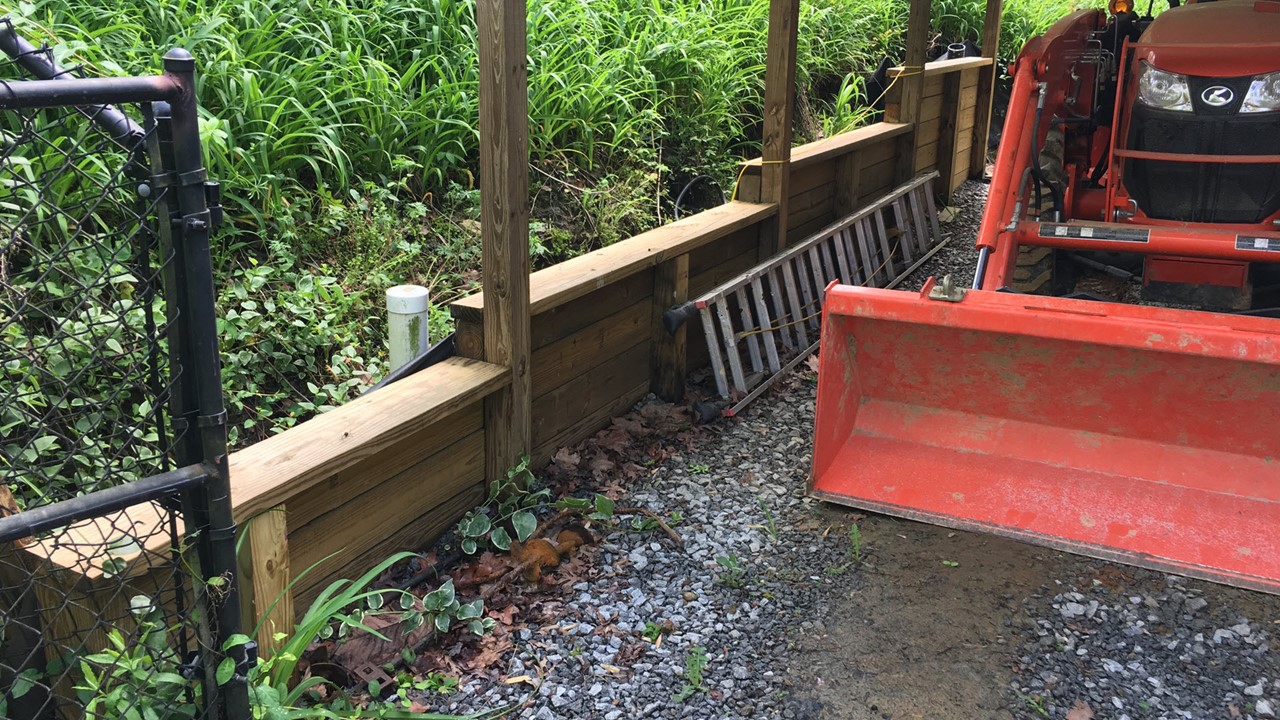
Since my shed is next to a steep embankment, I need a French drain and a retaining wall. The French drain was made by laying down a 4 foot wide roll of high quality weed mat along the trench, followed by a thin layer of number 57 gravel, then rigid 4” French drain pipe, followed by more gravel, then wrapping the weed mat over on itself to cover the pipe and gravel. I added a section of flexible 4” French drain pipe at the end to continue on around the curve of the bank.
I won’t go into much detail about the retaining wall since this project is really about building the tractor shed, but I’ll cover the basics on it. I built my retaining wall by attaching 4×6 pressure treated lumber to the back side of the post with 3/8” by 6” galvanized lag screws and washers. They were screwed in from the back side to be invisible. The short posts between the shed posts provide extra strength for the wall. Also, I added a pipe stub up for a future gutter to feed into the French drain. Left over roofing felt made a perfect protective barrier between the soil and the wall lumber. Finally, each section of wall was topped with a piece of 2×8 pressure treated lumber.
Picture Gallery


3 thoughts on “Building a Tractor Shed for My Kubota”
Comments are closed.